1 - 10 of 19 results

Zebra + Lower post

Product no.: zebra+lowerpost

In stock

Old price 41.00 €
Price 26.00
Price includes VAT
Sum of individual prices 28.80 €


Available delivery methods: Courier Zone 1, Courier Zone 2, Courier Zone 3, Courier Zone 4, Light package, Shipping small items region 2, Entrega Canarias/Baleares, Overseas traceable, Letter, Entrega gratuita España

Set of zebra + lower post repair piece

Additional product information


This includes the following individual products

Product no.: Lowpostrepair

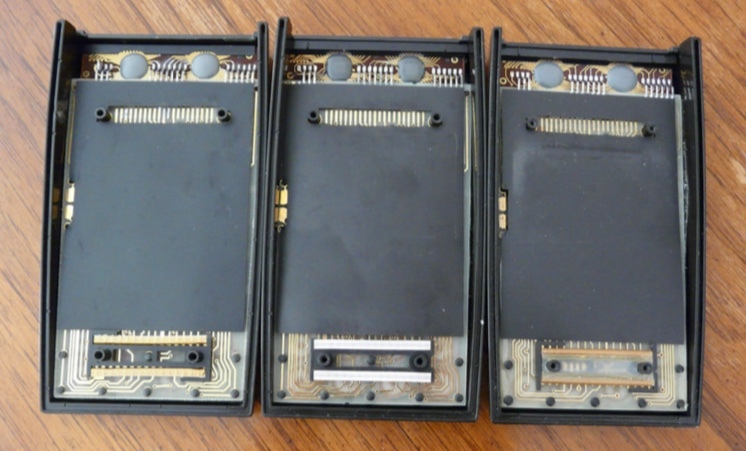
Piece to repair HP41c full nut series lower screw posts

1 piece(s)
16.00 *
Product no.: Zebra PCB

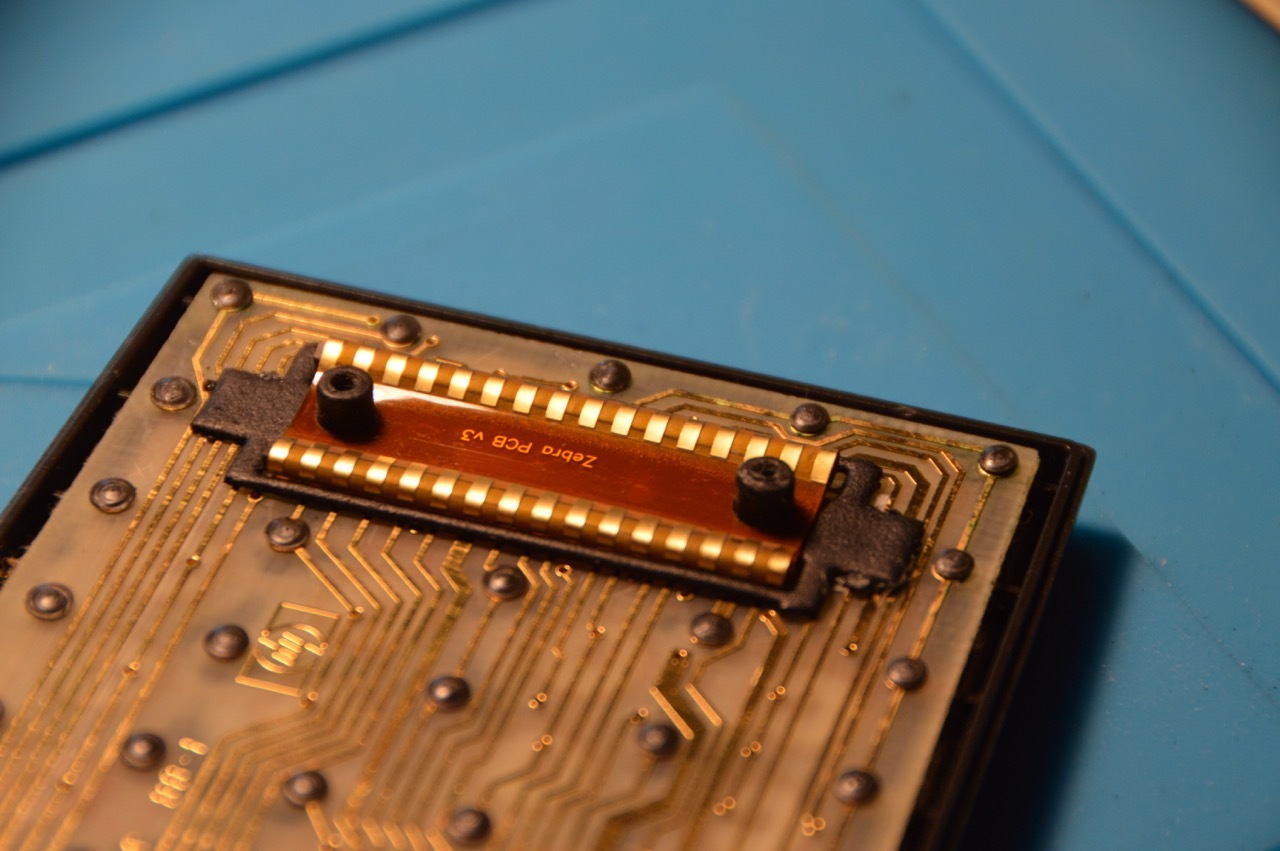
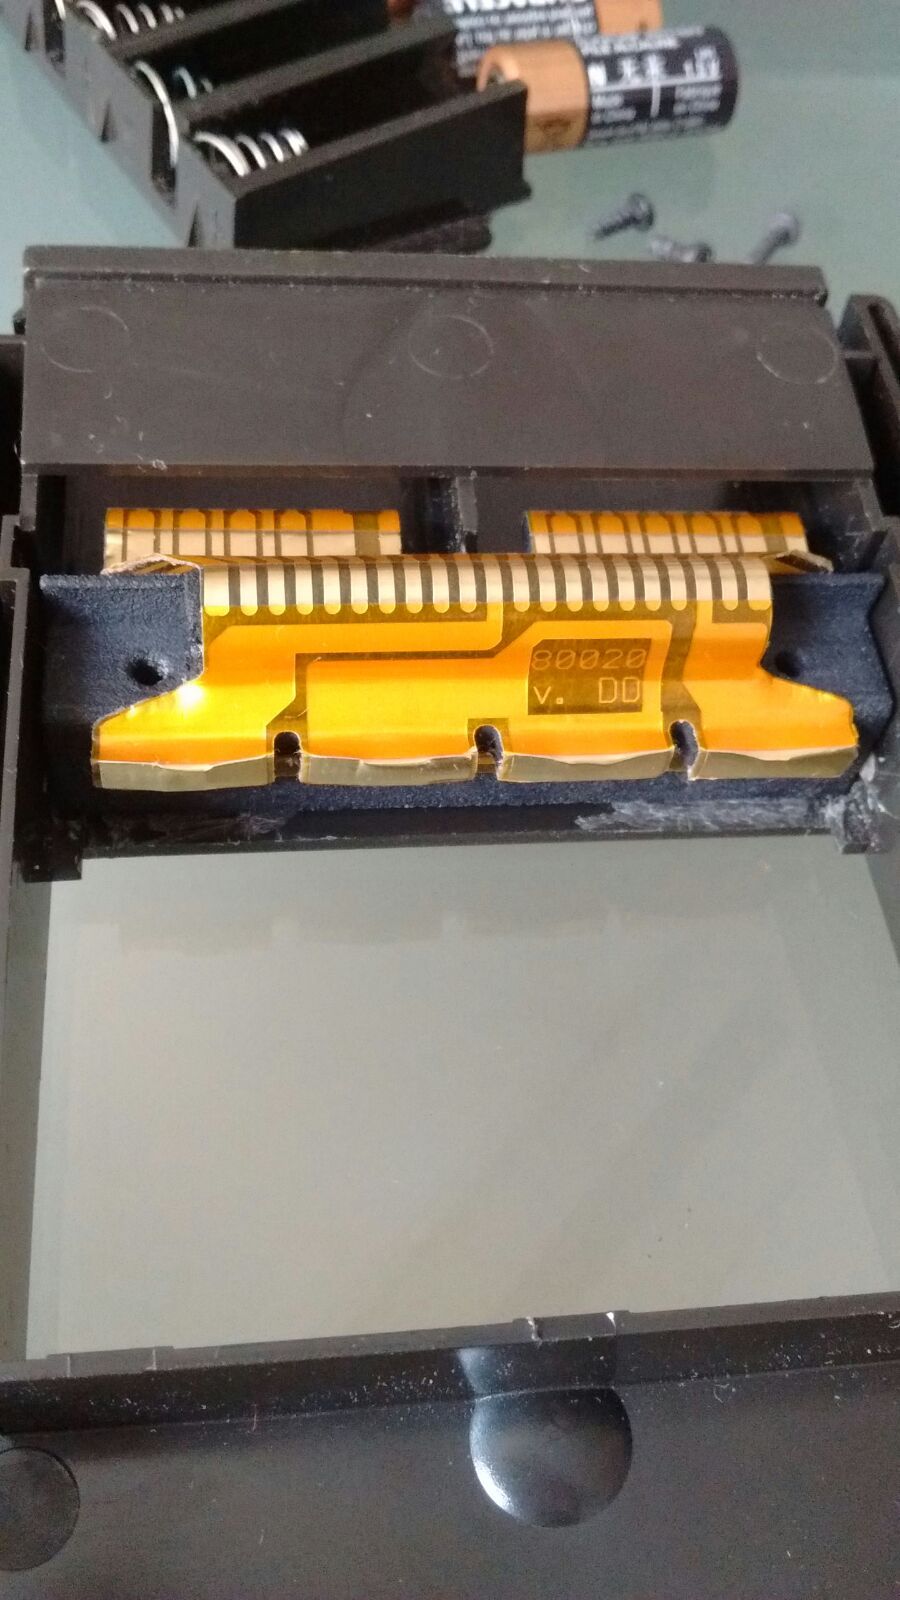
This piece is for repair of HP41c full nut calculator, substituting the damaged or corroded zebra connector that links the main board with the processor circuit. New design.

Black Friday: 20% off

1 piece(s)
Old price 16.00 €
12.80 *
* Prices include VAT

Accessories

Product Note Status Price
Zebra connector for HP41C repair Zebra connector for HP41C repair
12.80 € *
* Prices include VAT
Display accessory details

Customers who bought this product also bought

Upper Post Repair part
16.00 *
Assembled HP-41c battery bay and expansion ports module
44.00 *
Set of 4 screw for HP41 - inox
3.00 / 4 piece(s) *
Feet for HP41c HP41cv HP41cx calculators - set of 4
4.00 / 4 piece(s) *
Piece for repair of back case of HP41C
17.00 *
Spacer set for repairing old HP41c
10.00 *
* Prices include VAT

Browse these categories as well: Home, Accessories and spares, Classic Calculators, The HP41 Corner, HP 41C Repair, Broken lower screw posts, Corroded or broken zebra contacts

Assembled HP-41c battery bay and expansion ports module

Product no.: Flex-PCB Assembled

In stock
can be shipped within 10 days

Old price 55.00 €
44.00
Price includes VAT


Available delivery methods: Courier Spain, Courier Zone 1, Courier Zone 2, Courier Zone 3, Courier Zone 4, Light package, Shipping small items region 2, Overseas traceable, Letter, Entrega gratuita España

Assembled Battery-back port module repair kit for the often damaged flexible PCB in the battery bay (and I/O ports) of the HP-41c range of calculators.

It is made of a flexible circuit, already collated to an 3D-printed battery-expansion ports module, ready for assembly within your HP41c. Standard colour of the base is black, but it can also be ordered in white (like the pictures)

Instructions for battery and ports module

Open the calculator

First remove the rubber feet. To do so, use a small, flat screwdriver and introduce it beneath the rubber, taking care of pulling also the adhesive sheet that glues the rubber to the calculator. Try to make here a good job because usually you will have to reuse the rubber feet when you're done. Put the rubber feet aside so that they don't hinder the work (they have an uncanny ability to adhere to shirts, tools, calculators and eventually get lost.

Unscrew carefully and slowly the four screws beneath the rubber feet. Turn gently the screws: they operate on plastic that, after 30 years, is very brittle and fragile. It is very easy to break a screw post or "overdo" the thread.

Remove the back side of the calculator and put it aside. For comfort, remove also the intermediate piece between backside and main body. Later we will take care of putting it the right way, since it has two ways.

Remove the old piece

Now it is the time to remove the damaged battery-ports module. To do that, first remove all 4 module covers or modules; then pull the module vertically and carefully, since there are four plastic tabs in the calculator used to secure it, and it you do horizontal movements you can bend or break them. Yes, they have also became brittle!

Sometimes grit and grease have "glued" the old piece to the backside. It will be very difficult to remove it. Be aware that it is NOT glued by design - this is an unwanted effect of grease, grit and time. To remove the piece in this case, try pushing up with a screwdriver on the back module connectors. Increase upward force until eventually it separates from the body. Clean the backside plastic with water and soap or a lenses cleaner. It may happen that one or both of the screw supports are broken. You will have to repair it beforehand with the broken back repair piece.

Once the backside is clean and free from the old battery module, insert the new one carefully, making sure that the 4 vertical tabs are not bent. This is done without the module covers in. Be sure that it goes down to the calculator body. 

After it has been installed, put the module covers or modules so that they push the piece in place.

Reassembling

You can now reassemble the calculator. Put the keyboard face down on the table. Then, put the intermediate piece with the open side upwards, taking care that the wider part is up, like "opening up"  (this piece has a slight angle when looked from the front of the open side). This is important for the calculator to close properly. See picture.

Then put the back side on top. You can start by any screw - I usually start by the upper ones. If everything is ok, you will be able to screw through the piece and into the calculator. Screw carefully not to break the threads. If that happens, repair will be substantially more complex and will need the upper post repair piece and some drilling.

And that's it!!


Please be sure to eliminate rusting from the main board with Caig DeOxit (best), WD-40 (not as good) or other suitable cleaner, applied with cotton buds.

Save your HP41c !!


Additional product information


Accessories

Product Note Status Price
Repair kit for HP-41c battery bay and expansion ports Repair kit for HP-41c battery bay and expansion ports
22.00 € *
Assembled HP-41c battery bay and expansion ports module Flat Assembled HP-41c battery bay and expansion ports module Flat
44.00 € *
* Prices include VAT
Display accessory details

Customers who bought this product also bought

Feet for HP41c HP41cv HP41cx calculators - set of 4
4.00 / 4 piece(s) *
HP41c side cover
6.00 *
HP41c battery holder spring
3.00 *
Piece for repair of back case of HP41C
17.00 *
Repair kit for HP-41c battery bay and expansion ports
22.00 *
Set of 4 screw for HP41 - inox
3.00 / 4 piece(s) *
* Prices include VAT

Browse these categories as well: Accessories and spares, Classic Calculators, The HP41 Corner, Home, Corroded Battery contacts, Corroded circuit paths, Damaged screen - not all segments light on, HP 41C Repair, Scientific, The Calculator Store Offers

Assembled HP-41c battery bay and expansion ports module Flat

Product no.: Flex-PCB AssembledFlat

In stock

Old price 55.00 €
44.00
Price includes VAT


Available delivery methods: Free Delivery, Courier Spain, Courier Zone 1, Courier Zone 2, Courier Zone 3, Courier Zone 4, Light package, Shipping small items region 2, Entrega Canarias/Baleares, Overseas traceable, Letter, Entrega gratuita España

Assembled Battery-back port module repair kit for the often damaged flexible PCB in the battery bay (and I/O ports) of the HP-41c range of calculators.

This is the FLAT version, when the screw head domes are broken and grinded down - see pictures.

It is made of a flexible circuit, already collated to an 3D-printed battery-expansion ports module, ready for assembly within your HP41c. Standard colour of the base is black, but it can also be ordered in white (like the pictures)

Instructions for battery and ports module

Open the calculator

First remove the rubber feet. To do so, use a small, flat screwdriver and introduce it beneath the rubber, taking care of pulling also the adhesive sheet that glues the rubber to the calculator. Try to make here a good job because usually you will have to reuse the rubber feet when you're done. Put the rubber feet aside so that they don't hinder the work (they have an uncanny ability to adhere to shirts, tools, calculators and eventually get lost.

Unscrew carefully and slowly the four screws beneath the rubber feet. Turn gently the screws: they operate on plastic that, after 30 years, is very brittle and fragile. It is very easy to break a screw post or "overdo" the thread.

Remove the back side of the calculator and put it aside. For comfort, remove also the intermediate piece between backside and main body. Later we will take care of putting it the right way, since it has two ways.

Remove the old piece

Now it is the time to remove the damaged battery-ports module. To do that, first remove all 4 module covers or modules; then pull the module vertically and carefully, since there are four plastic tabs in the calculator used to secure it, and it you do horizontal movements you can bend or break them. Yes, they have also became brittle!

Sometimes grit and grease have "glued" the old piece to the backside. It will be very difficult to remove it. Be aware that it is NOT glued by design - this is an unwanted effect of grease, grit and time. To remove the piece in this case, try pushing up with a screwdriver on the back module connectors. Increase upward force until eventually it separates from the body. Clean the backside plastic with water and soap or a lenses cleaner. It may happen that one or both of the screw supports are broken. You will have to repair it beforehand with the broken back repair piece.

We assume that the screw supports are broken. Grind down to flat the screw supports with a dremel-like machine with some grinder head.

Once the backside is clean and free, glue the lower side of tthe module with E6000 glue, including putting some in the holes where the tabs are going to be. Then insert the module carefully, making sure that the 4 vertical tabs are not bent. This is done without the module covers in. Be sure that it goes down to the calculator body, and put pressure on the sides with cloth pegs to ensure good contact. Put also the module in to ensure good vertical position. Leave it overnight.

Reassembling

You can now reassemble the calculator. Put the keyboard face down on the table. Then, put the intermediate piece with the open side upwards, taking care that the wider part is up, like "opening up"  (this piece has a slight angle when looked from the front of the open side). This is important for the calculator to close properly. See picture.

Then put the back side on top. You can start by any screw - I usually start by the upper ones. If everything is ok, you will be able to screw through the piece and into the calculator. Screw carefully not to break the threads. If that happens, repair will be substantially more complex and will need the upper post repair piece and some drilling.

And that's it!!


Please be sure to eliminate rusting from the main board with Caig DeOxit (best), WD-40 (not as good) or other suitable cleaner, applied with cotton buds.

Save your HP41c !!


Additional product information


Accessories

Product Note Status Price
Repair kit for HP-41c battery bay and expansion ports Repair kit for HP-41c battery bay and expansion ports
22.00 € *
Assembled HP-41c battery bay and expansion ports module Assembled HP-41c battery bay and expansion ports module
44.00 € *
Zebra connector for HP41C repair Zebra connector for HP41C repair
12.80 € *
* Prices include VAT
Display accessory details

Customers who bought this product also bought

Upper Post Repair part
16.00 *
Feet for HP41c HP41cv HP41cx calculators - set of 4
4.00 / 4 piece(s) *
Zebra + Lower post
26.00 *
Piece for repair of back case of HP41C
17.00 *
Lower Post Repair part
16.00 *
Set of 4 screw for HP41 - inox
3.00 / 4 piece(s) *
* Prices include VAT

Browse these categories as well: Accessories and spares, Classic Calculators, The HP41 Corner, Home, Corroded Battery contacts, Corroded circuit paths, Damaged screen - not all segments light on, Scientific, HP 41C Repair, The Calculator Store Offers
New

Zebra connector for HP41C repair

Product no.: Zebra PCB

In stock

Old price 16.00 €
12.80
Price includes VAT


Available delivery methods: Courier Zone 1, Courier Zone 2, Courier Zone 3, Courier Zone 4, Light package, Shipping small items region 2, Entrega Canarias/Baleares, Overseas traceable, Letter, Entrega gratuita España

This piece is for repair of HP41c full nut calculator, substituting the damaged or corroded zebra connector that links the main board with the processor circuit. New design in a single piece, with 50 times more conductivity than elastomeric contacts.

Installation instructions

Open the calculator

First remove the rubber feet. To do so, use a small, flat screwdriver and introduce it beneath the rubber, taking care of pulling also the adhesive sheet that glues the rubber to the calculator. Try to make here a good job because usually you will have to reuse the rubber feet when you're done. Put the rubber feet aside so that they don't hinder the work (they have an uncanny ability to adhere to shirts, tools, calculators and eventually get lost.

Unscrew carefully and slowly the four screws beneath the rubber feet. Turn gently the screws: they operate on plastic that, after 30 years, is very brittle and fragile. It is very easy to break a screw post or "overdo" the thread.

Remove the back side of the calculator and put it aside. For comfort, remove also the intermediate piece between backside and main body. Later we will take care of putting it the right way, since it has two ways.

Remove the processor.

There are two possible cases:

  • In the old calculators the processor circuit is pressed down to the main circuit by a couple of nuts screwed on the plastic posts. The post do not have any thread themselves - the thread is carved by the nut itself. These have to be removed with care because you risk to break the post, by unscrewing counterclockwise. More than a couple of in and outs and the post will break for sure. Once done, lif the circuit. 
  • In the newer ones, this pressure is exerted by two cylinders around the screw holes in the back side of the case. These are not present in the old models. You just need to lift the circuit.

Once the circuit is lifted, you will see the zebra connectors. These may be of three different types (thanks to monte Dalrymple for the image)

zebra_types

  • The left one can be reused if treated with care and not corroded - clean it with paper embedded in Caig Deoxit. However, it doesn't work in some circumstances and there is no clear reason why.
  • The second is completely useless and will need to be replaced. Every time.
  • The thirs type is the best of the lot and can be reused with care if not corroded. It is also sensitive to friction and can be easily damaged. Discard if corroded.
 
Now you have to lay the new zebra. As it is simmetrical, it works all 4 ways. Make sure it goes to the end of the tubes on both sides. All circuit lanes should line up perfectly with the circuit pad below. Once laid down the zebra, put the processor circuit on top and press down to ensure contact.
 
manuales_-_3
 
For the cases where there were nuts, we recommend not using the nuts anymore and replace them by one of our spacers. You can try several height measures until you find the one that closes perfectly the calculator and yet pushes down the circuit to ensure good contact.
 
image2-4

Reassembling - closing the calculator

You can now reassemble the calculator. Put the keyboard face down on the table. Then, put the intermediate piece with the open side upwards, taking care that the wider part is up, like "opening up"  (this piece has a slight angle when looked from the front of the open side). This is important for the calculator to close properly. See picture.

intermediario

Then put the back side on top. You can start by any screw - I usually start by the upper ones. If everything is ok, you will be able to screw through the piece and into the calculator. Screw carefully not to break the threads. If that happens, repair will be substantially more complex and will need the upper post repair piece and some drilling.

And that's it!!


Additional product information


Accessories

Product Note Status Price
Zebra + Lower post Zebra + Lower post
26.00 € *
Assembled HP-41c battery bay and expansion ports module Assembled HP-41c battery bay and expansion ports module
44.00 € *
Repair kit for HP-41c battery bay and expansion ports Repair kit for HP-41c battery bay and expansion ports
22.00 € *
Spacer set for repairing old HP41c Spacer set for repairing old HP41c
10.00 € *
Assembled HP-41c battery bay and expansion ports module Flat Assembled HP-41c battery bay and expansion ports module Flat
44.00 € *
* Prices include VAT
Display accessory details

Customers who bought this product also bought

Feet for HP41c HP41cv HP41cx calculators - set of 4
4.00 / 4 piece(s) *
Repair kit for HP-41c battery bay and expansion ports
22.00 *
HP41c side cover
6.00 *
HP41c battery holder spring
3.00 *
Assembled HP-41c battery bay and expansion ports module
44.00 *
Set of 4 screw for HP41 - inox
3.00 / 4 piece(s) *
* Prices include VAT

Browse these categories as well: The HP41 Corner, Accessories and spares, Home, HP 41C Repair, Corroded or broken zebra contacts, Corroded circuit paths, Damaged screen - not all segments light on, The Calculator Store Offers
New

Repair kit for HP-41c battery bay and expansion ports

Product no.: Flex-PCB

In stock

Old price 26.00 €
22.00
Price includes VAT


Available delivery methods: Free Delivery, Light package, Shipping small items region 2, Entrega Canarias/Baleares, Overseas traceable, Letter, Entrega gratuita España

Adhesive circuit for the often damaged flexible PCB in the battery bay (and I/O ports) of the HP-41c range of calculators. Shipping included in price.

Designed to be folded in shape, it has an adhesive back with a 3M Very High Bond surface.

Please looked to the attached manual.

Shipping included in price.

Additional product information

Handbook Download

Accessories

Product Note Status Price
Assembled HP-41c battery bay and expansion ports module Assembled HP-41c battery bay and expansion ports module
44.00 € *
* Prices include VAT
Display accessory details

Customers who bought this product also bought

Feet for HP41c HP41cv HP41cx calculators - set of 4
4.00 / 4 piece(s) *
HP41c side cover
6.00 *
HP41c battery holder spring
3.00 *
Zebra connector for HP41C repair
12.80 *
Assembled HP-41c battery bay and expansion ports module
44.00 *
Piece for repair of back case of HP41C
17.00 *
* Prices include VAT

Browse these categories as well: Accessories and spares, Classic Calculators, The HP41 Corner, Home, Corroded Battery contacts, Corroded circuit paths, Damaged screen - not all segments light on, HP 41C Repair, Scientific

Spacer set for repairing old HP41c

Product no.: SpacerSet

In stock

10.00
Price includes VAT


Available delivery methods: Courier Spain, Courier Zone 1, Courier Zone 2, Courier Zone 3, Courier Zone 4, Light package, Shipping small items region 2, Entrega Canarias/Baleares, Overseas traceable, Entrega gratuita España

Set of 8 pairs of spacers for nut-screwed full-nut HP41c calculators. Substitutes the nuts that are screwed on the lower posts to secure the circuit. These nuts can only be used a couple of times before the posts are destroyed. The diameter is just right for the original posts, and the height can be chosen to adjust perfectly so that the case can be closed completely and the pressure to the zebras is transmitted efficiently.

The heights provided are: 1,2mm, 1,4mm, 1,6mm, 1,8mm, 2,0mm, 2,2mm, 2,4mm and 2,6mm

Additional product information


Accessories

Product Note Status Price
HP41c Lower Post Repair Kit
40.00 € *
Lower Post Repair part Lower Post Repair part
16.00 € *
* Prices include VAT
Display accessory details

Customers who bought this product also bought

Set of 4 screw for HP41 - inox
3.00 / 4 piece(s) *
Zebra connector for HP41C repair
12.80 *
Feet for HP41c HP41cv HP41cx calculators - set of 4
4.00 / 4 piece(s) *
Zebra + Lower post
26.00 *
Piece for repair of back case of HP41C
17.00 *
HP41c side cover
6.00 *
* Prices include VAT

Browse these categories as well: HP 41C Repair, The HP41 Corner, Accessories and spares

lower post long screw - inox

Product no.: lowerscrew

In stock

1.00 / 2 piece(s)
Price includes VAT


Available delivery methods: Courier Spain, Courier Zone 1, Courier Zone 2, Courier Zone 3, Courier Zone 4, Light package, Shipping small items region 2, Entrega Canarias/Baleares, Overseas traceable, Letter, Entrega gratuita España

Two long screw for the lower screw posts of HP41c calculators. As they are slightly longer, they can still hold when the original screws have destroyed the thread.

The screws are too "self-threading". Made in 304 inox steel.

Additional product information


Customers who bought this product also bought

Feet for HP41c HP41cv HP41cx calculators - set of 4
4.00 / 4 piece(s) *
Set of 4 screw for HP41 - inox
3.00 / 4 piece(s) *
Spacer set for repairing old HP41c
10.00 *
Assembled HP-41c battery bay and expansion ports module
44.00 *
Zebra + Lower post
26.00 *
HP41c Lower Post Repair Kit
40.00 *
* Prices include VAT

Browse these categories as well: Accessories and spares, The HP41 Corner, HP 41C Repair, Broken lower screw posts, Corroded or broken zebra contacts, Home

lower post long screw - black pair

Product no.: lowerscrewblack

In stock

4.00 / 2 piece(s)
Price includes VAT


Available delivery methods: Light package, Shipping small items region 2, Entrega Canarias/Baleares, Entrega gratuita España

Two long screw for the lower screw posts of HP41c calculators. As they are slightly longer, they can still hold when the original screws have destroyed the thread.

The screws are too "self-threading". Black 314 Stainless steel (A4)

Additional product information


Customers who bought this product also bought

Spacer set for repairing old HP41c
10.00 *
HP41c battery holder spring
3.00 *
Set of 4 screw for HP41 - inox
3.00 / 4 piece(s) *
HP41c Lower Post Repair Kit
40.00 *
lower post long screw - inox
1.00 / 2 piece(s) *
Zebra connector for HP41C repair
12.80 *
* Prices include VAT

Browse these categories as well: Accessories and spares, The HP41 Corner, HP 41C Repair, Broken lower screw posts, Corroded or broken zebra contacts, Home
New

Set of 4 screw for HP41 - inox

Product no.: Screwset

In stock

3.00 / 4 piece(s)
Price includes VAT


Available delivery methods: Courier Spain, Courier Zone 1, Courier Zone 2, Courier Zone 3, Courier Zone 4, Light package, Shipping small items region 2, Entrega Canarias/Baleares, Overseas traceable, Letter, Entrega gratuita España

Two long screw for the lower screw posts of HP41c calculators. As they are slightly longer, they can still hold when the original screws have destroyed the thread.

+ two screws for the upper posts - standard size

The screws are too "self-threading". Made in 304 inox steel.

Additional product information


Customers who bought this product also bought

Feet for HP41c HP41cv HP41cx calculators - set of 4
4.00 / 4 piece(s) *
Upper Post Repair part
16.00 *
Assembled HP-41c battery bay and expansion ports module
44.00 *
Spacer set for repairing old HP41c
10.00 *
Piece for repair of back case of HP41C
17.00 *
Zebra connector for HP41C repair
12.80 *
* Prices include VAT

Browse these categories as well: Accessories and spares, The HP41 Corner, HP 41C Repair, Broken lower screw posts, Corroded or broken zebra contacts, Home

4 x Piece for repair of back case of HP41C

Product no.: brokenback4

In stock

Old price 72.00 €
50.00
Price includes VAT


Available delivery methods: Light package, Shipping small items region 2, Entrega Canarias/Baleares, Entrega gratuita España

4 pieces for repairing HP41c back cases.

As many units suffer from broken upper screw supports on the back side of the calculator, we have created pieces for the repair of the back side of the HP41C - which offer bigger surface for adherence and also serve to hold the battery assembly in case the little wings in the back side are broken.

Includes shipment within Europe

Instructions for use of back side repair piece.

1. Be aware, before everything else, that the piece has a right side and a left side. This is due to the space for the tabs in the calculator that keep the battery-port assembly in place. You need to be aware of this at all times - more so if you want to cut it as explained below.

2. Decide whether you will replace both sides or just one. The decision is easy when both are broken, but if one is not, you'll have to check whether the old standing support will withstand the pressure for long. Our recommendation is to replace both sides. If later one of the sides breaks down, the repair will be much more difficult and probably less solid. And you have already paid for both sides!!

3. If you are going to replace just one side, cut with a hobbyist scissors just the side you don't need, according to picture enclosed, again, be careful of cutting the side you dont need, since the piece has a single correct orientation!. The rest of the piece will serve to increment the glued area, better align the piece in place and also to better support the battery-port assembly.


IMG_3904

2. With a Dremel machine, file and level the area that had the support. You don't need to remove the tabs in between the two screw post, but you need to remove them if they are twisted or half-broken.

IMG_3884

5. Put the piece in place. There is only one "right" way. The cross part is tight because it is needed to properly locate both holes at the extremes. Do not force it. Please make sure it is not bent downwards. Make sure it makes good contact. Remove the piece.

6. Put some glue in the bottom of the piece. Do not put too much or it will go out when pressed. We have used E6000 black glue with good results. Do not use cyanoacrylate glues. Put the piece back in place. Press and remove with a stick or a blade the excess glue, if any. If the screw holes are partially obstructed by glue, pass a screw in the opposite direction (to avoid separating the piece from the back side).

7. Secure the piece in place with a pair of clamps - lighter pressure like clothes' pegs will not be enough. Be careful that there is no excess glue from the other side of the case and the clamps are adhered to the piece! Leave for 24h for the glue to cure. And you're done! You have a repaired back that will withstand a lot of abuse again.

IMG_3900

8. The piece is designed to accept both the original and the new battery-ports assembly - so you need to press it down to have it in place. The screw holes should fit a little bit tighter than in the original calculator, but should be perfectly aligned with the assemblies and the screw posts below.

2017-05-21-PHOTO-00000365

Also, if you're buying from the US, it is maybe better to buy it directly from Shapeways there (just click on the link)


Additional product information


Accessories

Product Note Status Price
Assembled HP-41c battery bay and expansion ports module Assembled HP-41c battery bay and expansion ports module
44.00 € *
Repair kit for HP-41c battery bay and expansion ports Repair kit for HP-41c battery bay and expansion ports
22.00 € *
Piece for repair of back case of HP41C Piece for repair of back case of HP41C
17.00 € *
* Prices include VAT
Display accessory details

Customers who bought this product also bought

Upper Post Repair part
16.00 *
Assembled HP-41c battery bay and expansion ports module
44.00 *
HP41c Lower Post Repair Kit
40.00 *
Set of 4 screw for HP41 - inox
3.00 / 4 piece(s) *
Lower Post Repair part
16.00 *
Spacer set for repairing old HP41c
10.00 *
* Prices include VAT

Browse these categories as well: The HP41 Corner, Accessories and spares, Home, HP 41C Repair, Broken upper back case screw head supports
1 - 10 of 19 results