")
")
- El Rincón de la HP15c
- El Rincón de la HP41
- El Rincón de la HP Prime
- El Rincón de la HP12c
- The Calculator Store Offers
- Calculadoras cientificas
- Calculadoras financieras
- Calculadoras Gráficas
- Reparación de calculadoras HP
- Calculadoras HP Clásicas
- Calculator Accessories
- Guía de selección
- Productos en Promoción
- Calculator blog
- Blog en Español
- Mapa del sitio
- Comparativas
- Libros
- Education
- ¿Por qué RPN?
- Calculadoras baratas
-
The Calculator Store Club

- Audio

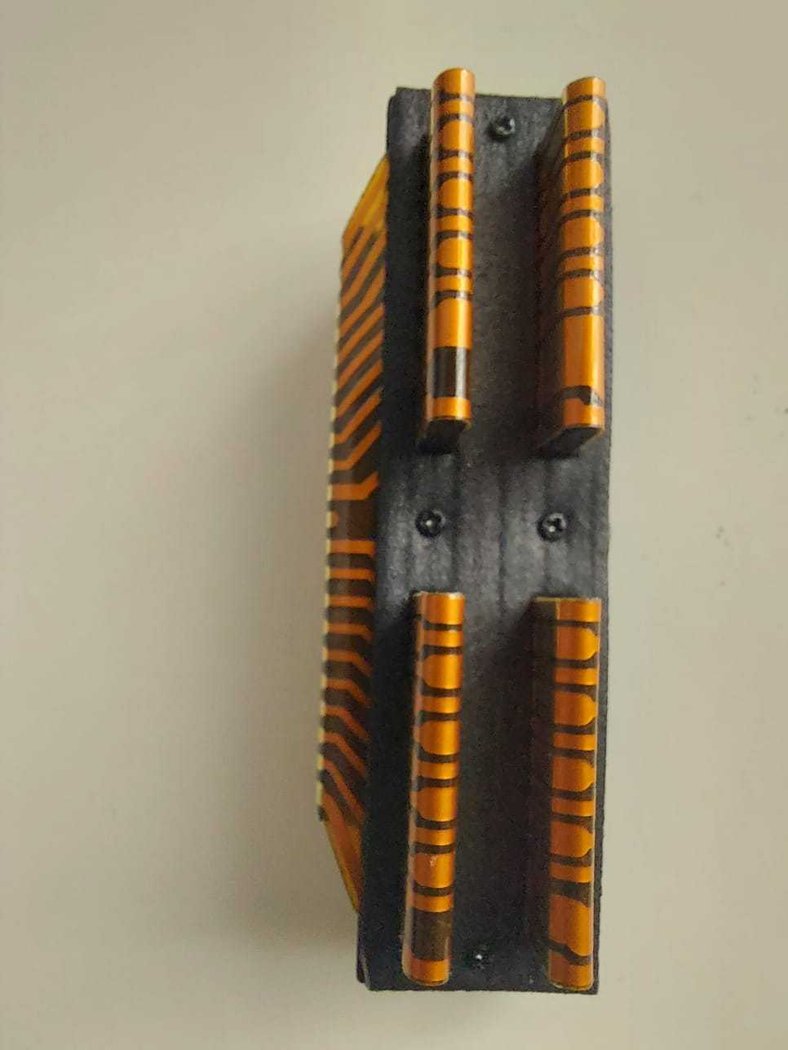
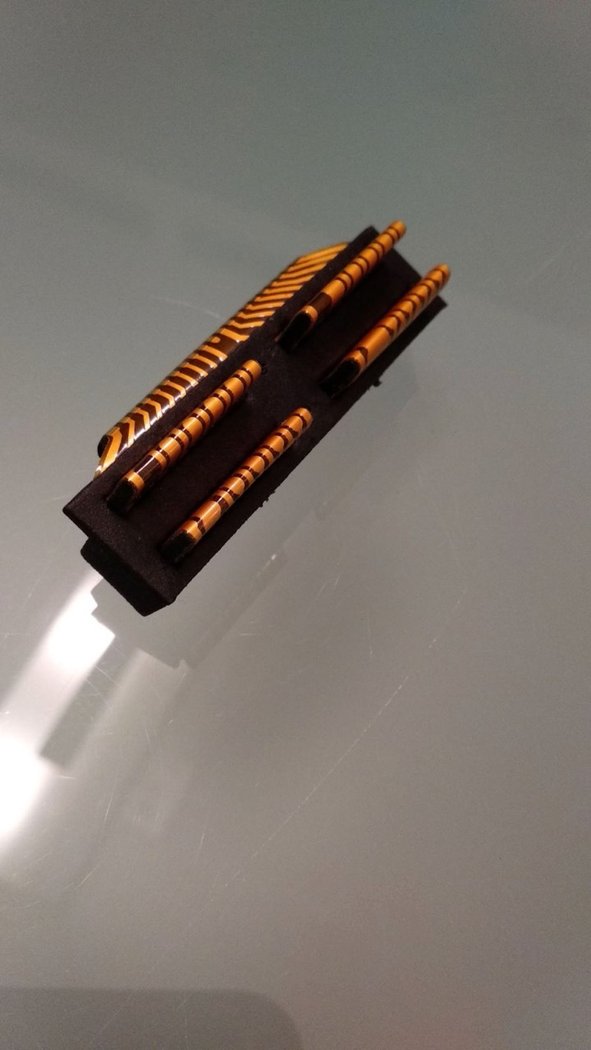
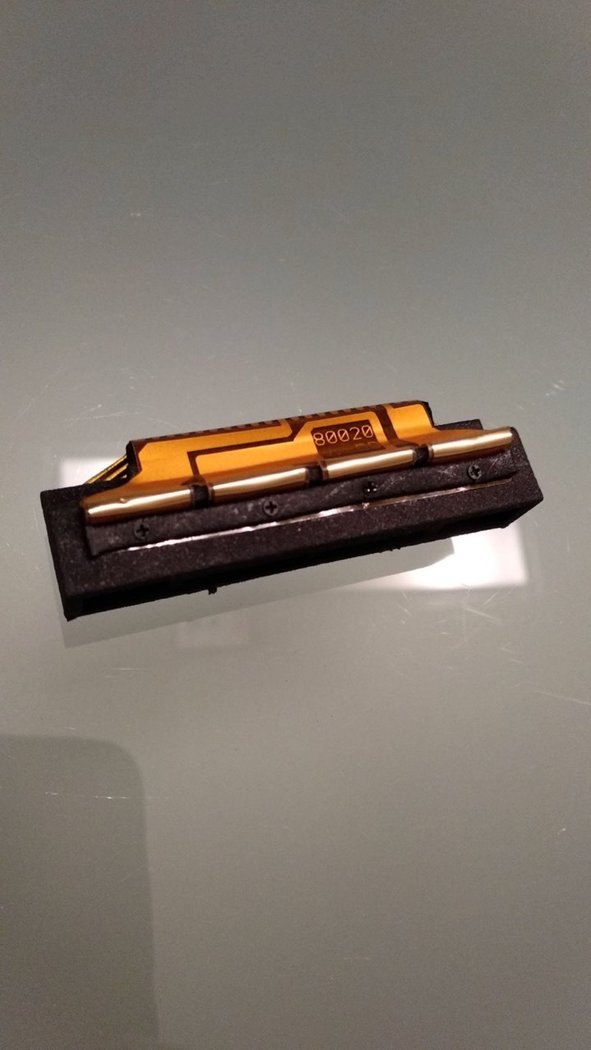
Calculadoras Calculator Accessories Zebra + Lower post
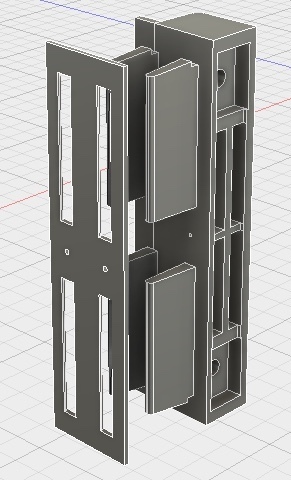
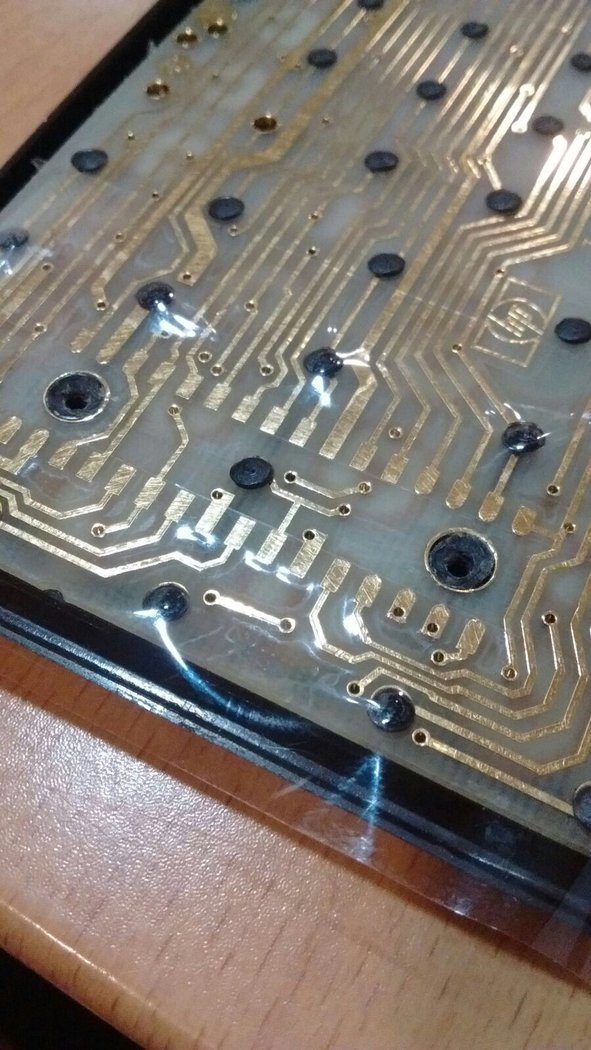
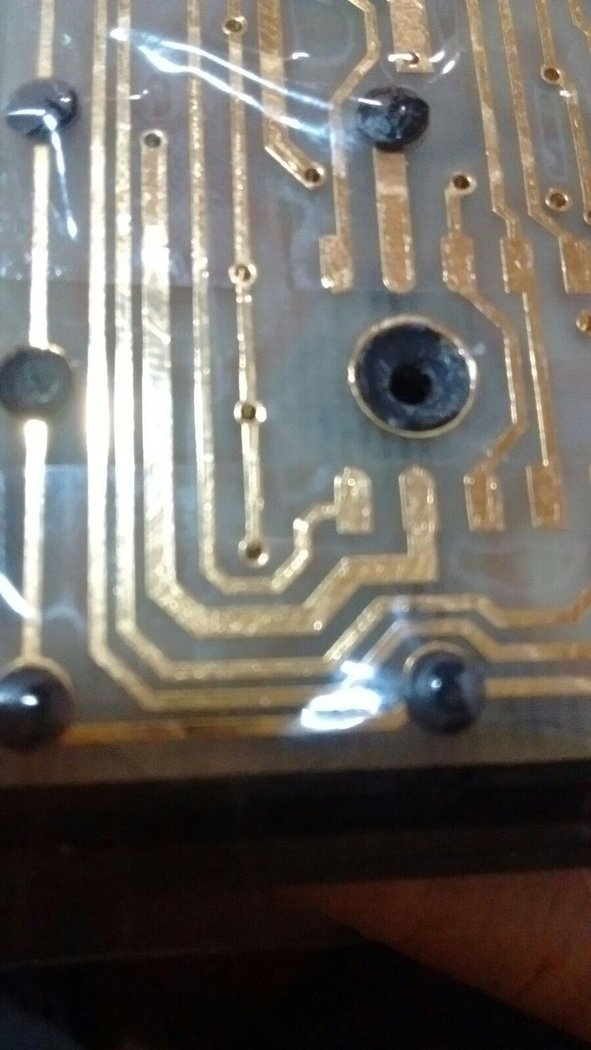
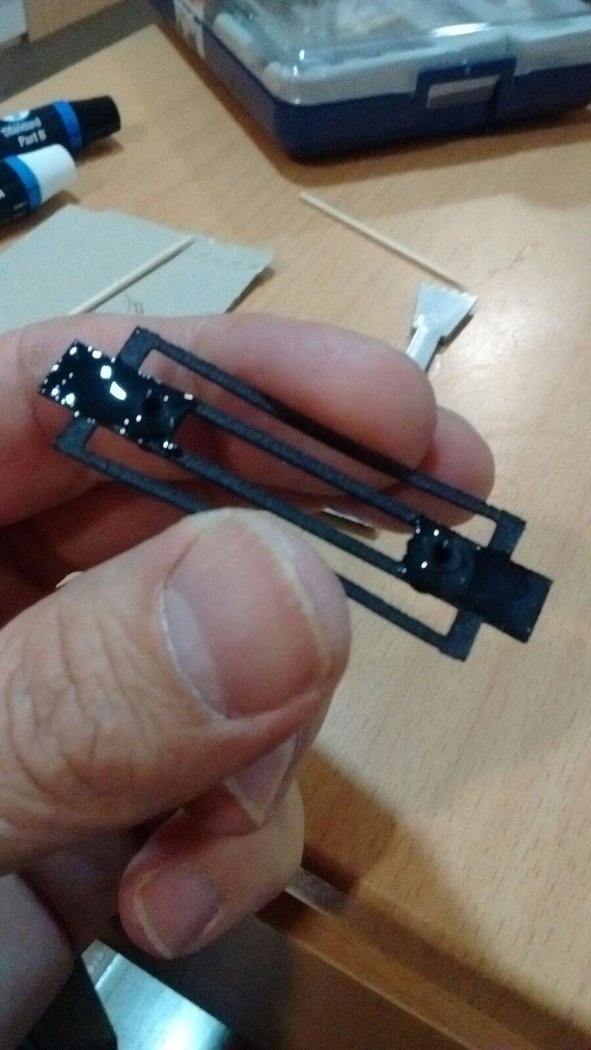
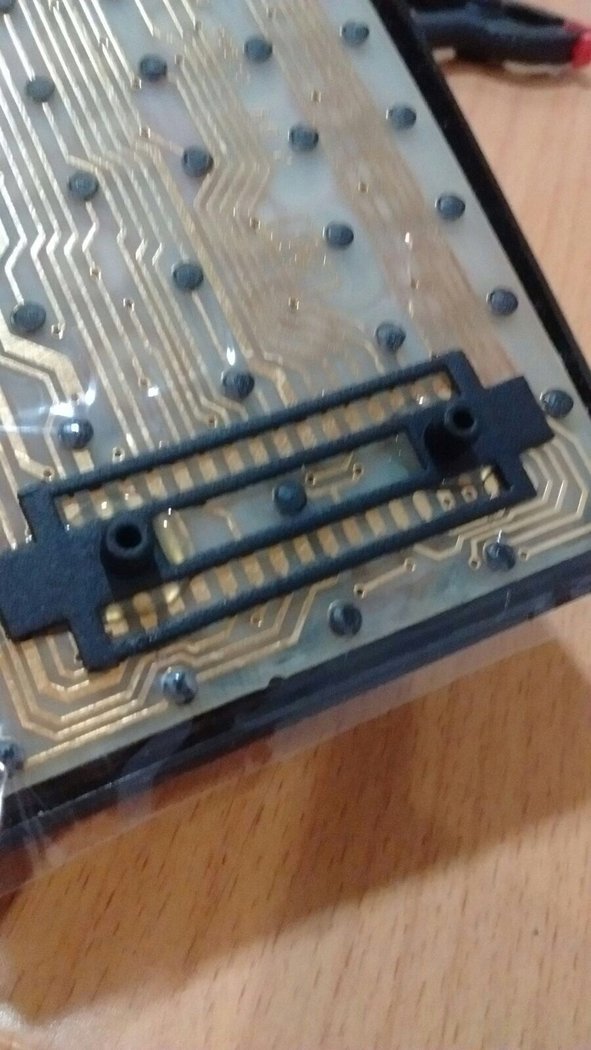
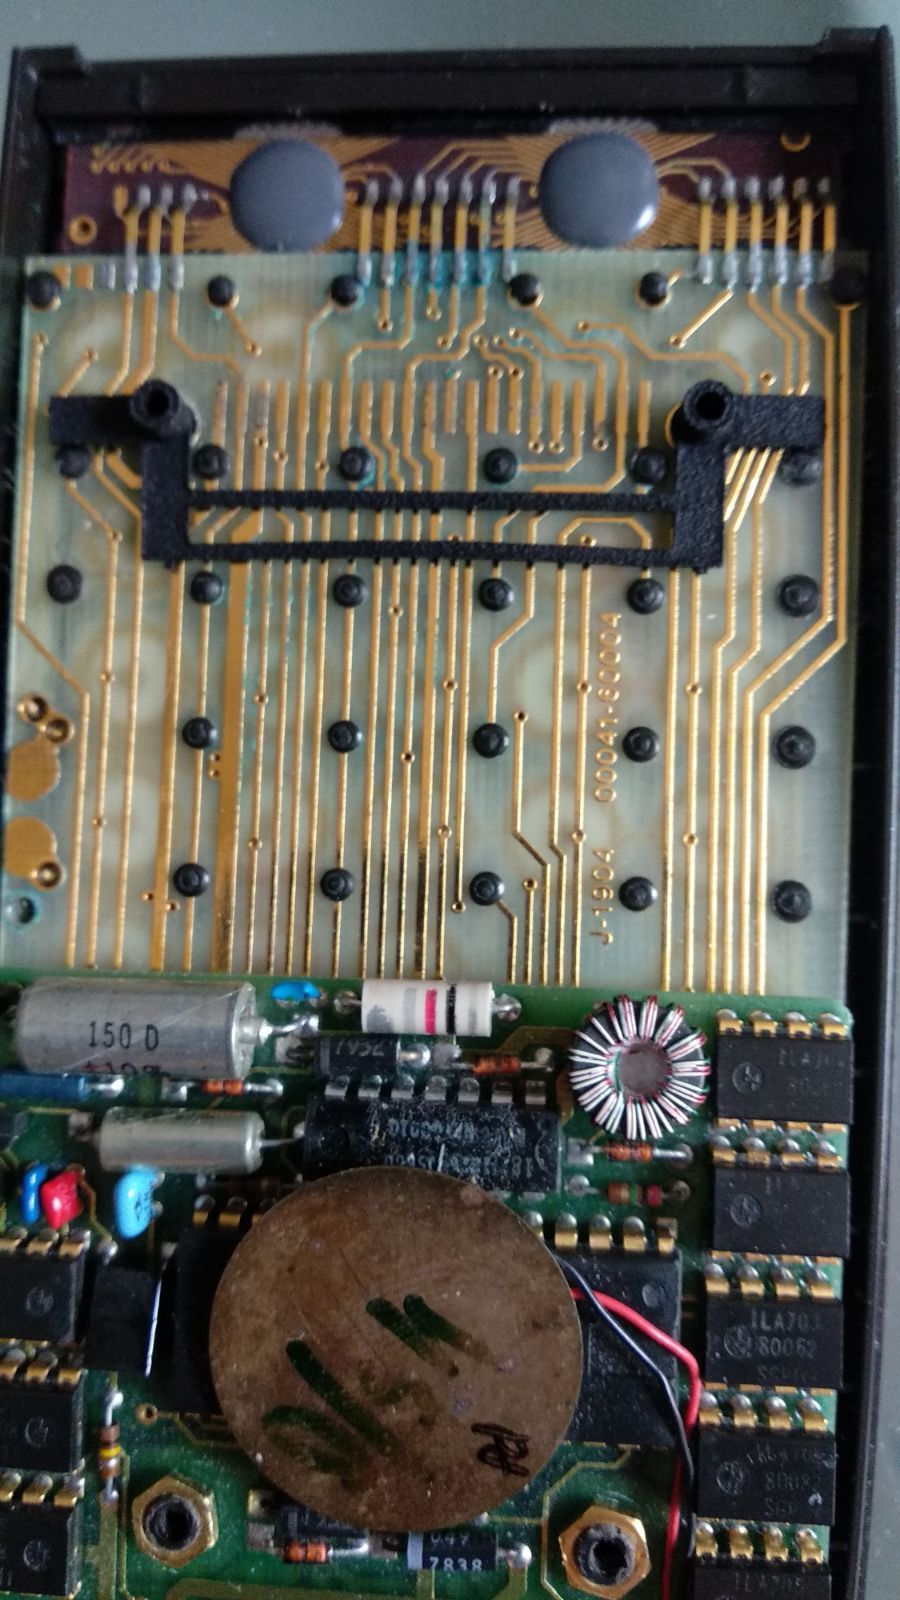
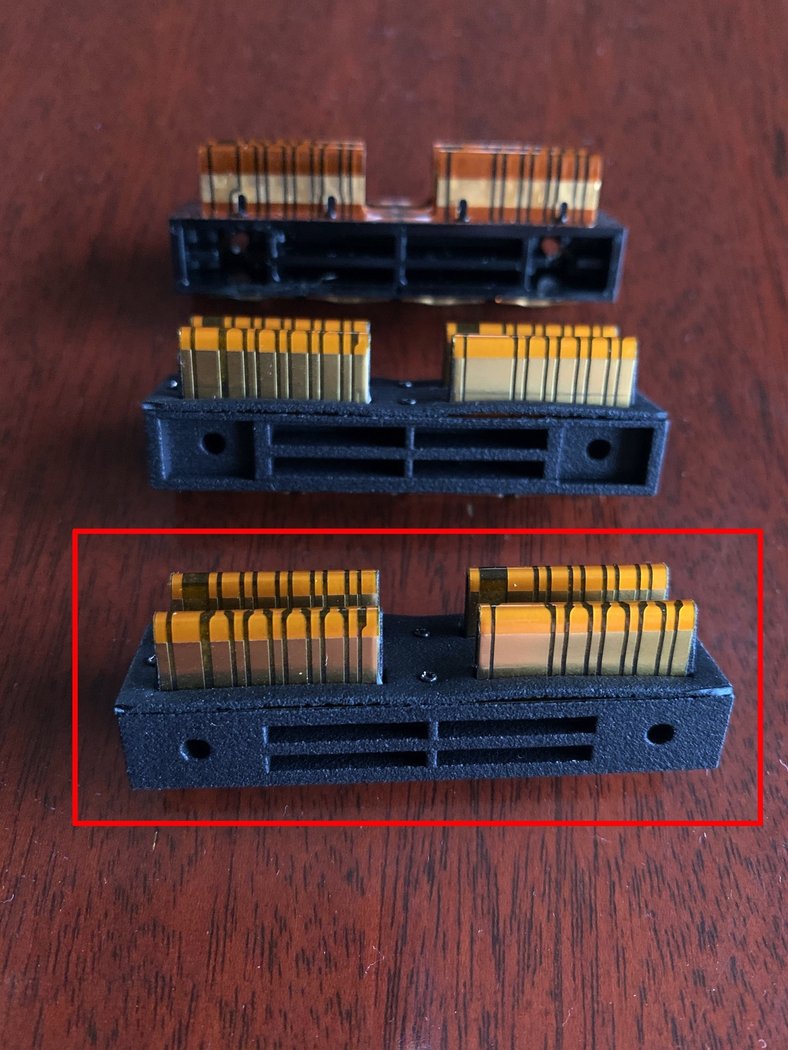
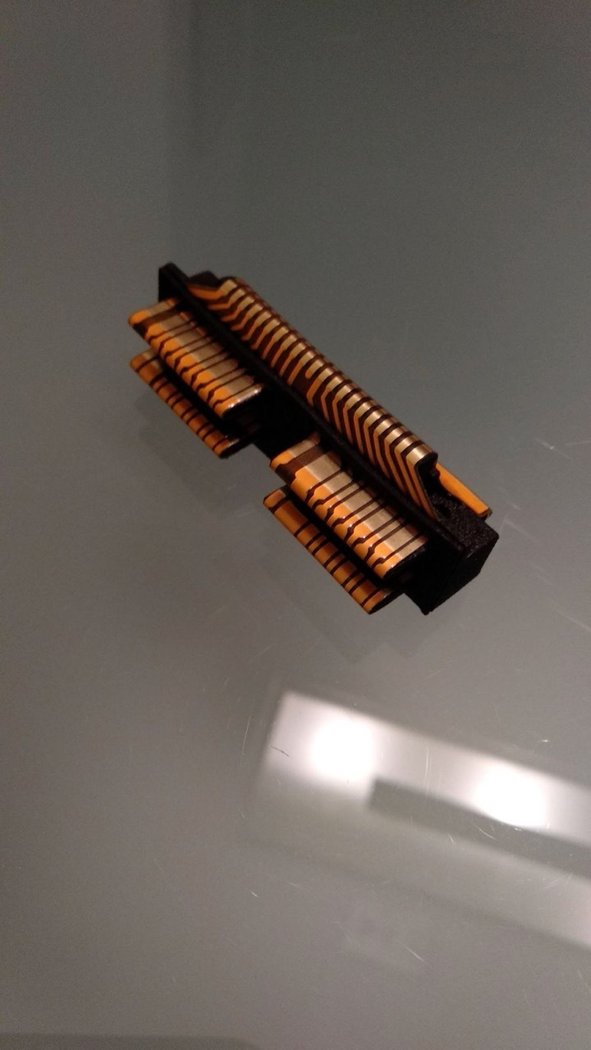
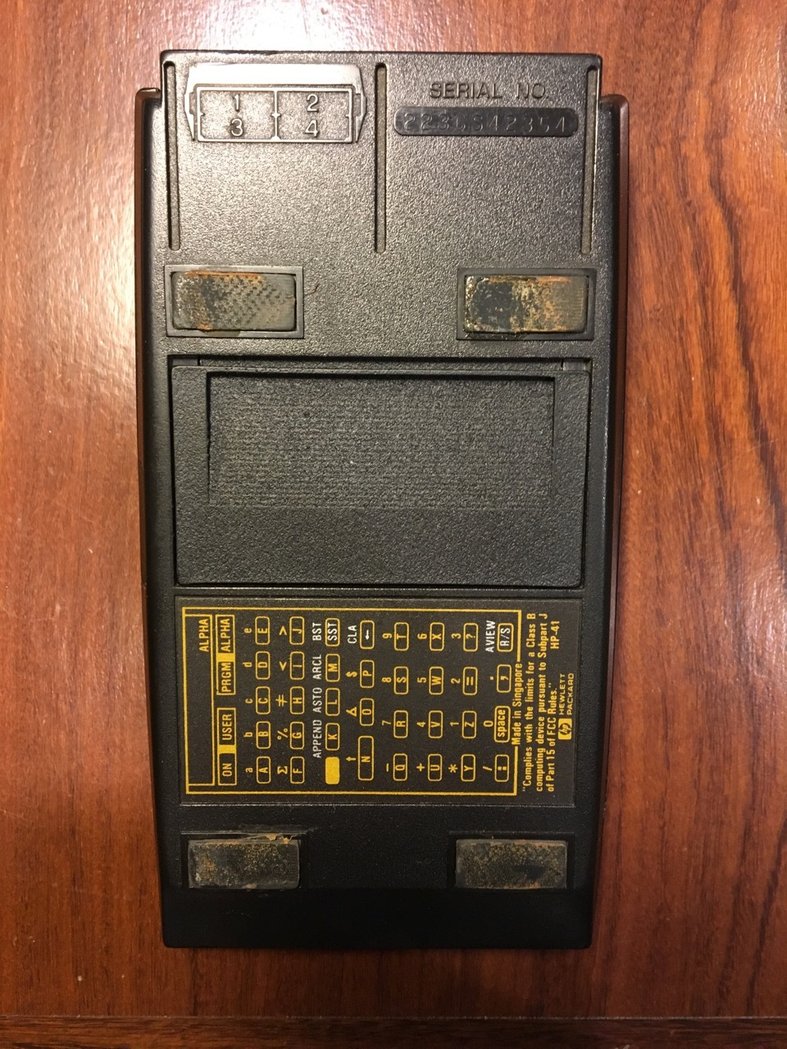
Calculadoras Calculator Accessories Módulo conector de baterías y puertos de expansión de HP-41c/cv/cx
Calculadoras Calculator Accessories Pieza para reparar postes inferiores
Calculadoras Calculator Accessories Pieza para reparar postes superiores
Calculadoras Calculator Accessories Módulo conector de baterías y puertos de expansión de HP-41c/cv/cx Plano
Calculadoras El Rincón de la HP41 Porta baterías para HP41C 3D
Calculadoras Calculator Accessories Muelle para cargador de HP41c
Calculadoras Calculator Accessories Esponja para las fundas de HP41c
Calculadoras El Rincón de la HP41 Pieza para reparación de parte trasera de HP41c
Calculadoras Calculator Accessories Tapa lateral para HP 41c
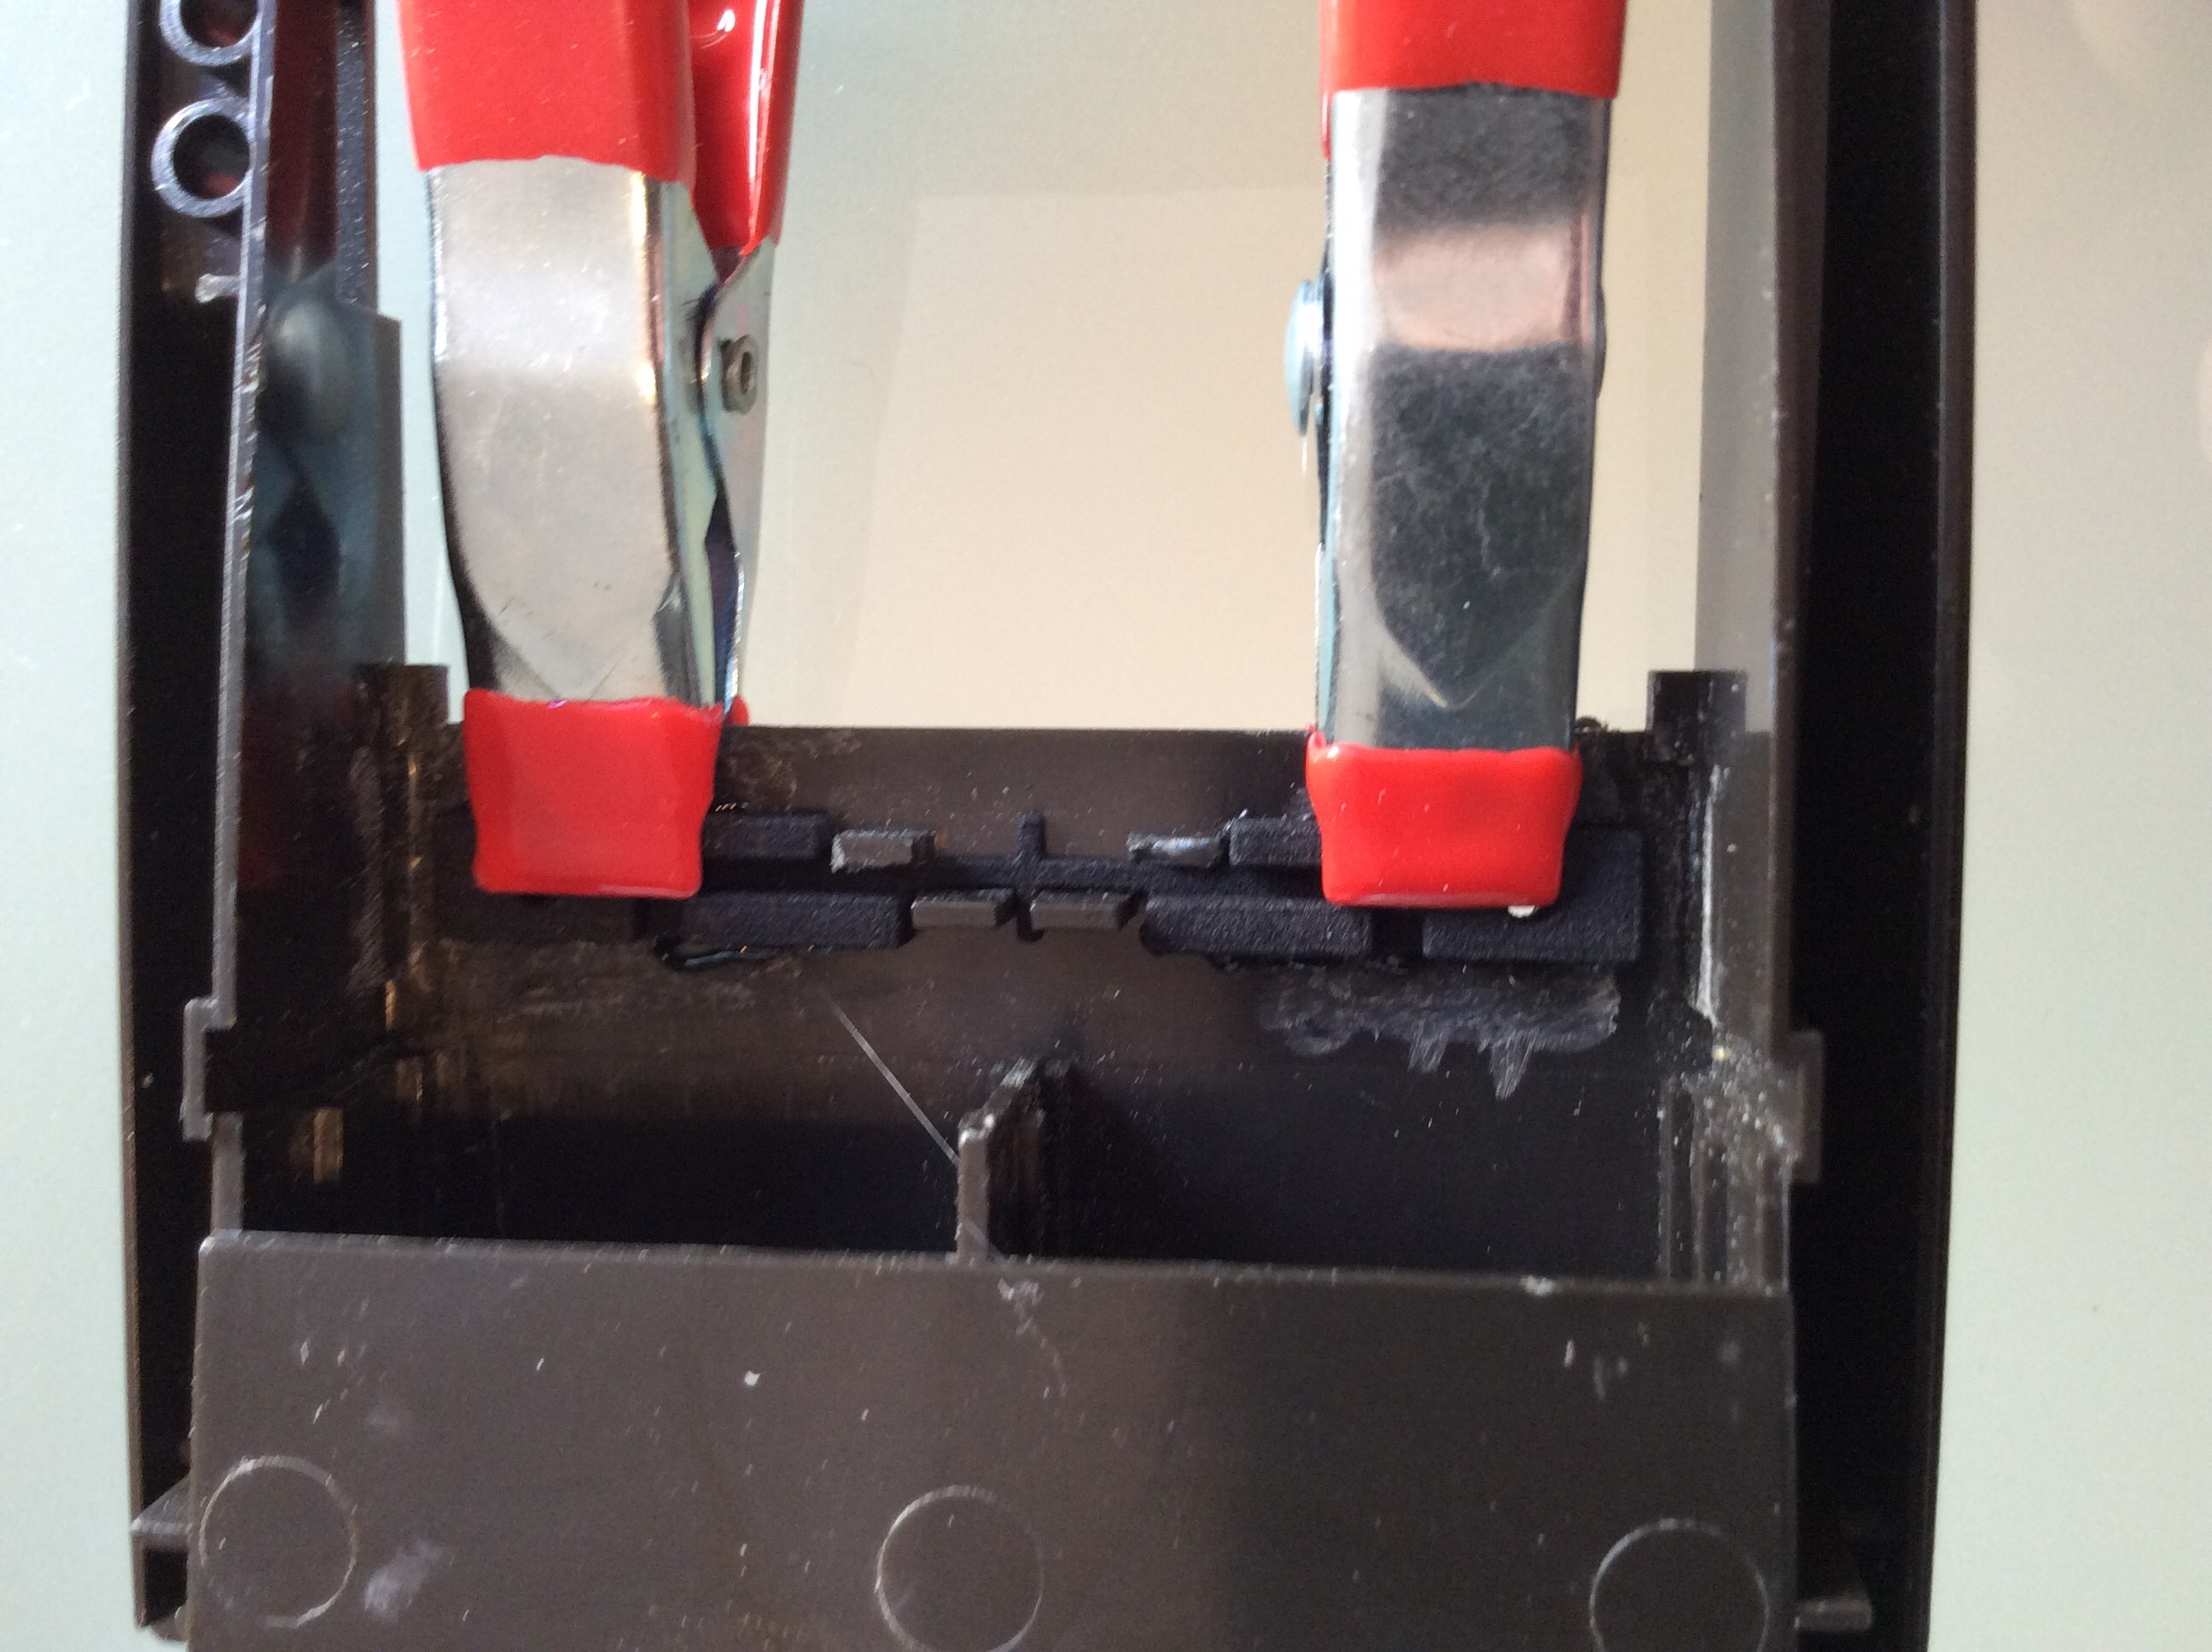
Zebra + Lower post
N.º de producto: zebra+lowerpostEn existencias
Formas de entrega disponibles: Courier Zona 1, Courier Zone 2, Courier Zona 3, Courier Zone 4, Carta, Small item outside EU, Entrega Canarias/Baleares, Overseas traceable, Letter, Entrega gratuita España
Se incluyen los siguientes productos independientes

|
N.º de producto: Lowpostrepair
Pieza para reparar los agujeros para tornillos inferiores de la familia HP41c, del tipo full-nut |
1 unidad(es)
16,00 €
*
|
|
|
|

|
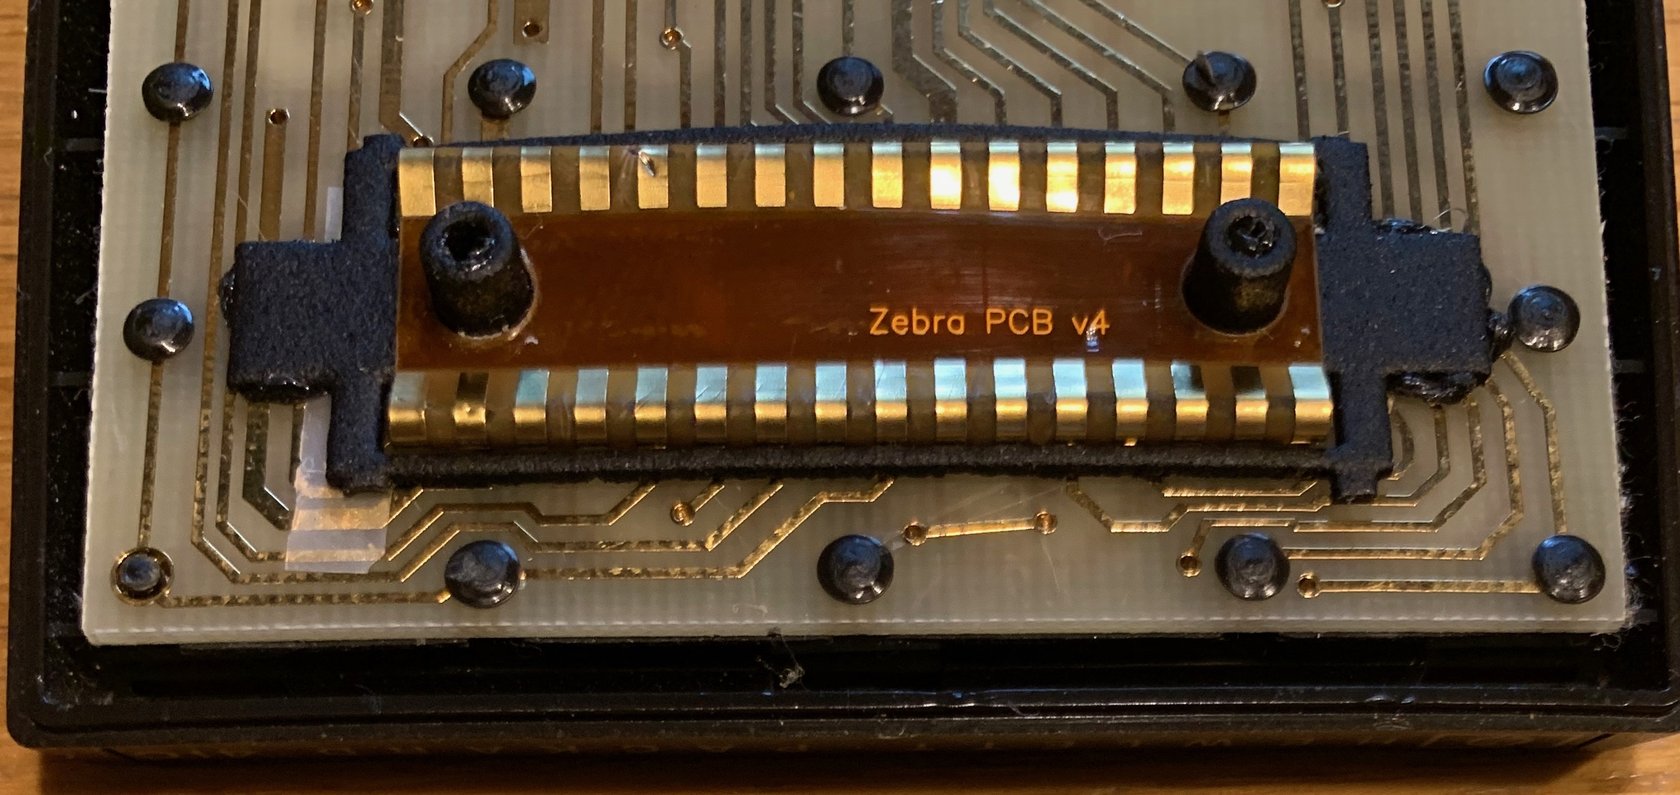
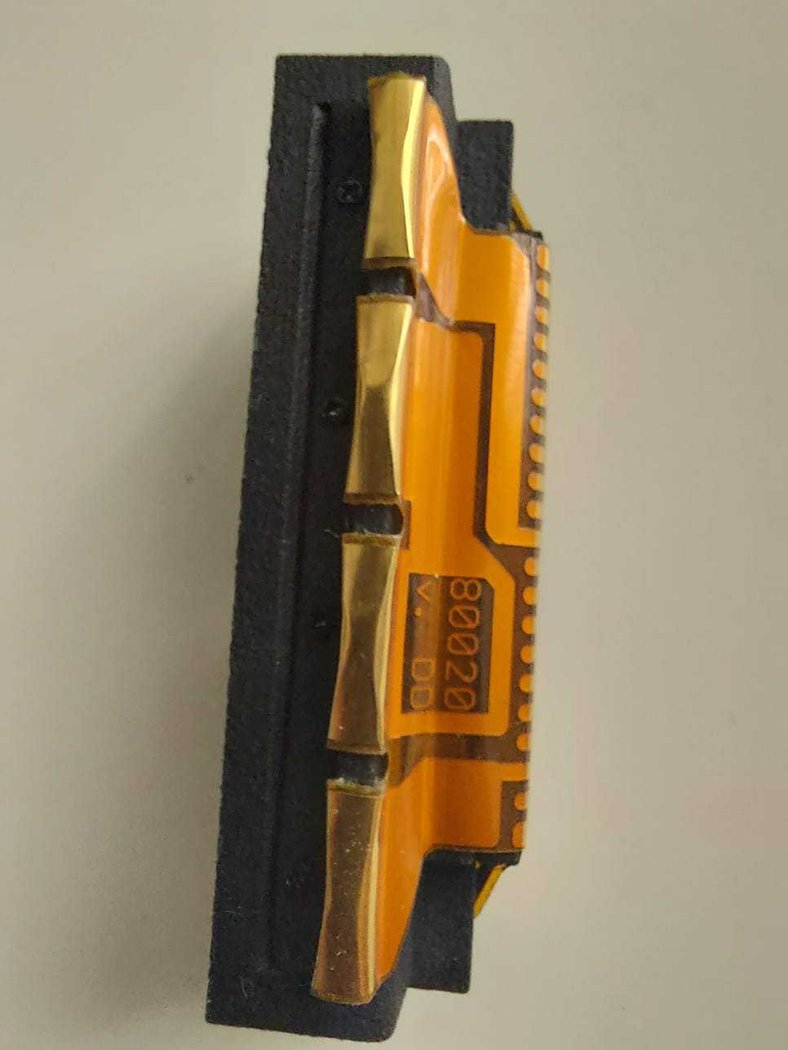
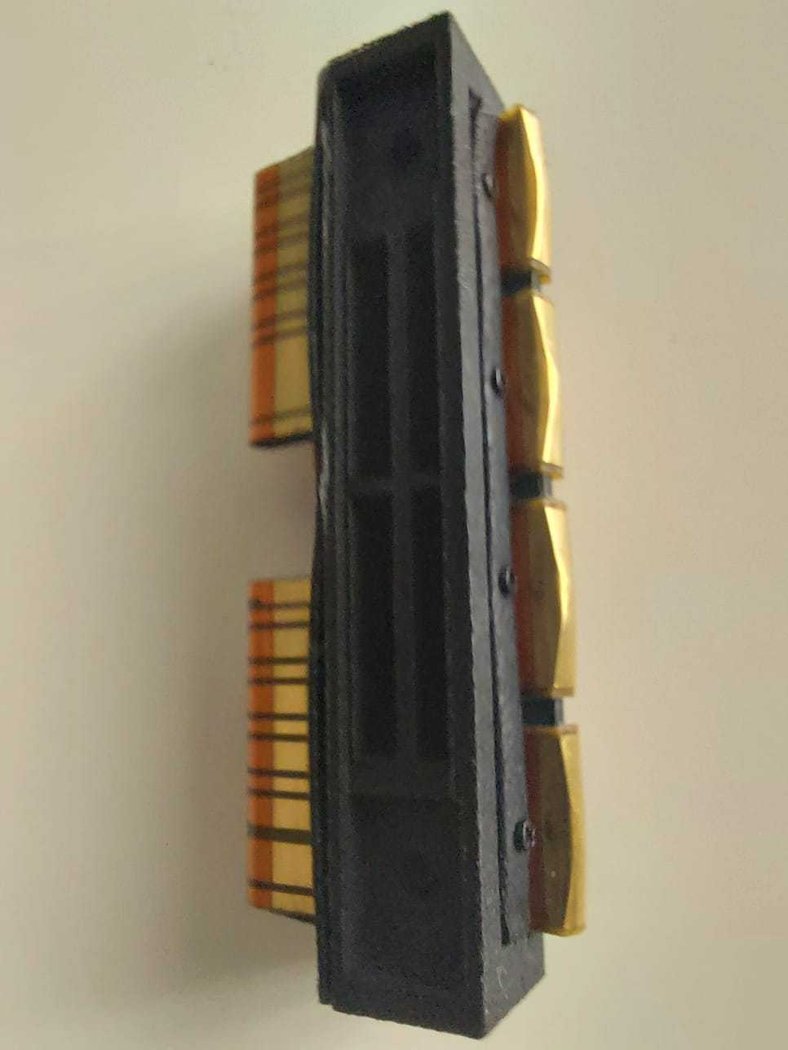
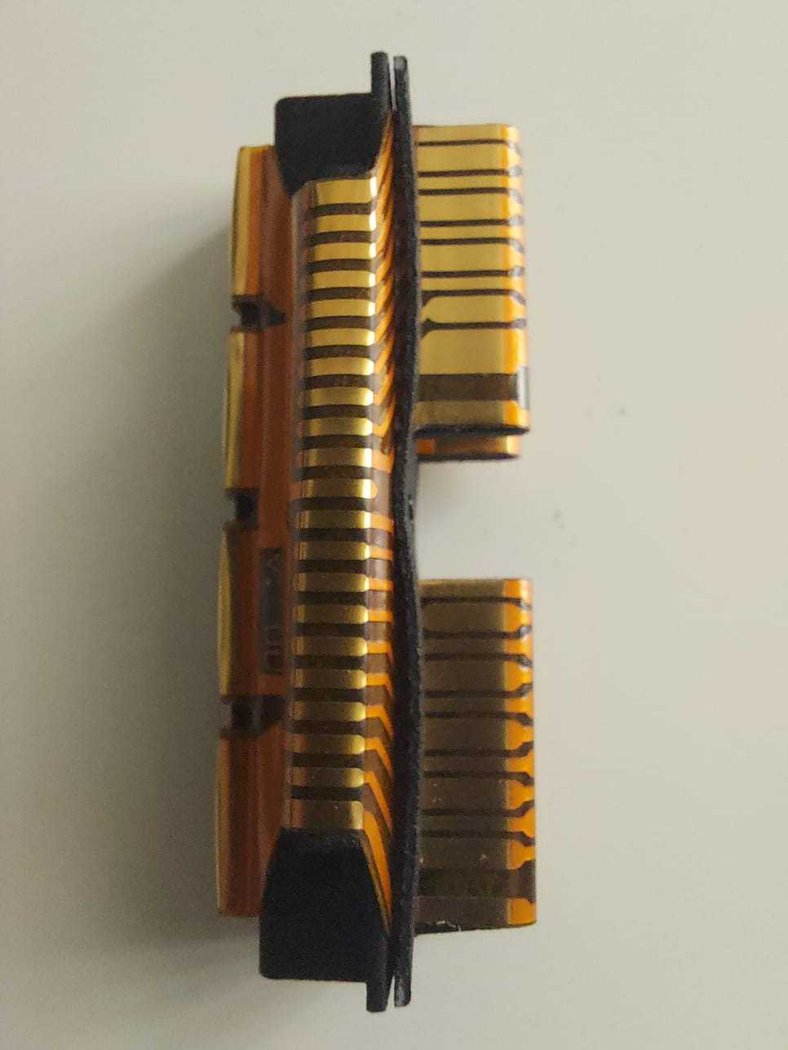
N.º de producto: Zebra PCB
This piece is for repair of HP41c full nut calculator, substituting the damaged or corroded zebra connector that links the main board with the processor circuit. New design. Black Friday: 20% off |
1 unidad(es)
Precio anterior 16,00 €
12,80 €
*
|
|
|
|
Accesorios
| Producto | Nota | Estado | Precio | ||
|---|---|---|---|---|---|
|
|
12,80 € * | |||
|
* Los precios incluyen el IVA
Mostrar detalles del accesorio
|
|||||
 Conector zebra para la reparación del las HP41c full nut
Los clientes que han comprado este producto también han comprado
 |
 |
 |
 |
 |
 |
Examine también estas categorías: Inicio, Accesorios, Calculadoras Clásicas, El Rincón de la HP41, HP 41C Repair, Broken lower screw posts, Corroded or broken zebra contacts
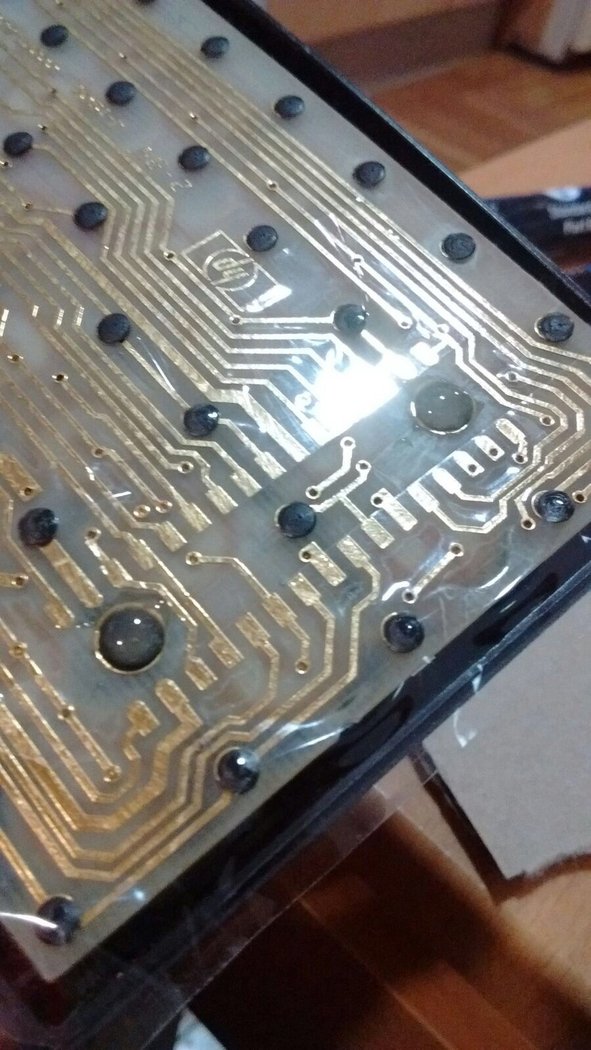
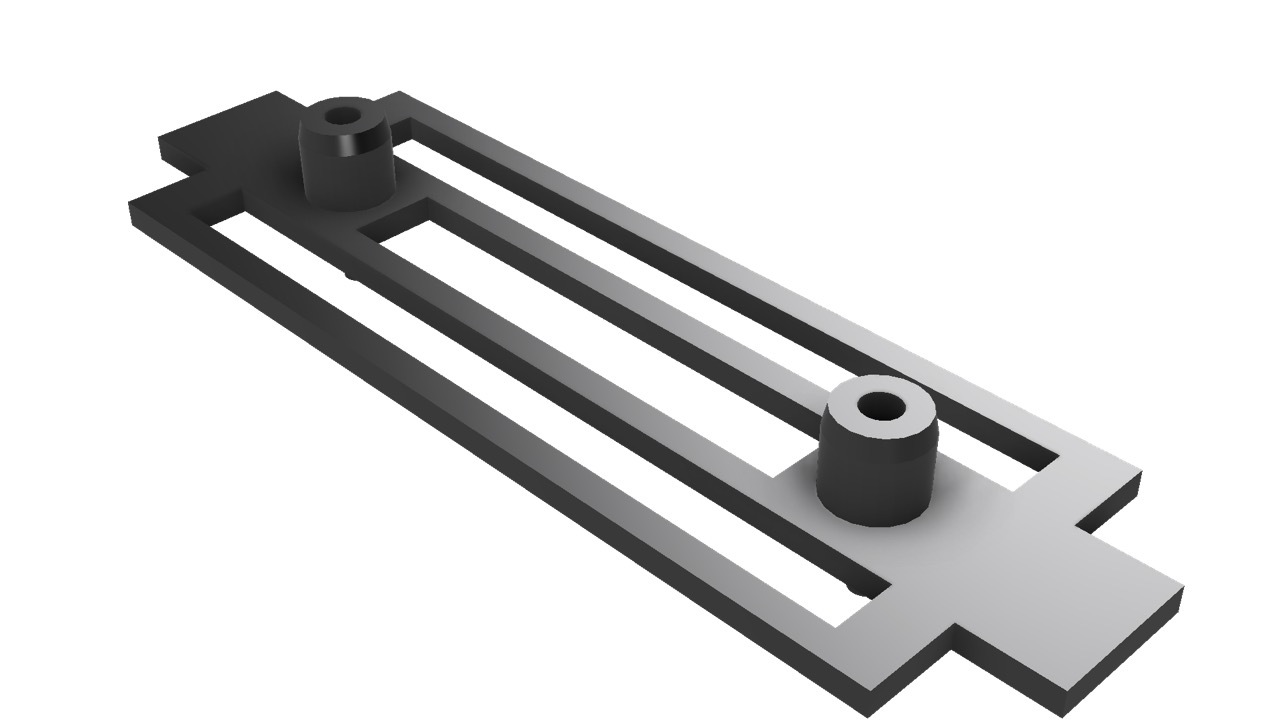
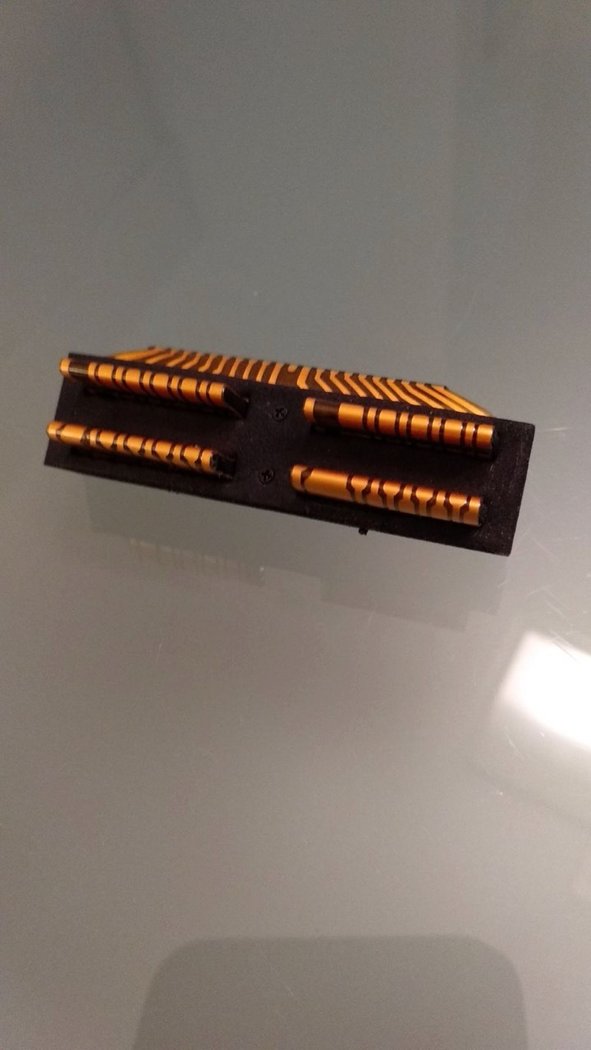
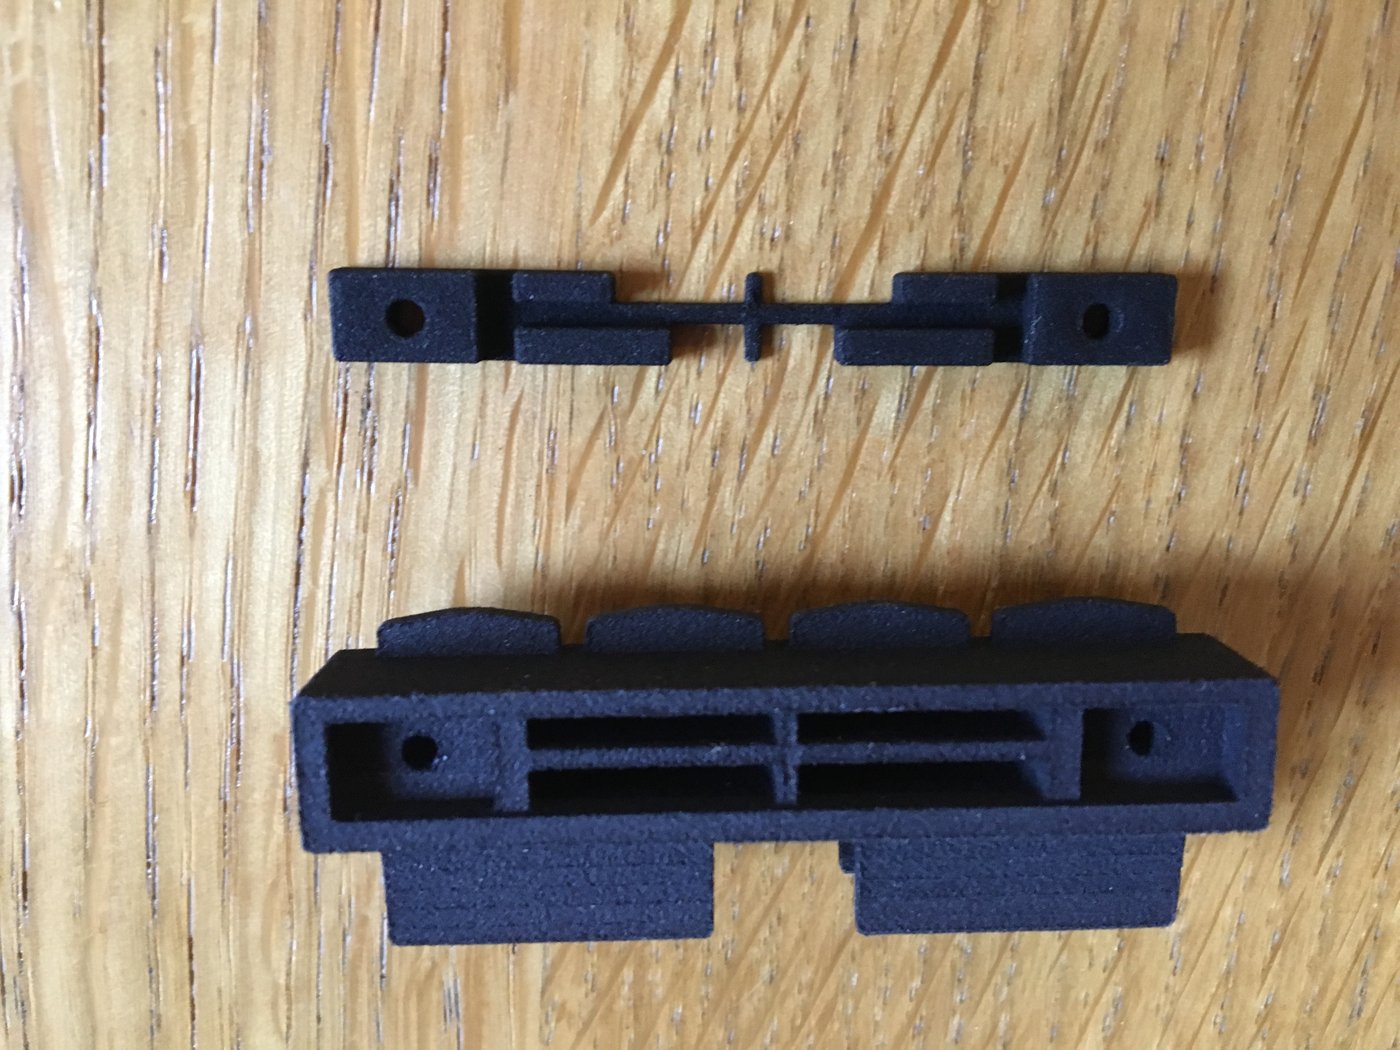
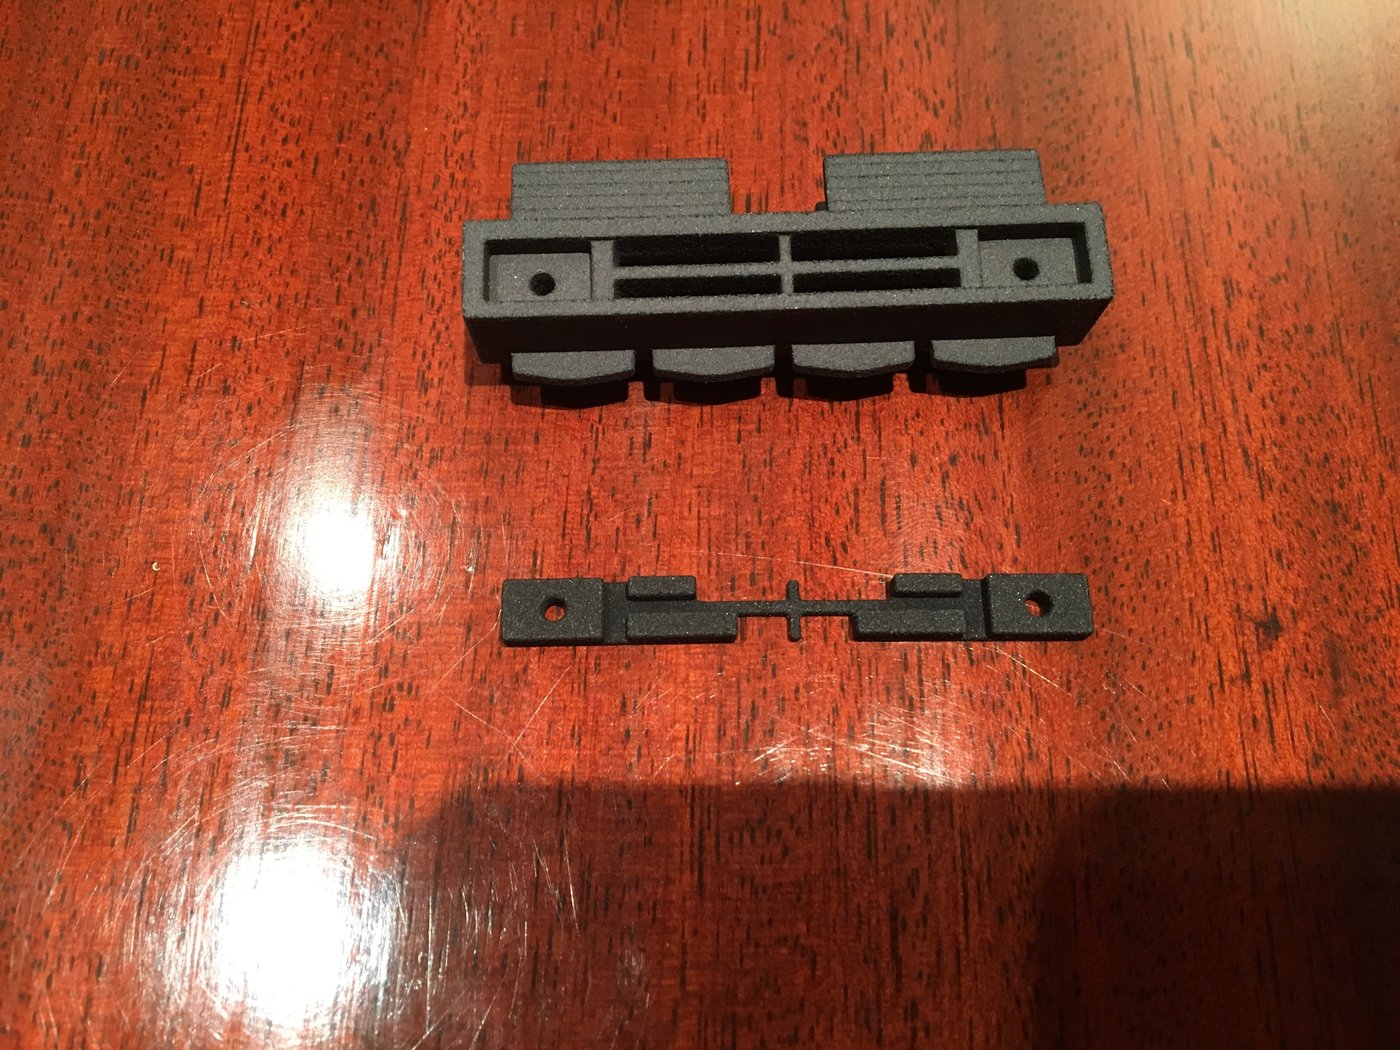
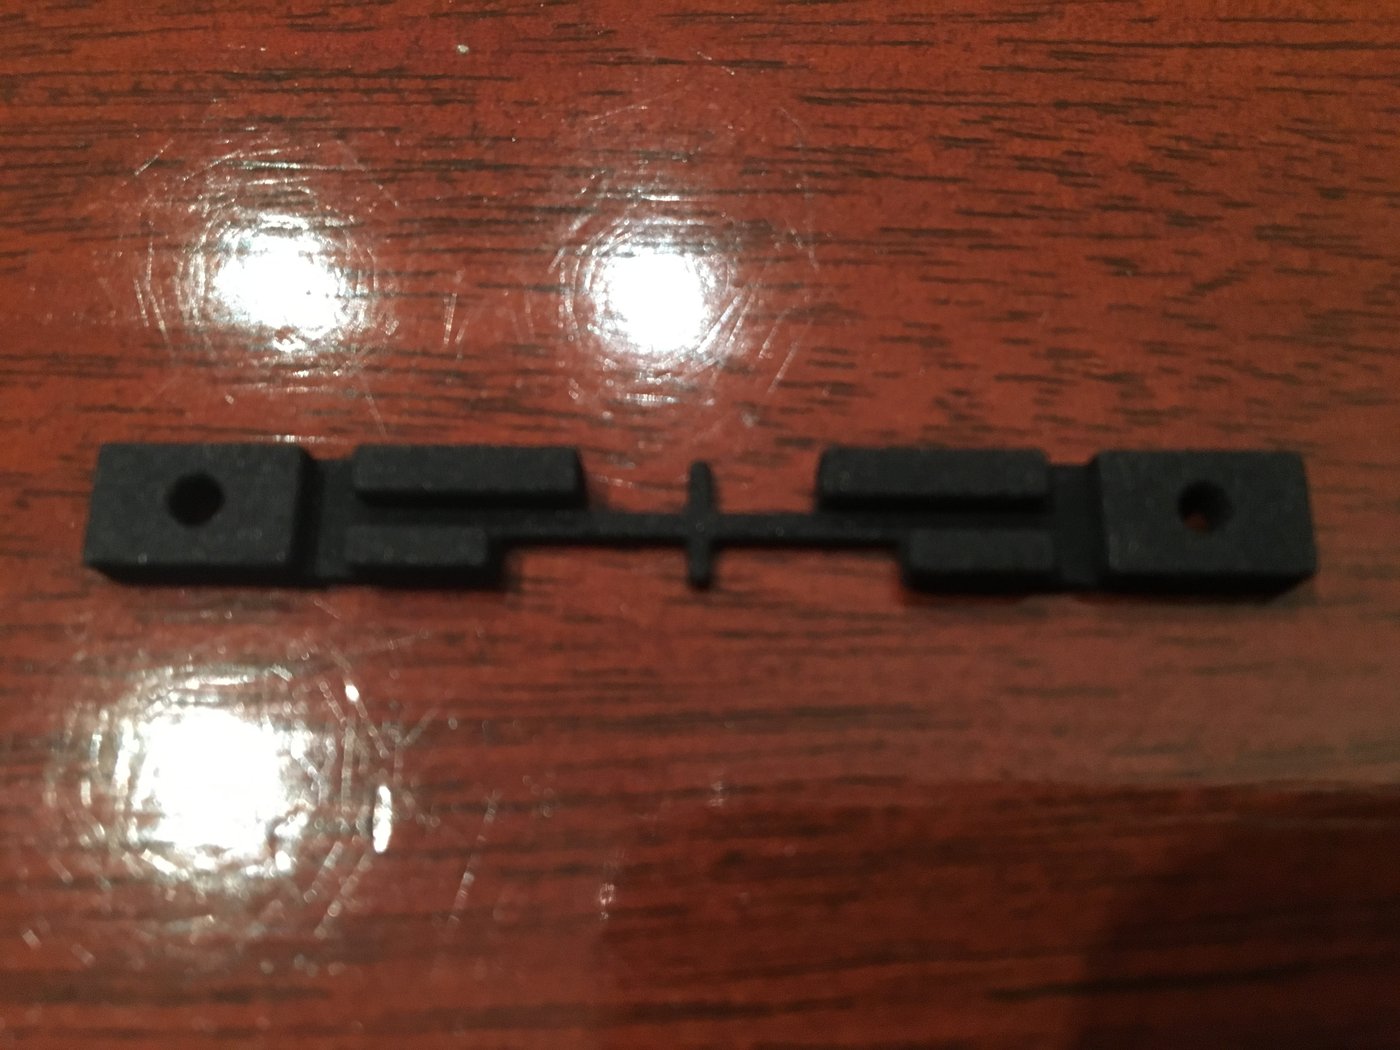
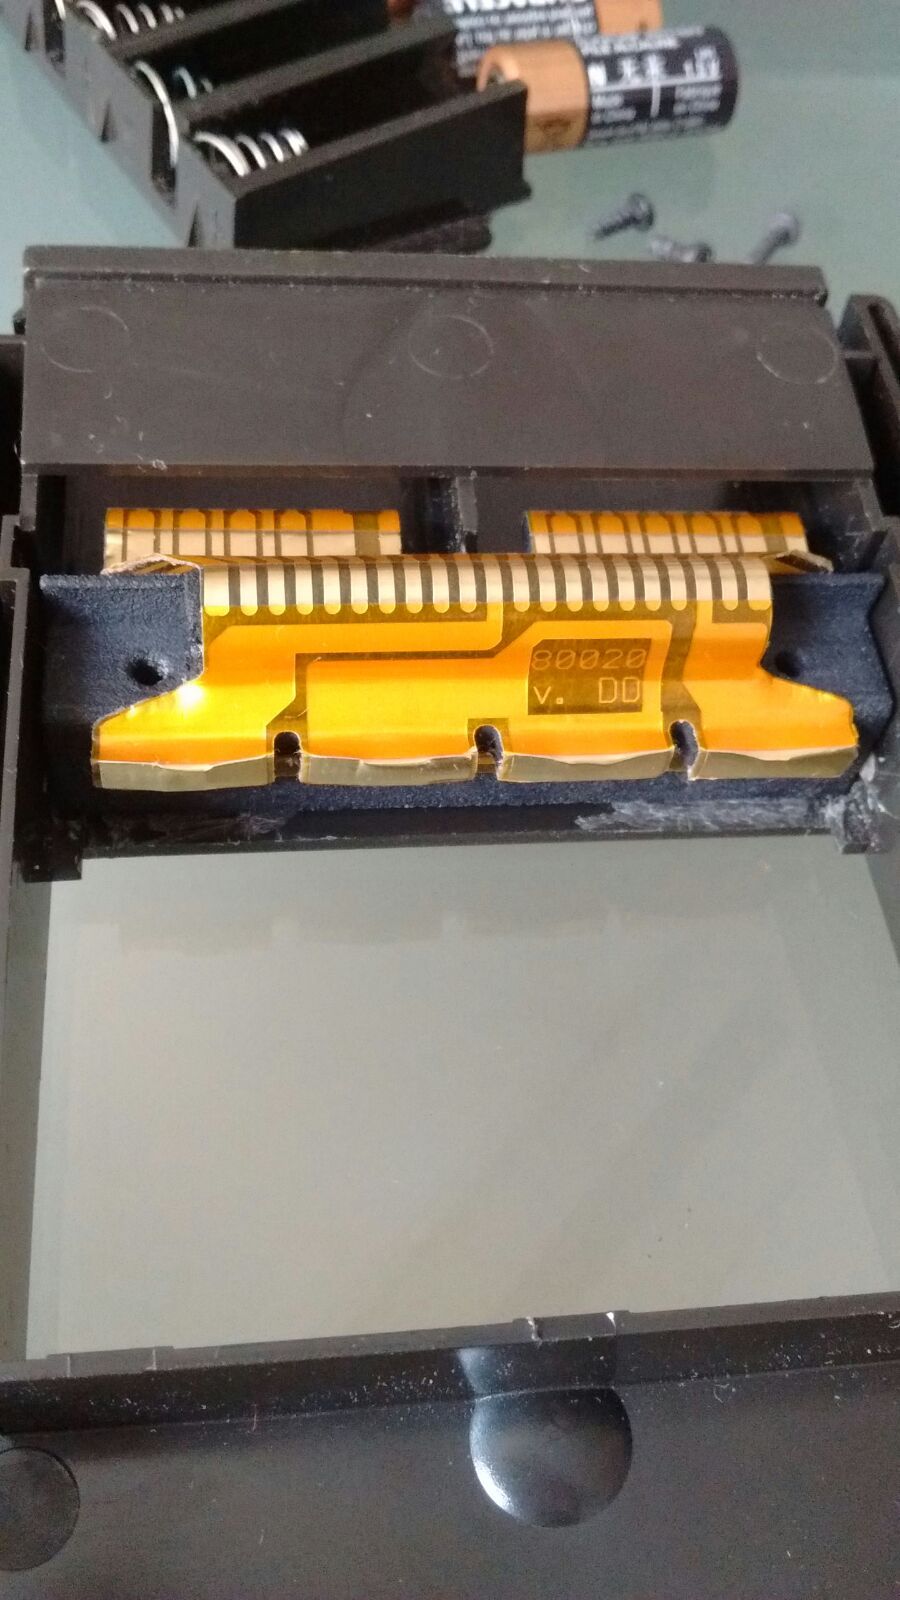
Módulo conector de baterías y puertos de expansión de HP-41c/cv/cx
N.º de producto: Flex-PCB Assembled
En existencias
se puede enviar en 10 días
Formas de entrega disponibles: Courier España, Courier Zona 1, Courier Zone 2, Courier Zona 3, Courier Zone 4, Carta, Small item outside EU, Overseas traceable, Letter, Entrega gratuita España


Accesorios
| Producto | Nota | Estado | Precio | ||
|---|---|---|---|---|---|
|
|
22,00 € * | |||
|
|
44,00 € * | |||
|
* Los precios incluyen el IVA
Mostrar detalles del accesorio
|
|||||
 Kit de reparación para conector de baterías y puertos de expansión de las HP-41c/cv/cx
 Módulo conector de baterías y puertos de expansión de HP-41c/cv/cx Plano
Los clientes que han comprado este producto también han comprado
|
|
 |
 |
|
|
 |
|
Examine también estas categorías: Accesorios, Calculadoras Clásicas, El Rincón de la HP41, Inicio, Corroded Battery contacts, Corroded circuit paths, Damaged screen - not all segments light on, HP 41C Repair, Científicas, The Calculator Store Offers
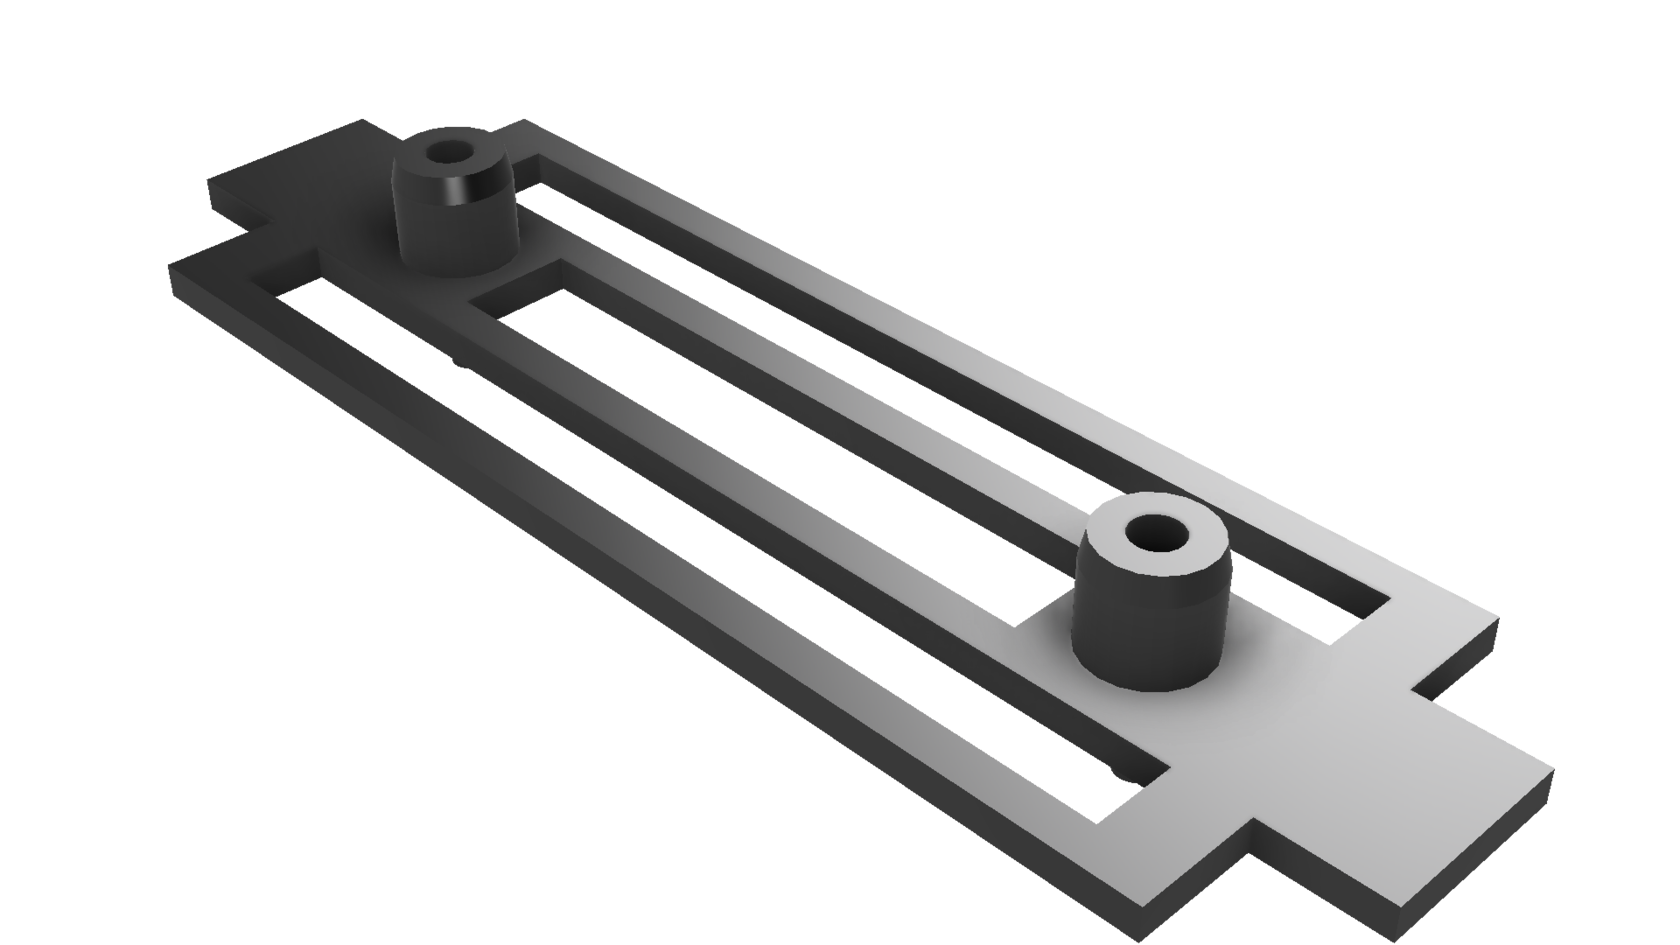
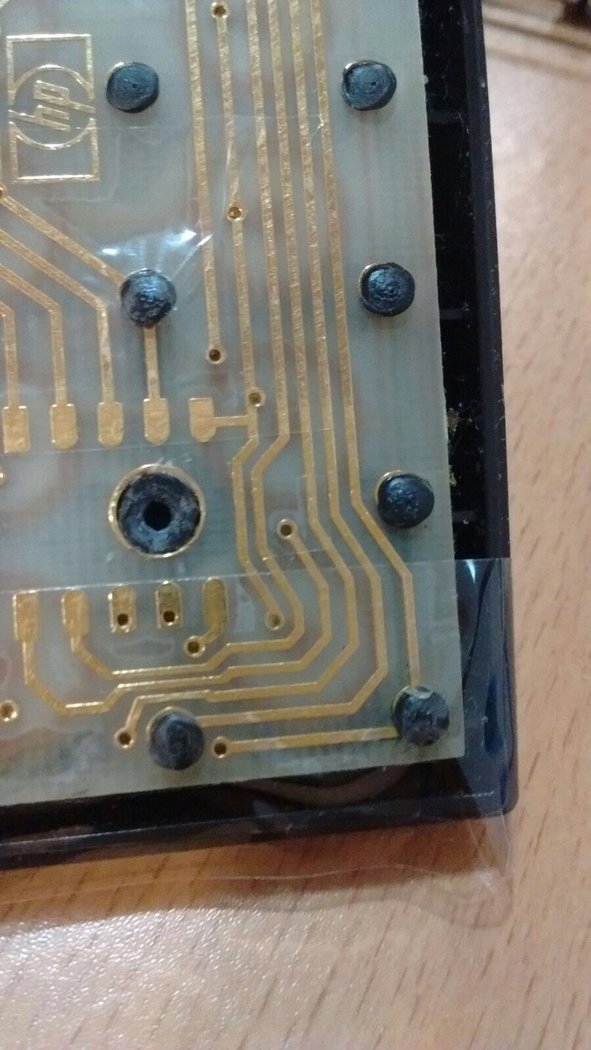
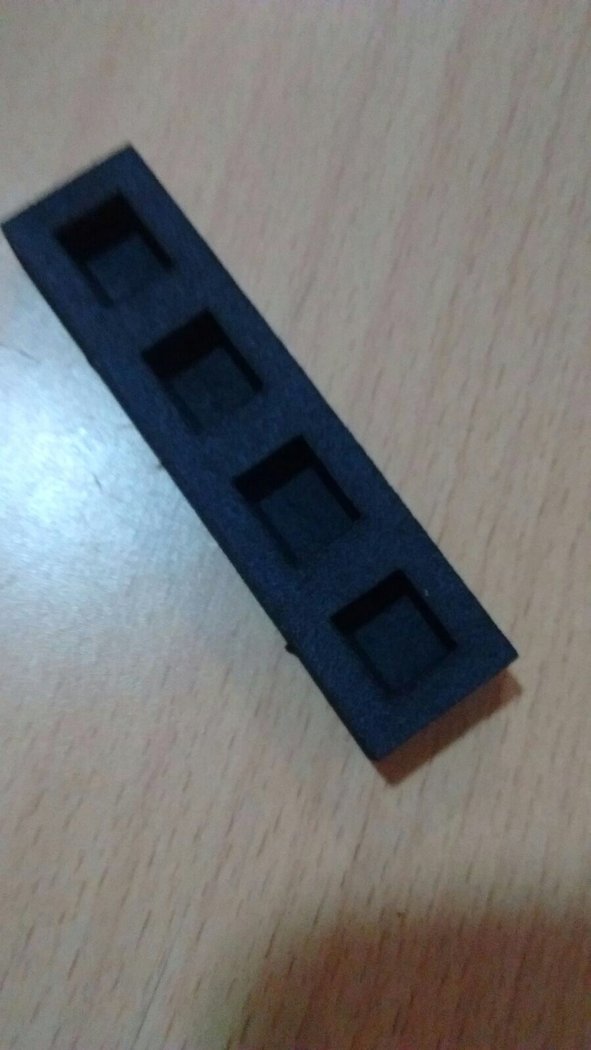
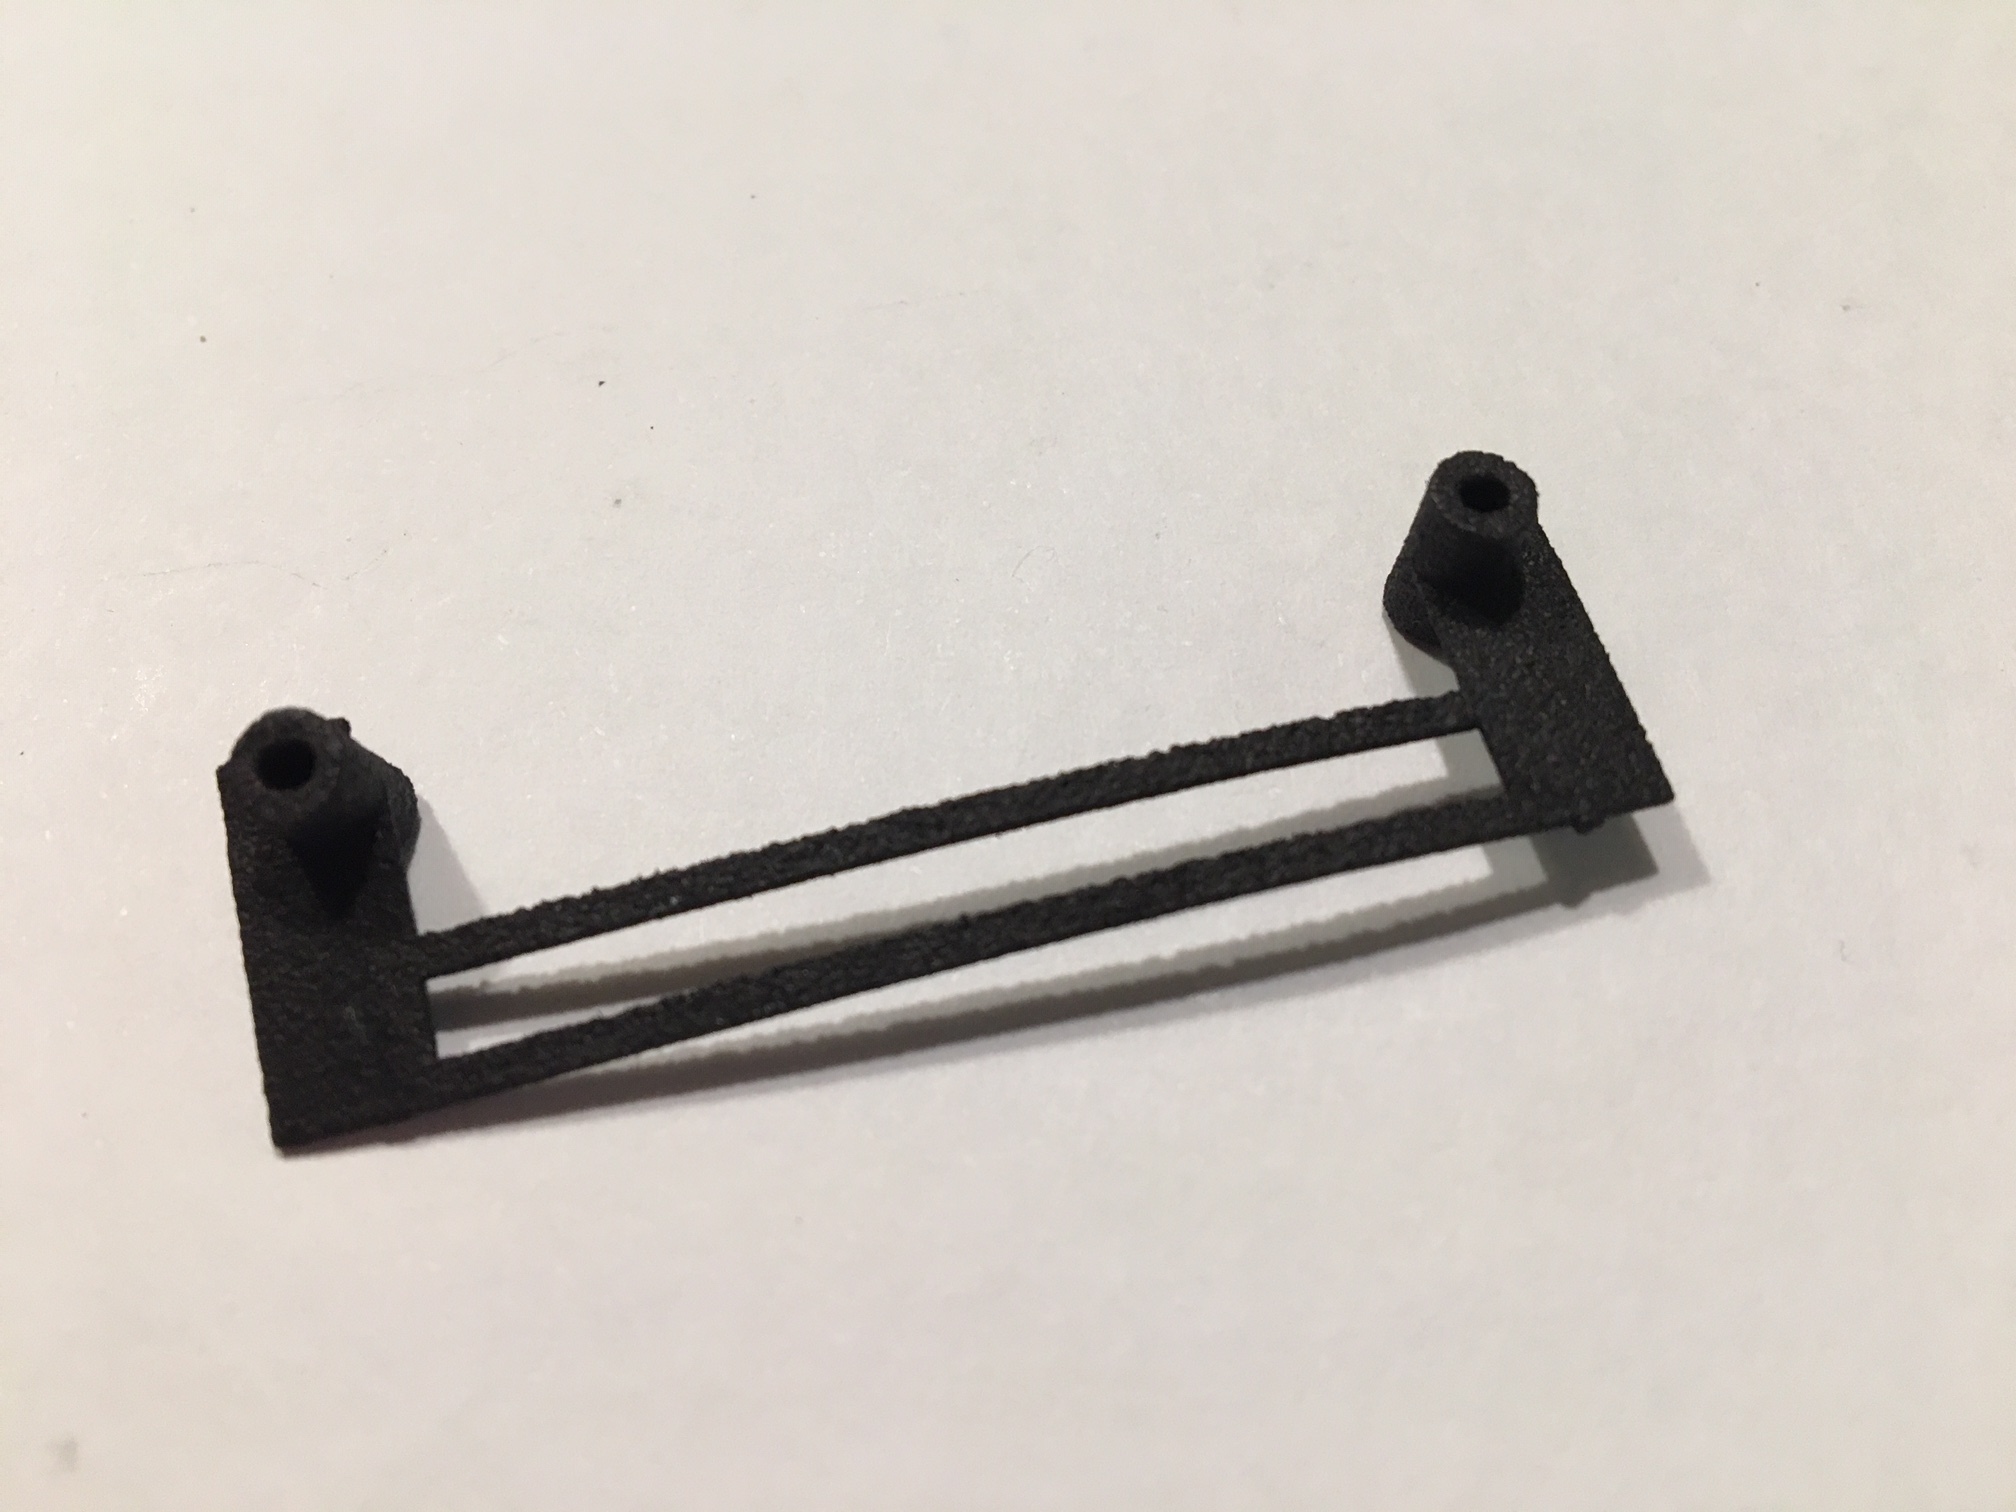
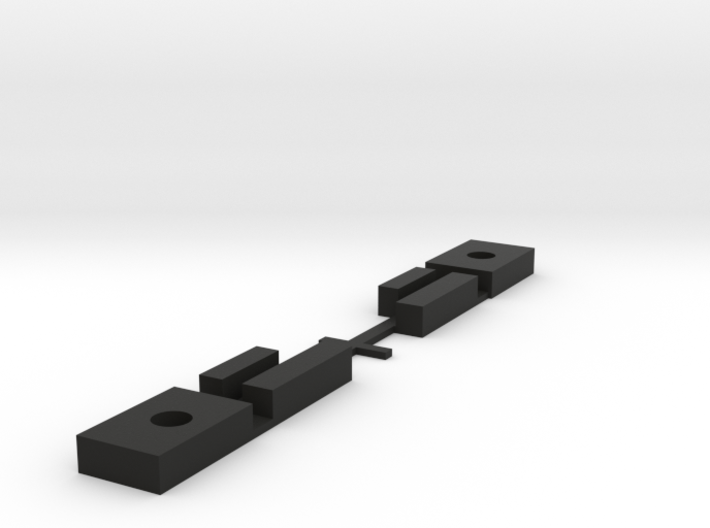
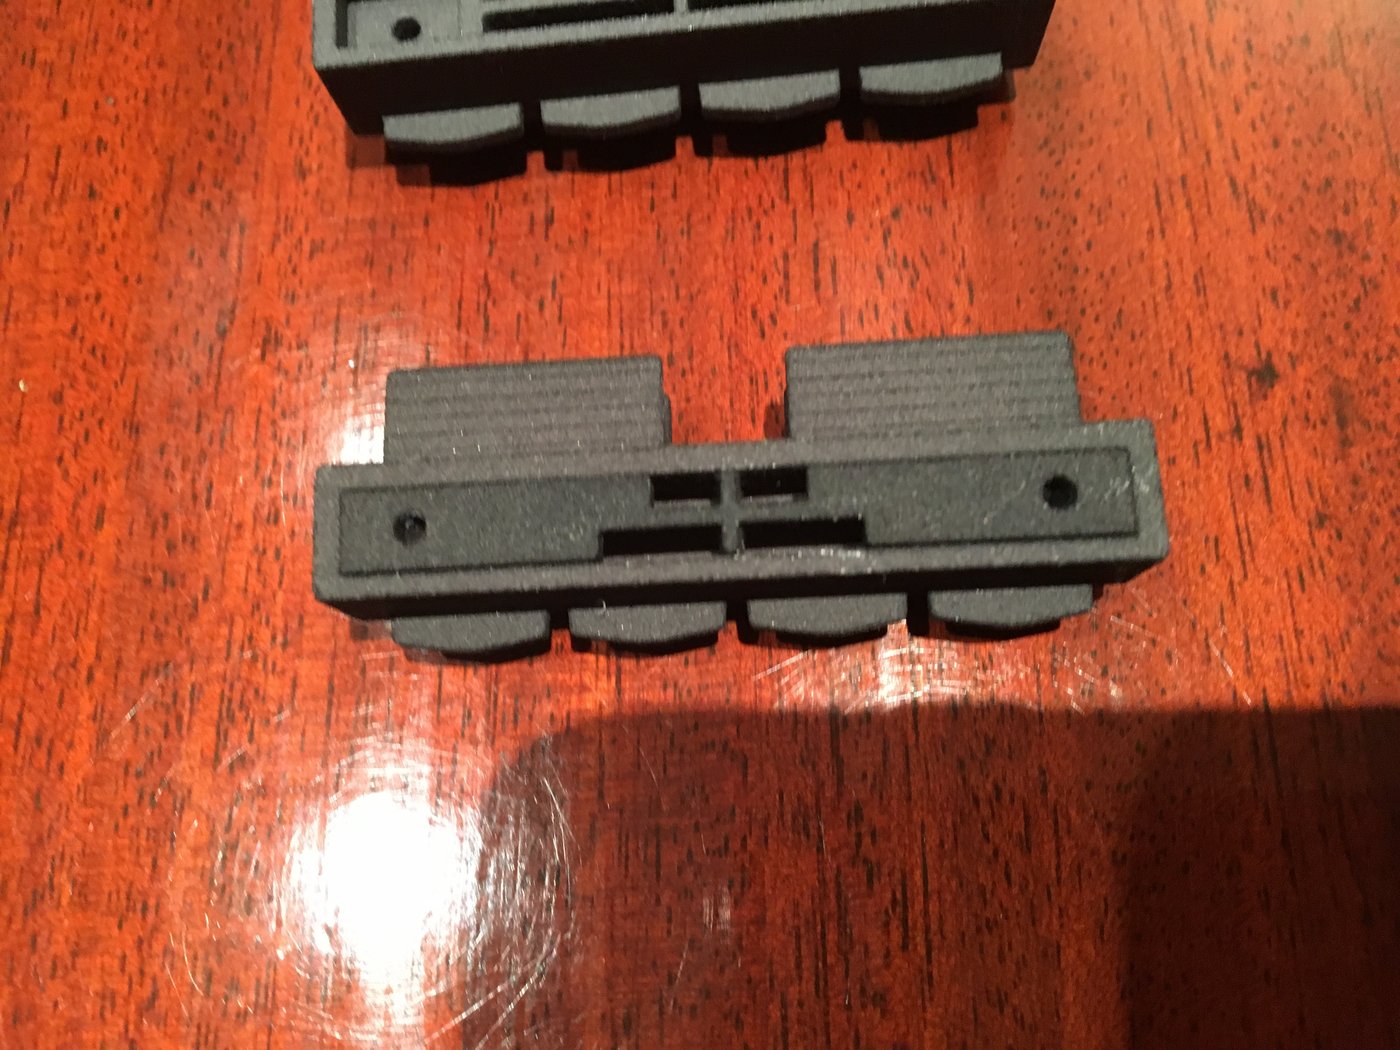
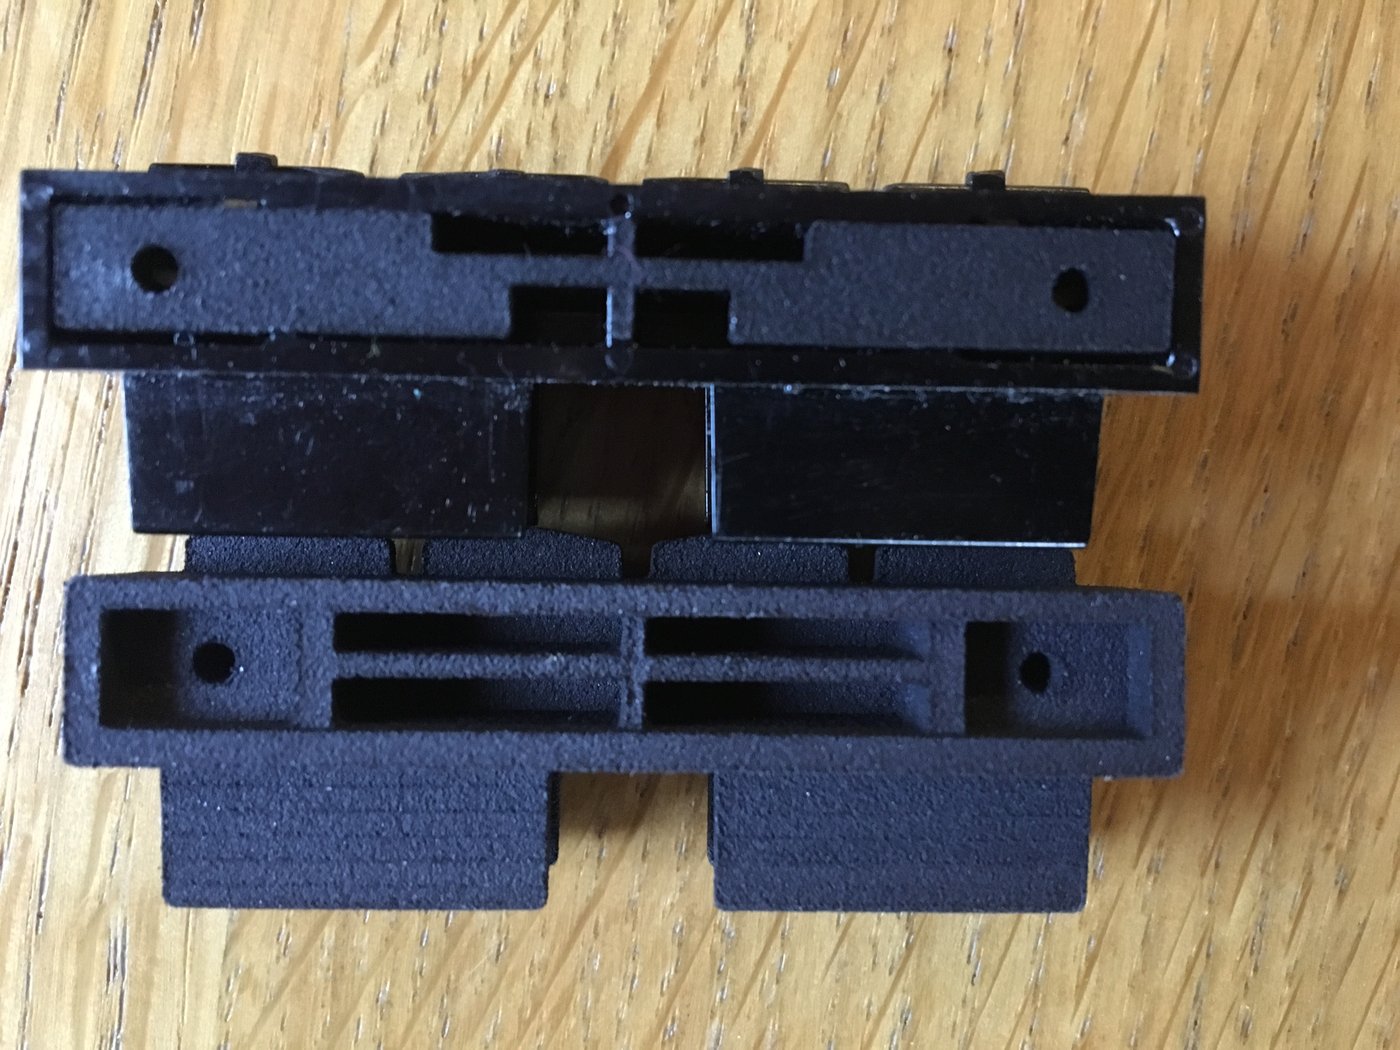
Pieza para reparar postes inferiores
N.º de producto: LowpostrepairEn existencias
Formas de entrega disponibles: Courier España, Courier Zona 1, Courier Zone 2, Courier Zona 3, Courier Zone 4, Carta, Small item outside EU, Entrega Canarias/Baleares, Overseas traceable, Letter, Entrega gratuita España


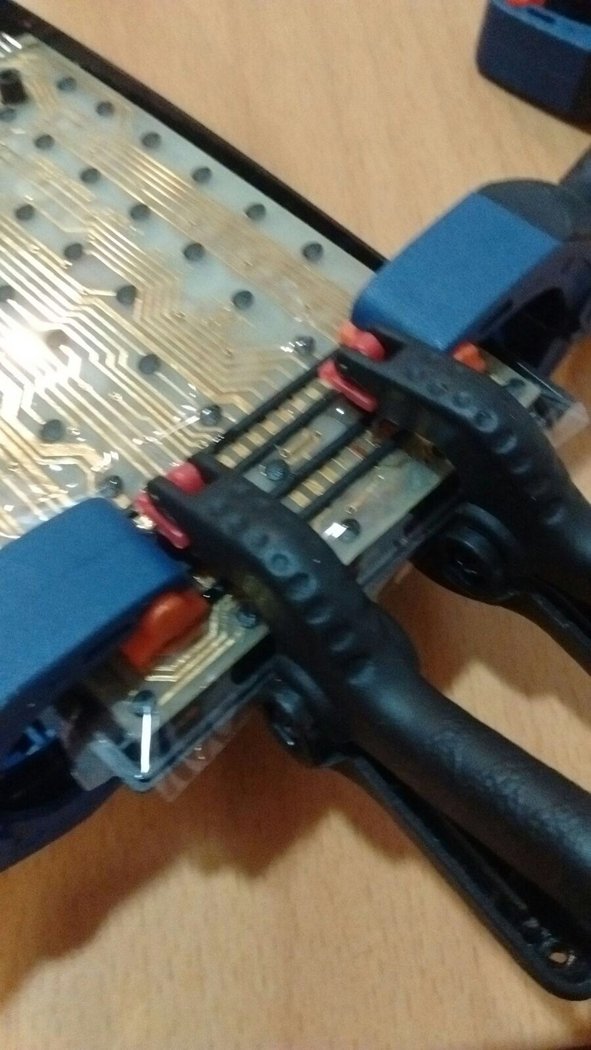
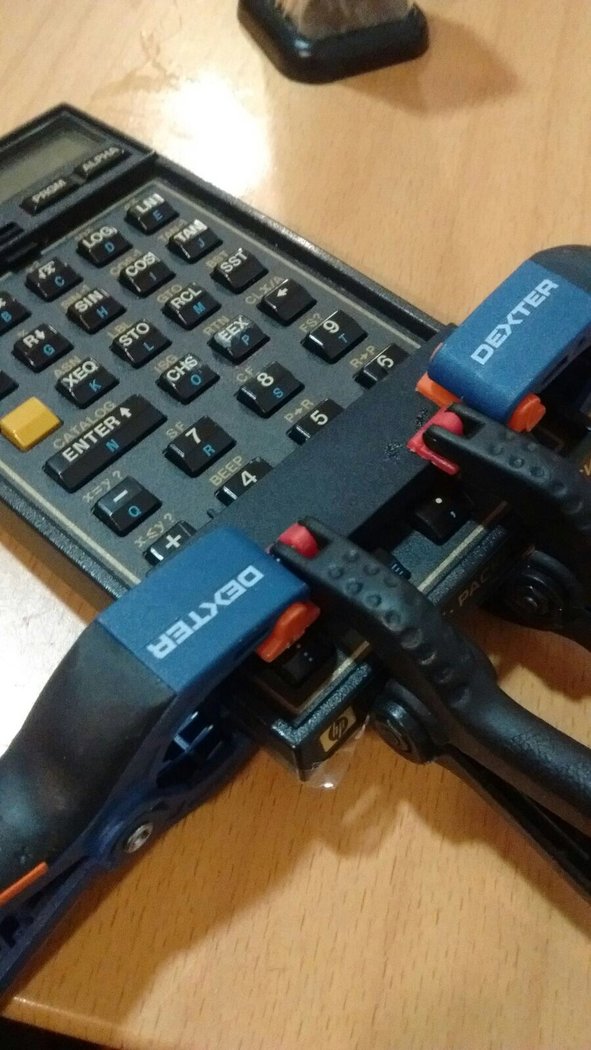
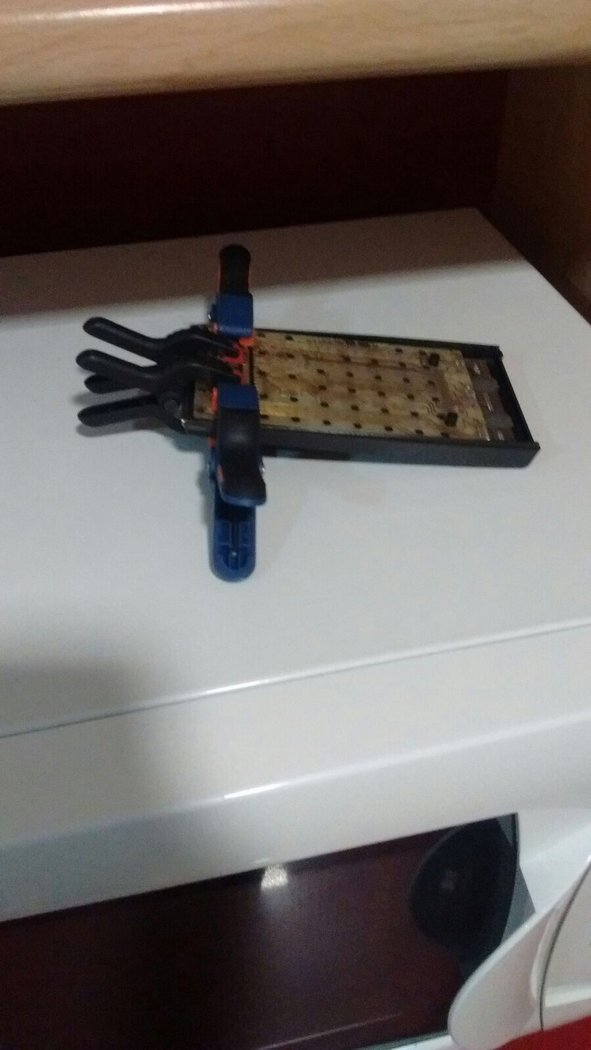
Lower Post repair
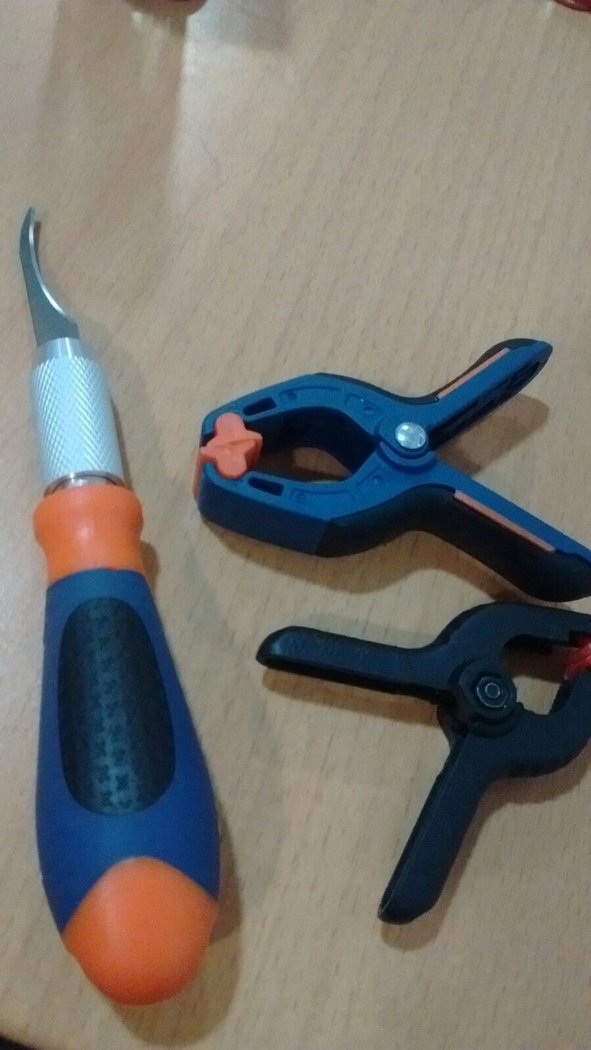
Material needed
- Lower post repair piece
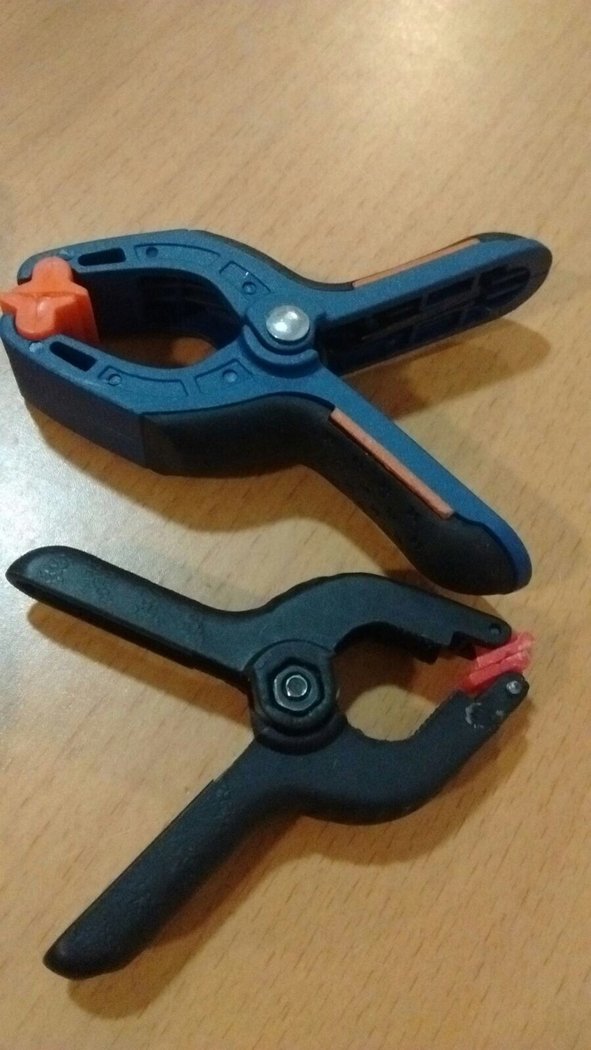
- Clothes' peg
- Keyboard support for clothes' pegs
Let's assume that both posts are broken or cracked. The effect of this cracking is that the screws do not do their job. Usually, using longer screws may help, but this typically is short lived since the cracks will continue downwards. Once the pressure between both halves is softened, the calculator doesn't work anymore. The solution is to repair the broken posts.
Old methods to repair broken post is to glue them (but this doesn't hold together too long) and to tie them down with very small gauge copper cable, applying pressure so that it holds together. This may solve some cases, but not when the screw path has been destroyed - maybe due to strong tightening of the screws.
Other repair methods have been proposed, including drilling down the screw and placing in its place a cylinder with screw path, glued in place. We tried this method but there was a problem: the torque used to screw resulted in cracked glue and the cylinder separating from the substrate - every time.
Our method was devised with three goals in mind:
- Try to avoid the torque from the screw forcing on the glue with the substrate
- Try to ensure that the front part of the calculator is pulled up when screwing the back side on.
- Try to be compatible with all known zebra connectors - including our own.
The piece that we have designed requires drilling the old posts to the keyboard circuit level, taking care of leaving the hole clear. The design of the piece has been modified so that the screws go through and enter in the substrate, making possible the use of long screws; and the surface of the piece can be glued to the keyboard circuit, so that the torque on the substrate is avoided (it also helps that torque is also resisted by the other post)
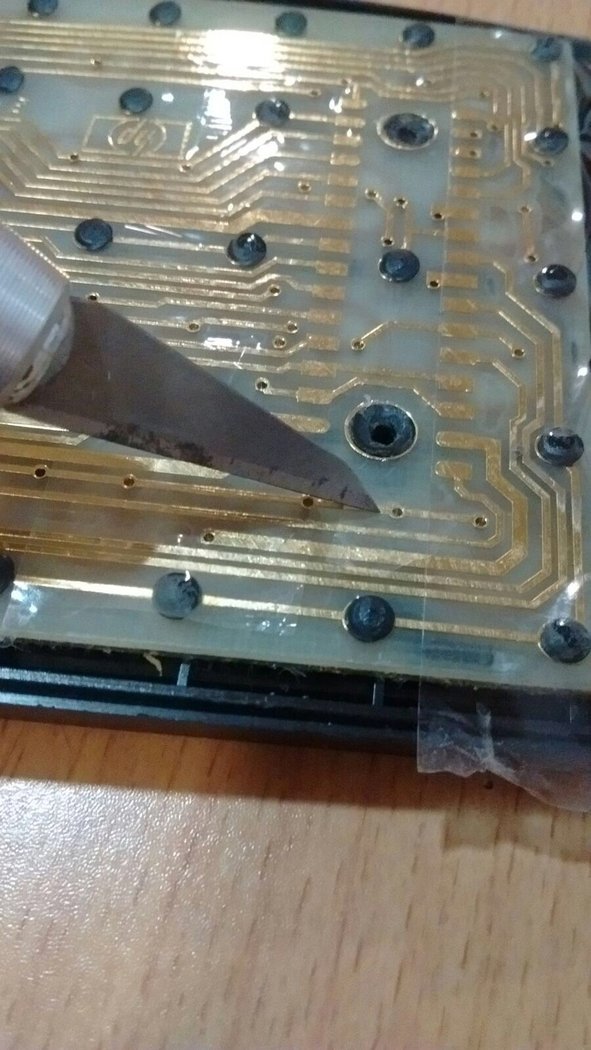
When gluing the piece, there are several precautions that need to be taken:
- Be sure of covering the zebra circuit part with tape -we don't want the glue to cover it.
- Cover also all nearby pin holes of the keyboard. If glue comes into one such hole, the key will not register. In severe cases, the key will be down all the time, glued in place!
- When you position the piece, make sure of using some pins through the holes to make sure the piece is well centered and the screws can go through.
- When applying pressure, use clothes' pegs to hold the piece in place, preferably on the outer side.
- To avoid pushing the keyboard down, and only push down the front of the calculator, use the keyboard cover we have designed to support the pegs. Pushing the keyboard instead will result on separation between both halves of the calculator, since the attachment of the substrate to the pin will be at a lower level (the keyboard is linked to the keyboard circuit, not to the substrate)
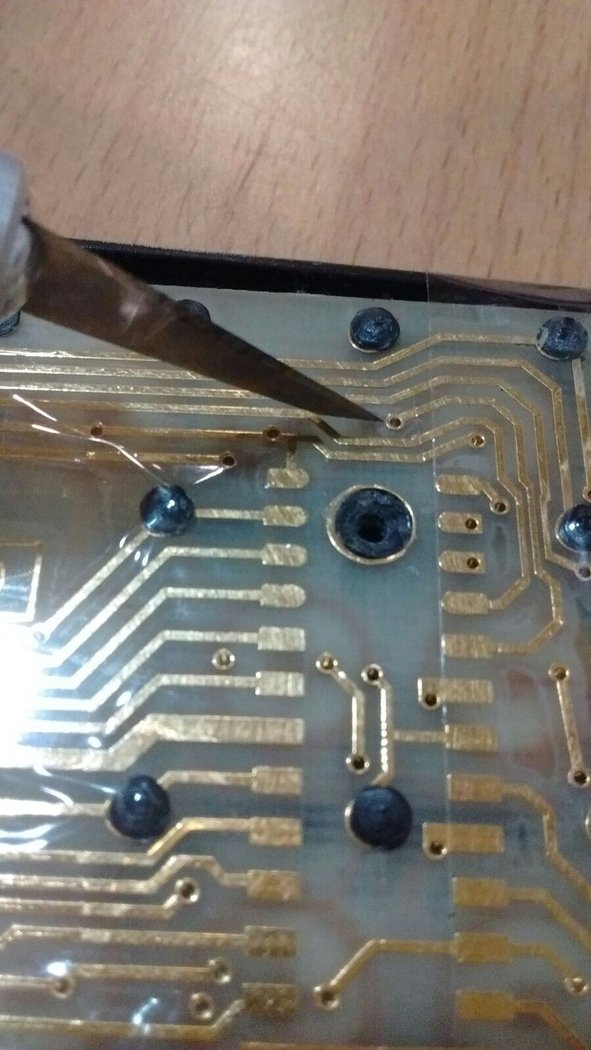
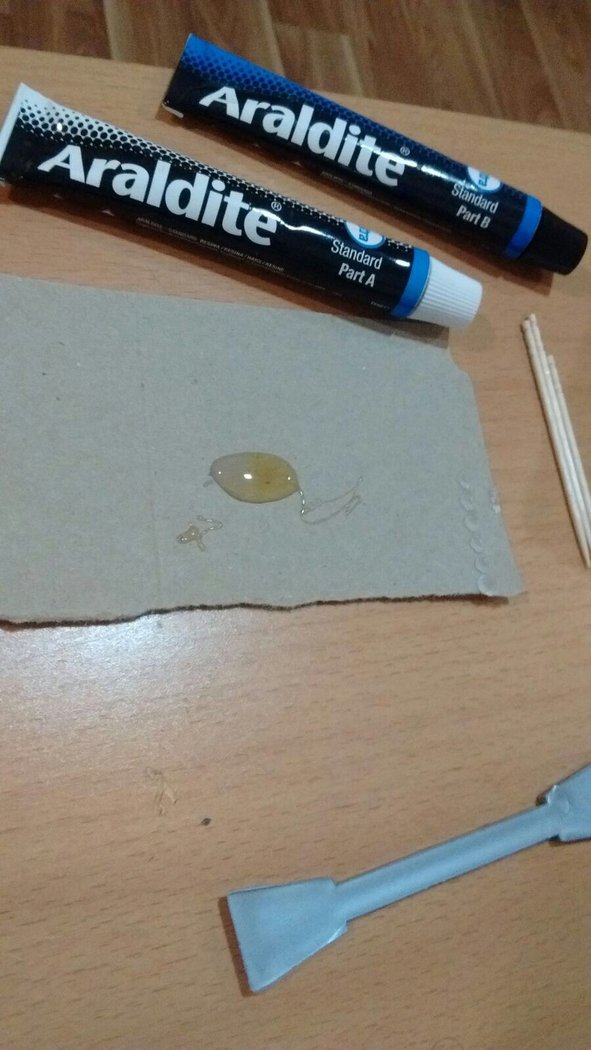
- Use epoxy glue, type Araldit.
- Let it cure overnight.
- Remove the tape over the zebra circuit path
- Place the zebra connectors
- Assemble the calculator and test.
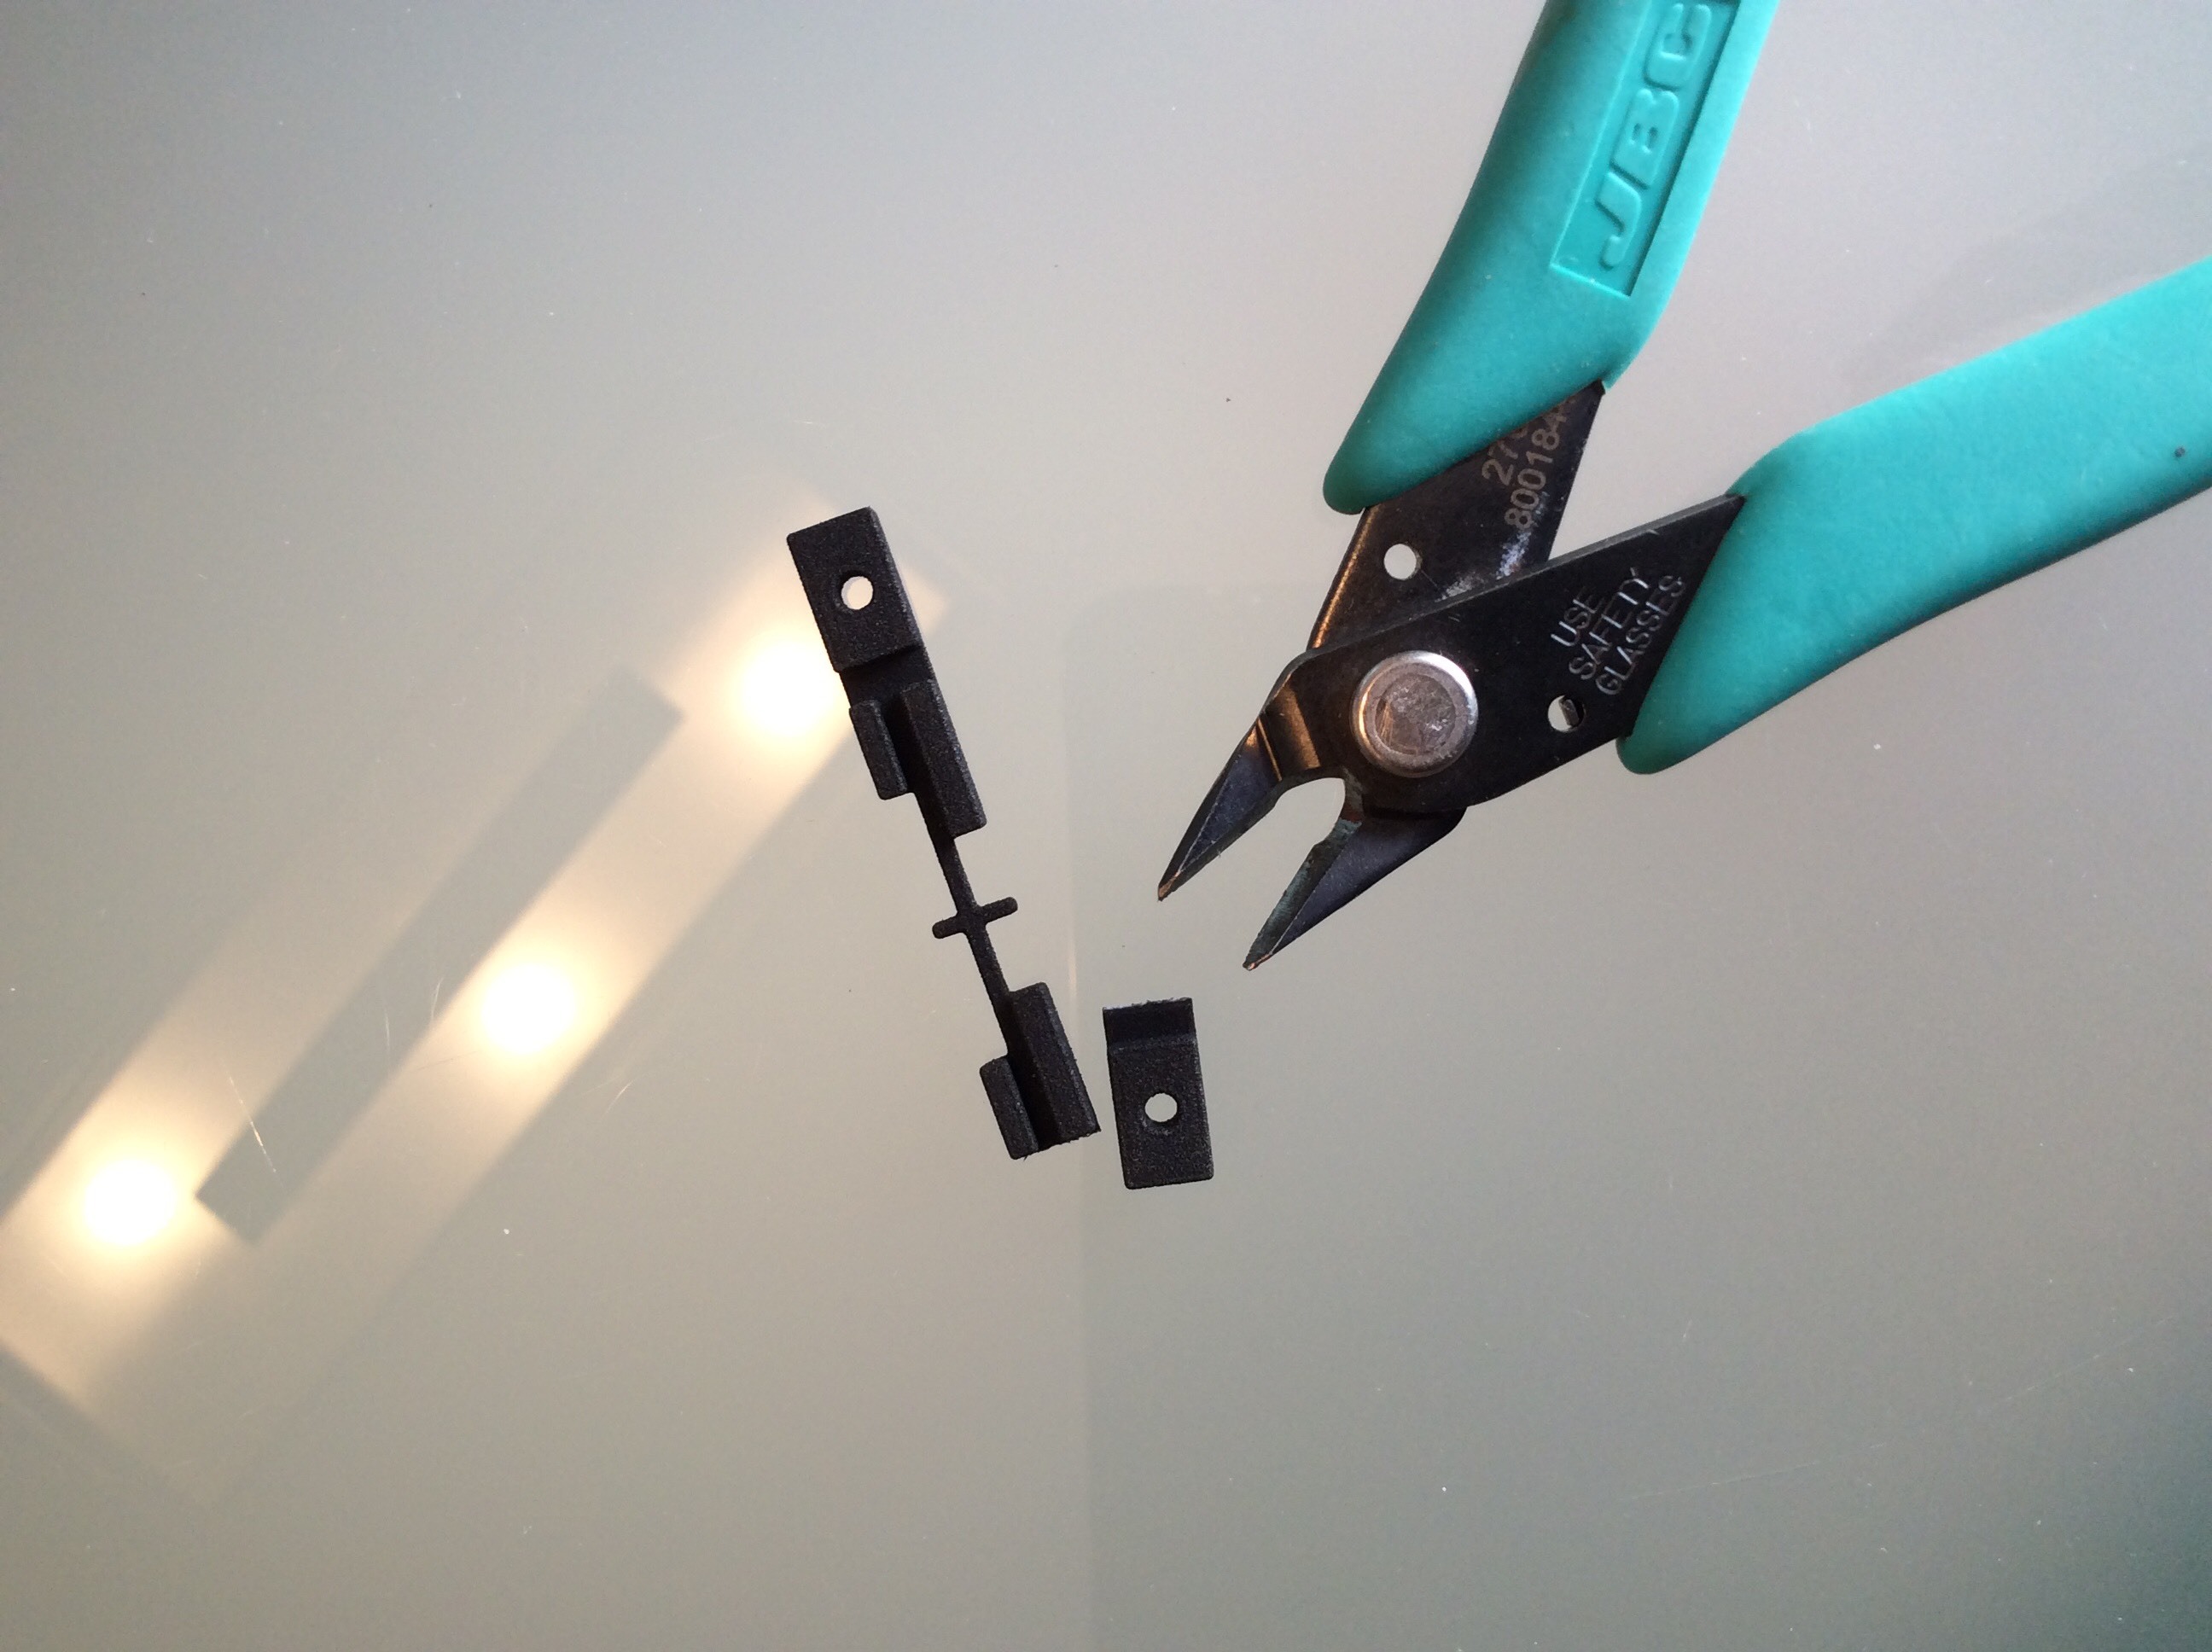
We recommend to repair both posts at the same time. However, if you are confident on the resistence of the other post, you can cut the piece in two. As it is symmetrical, it can be used for both posts, just twisting it 180º. Using the full piece, the other post side does not need to be glued - the torque resistence is done by the post itself over a much longer distance.
Información de producto adicional
Accesorios
| Producto | Nota | Estado | Precio | ||
|---|---|---|---|---|---|
|
|
25,00 € * | |||
|
|
10,00 € * | |||
|
* Los precios incluyen el IVA
Mostrar detalles del accesorio
|
|||||
 Soporte teclado para reparaciones
 Spacer set para reparar HP41c
Los clientes que han comprado este producto también han comprado
|
|
|
|
|
|
|
|
Examine también estas categorías: Accesorios, El Rincón de la HP41, Inicio, HP 41C Repair, Broken lower screw posts
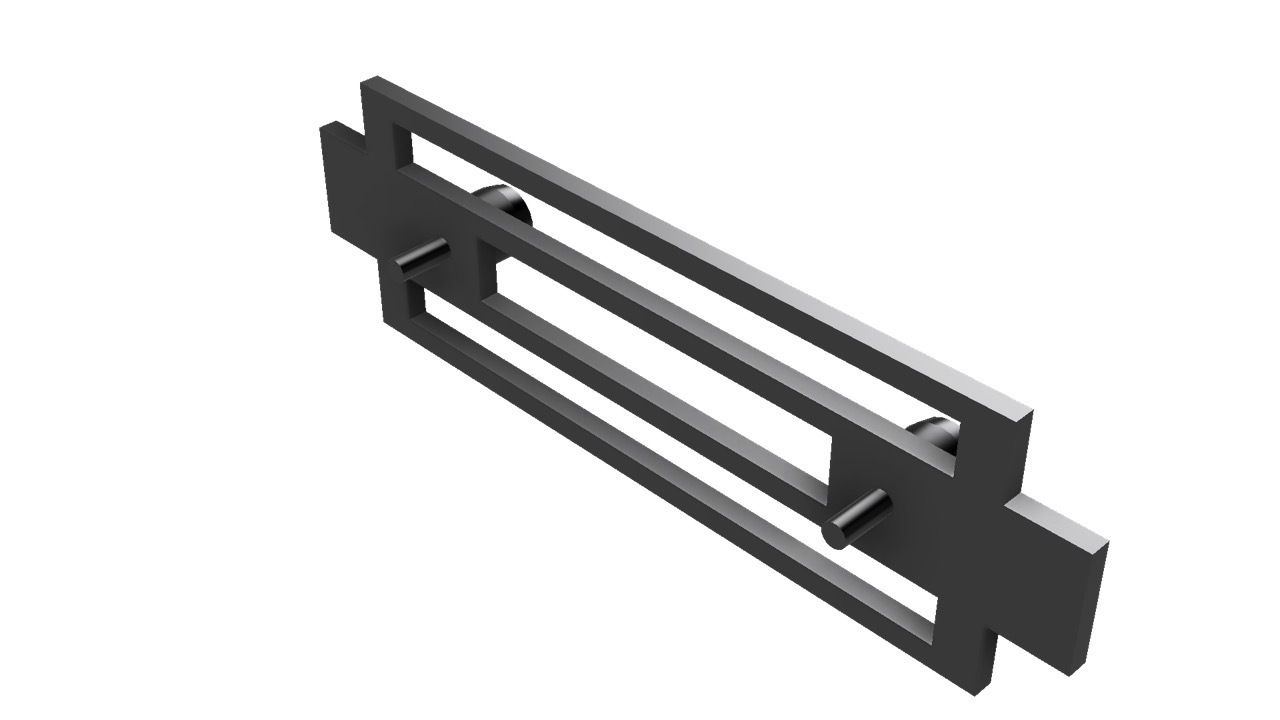
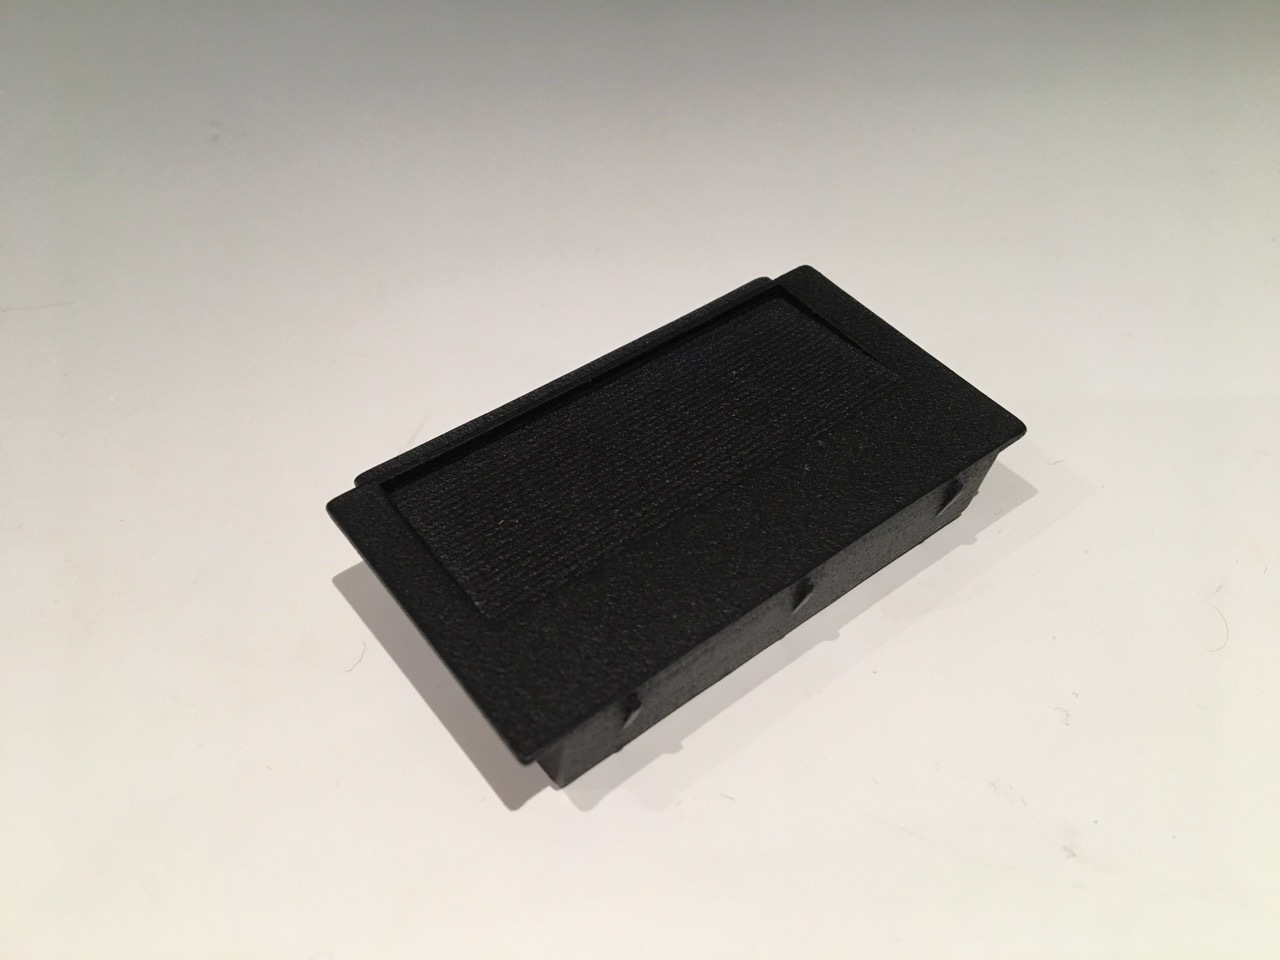
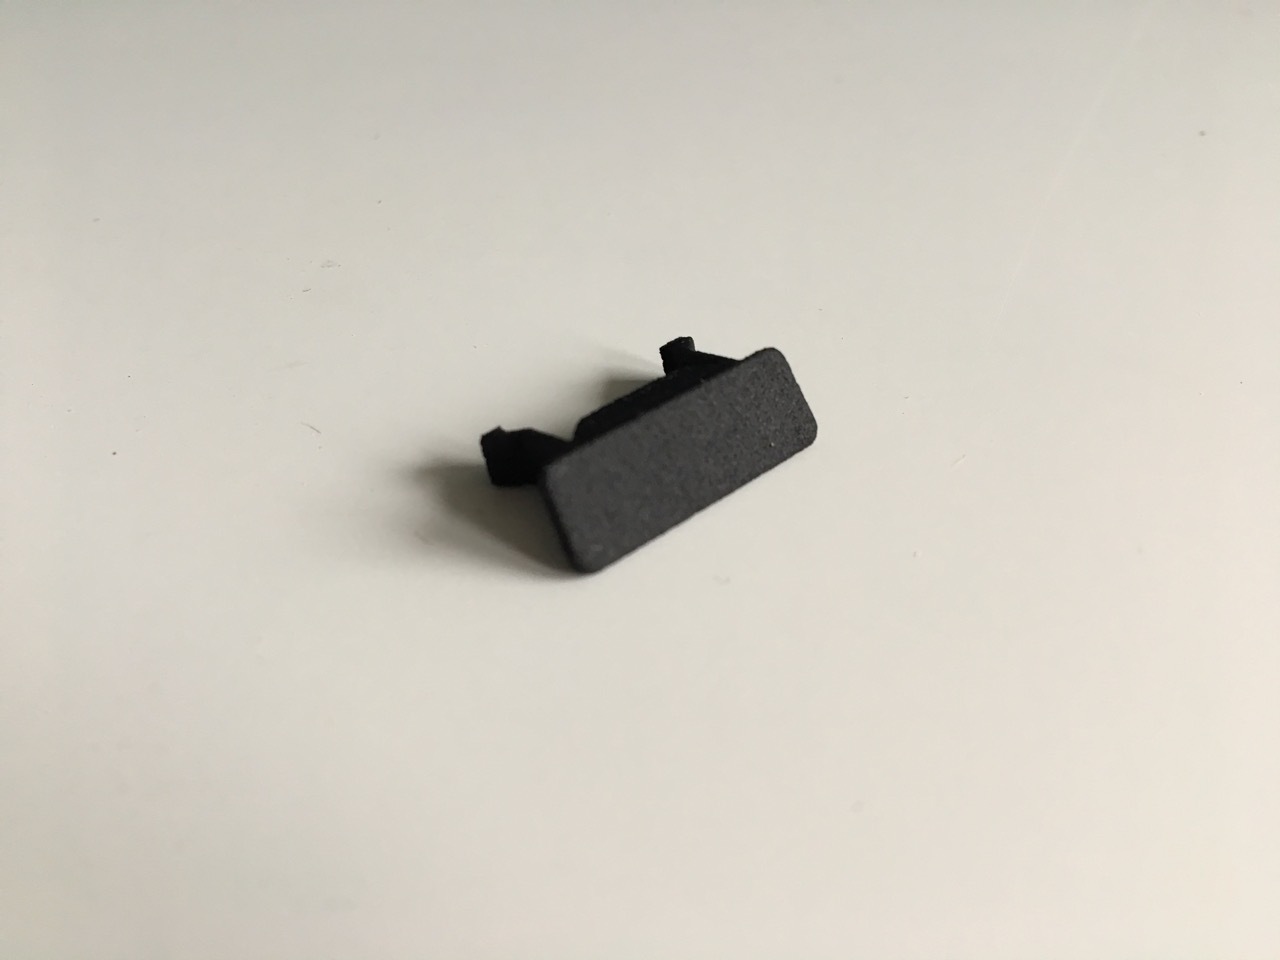
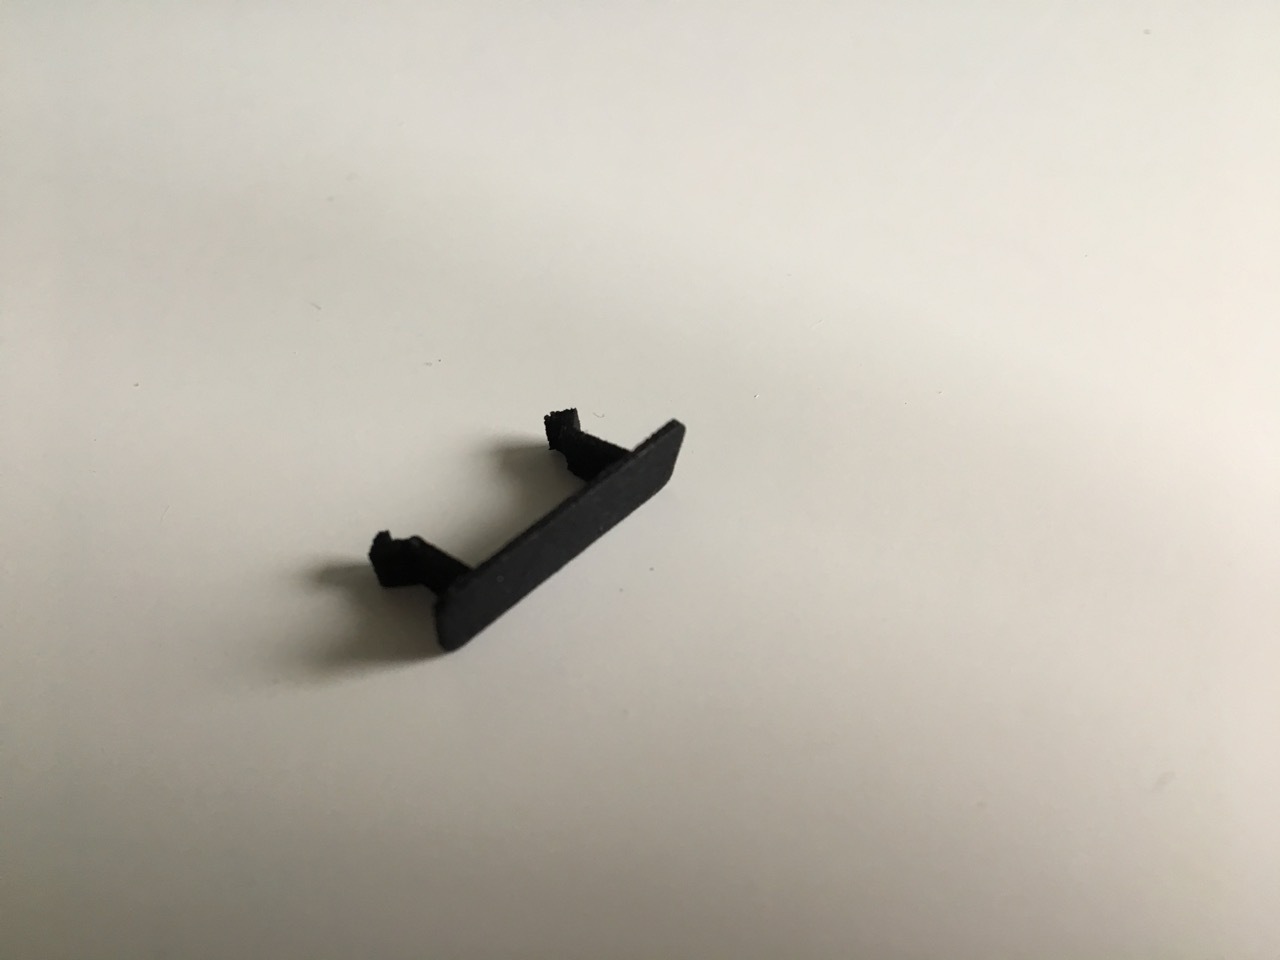
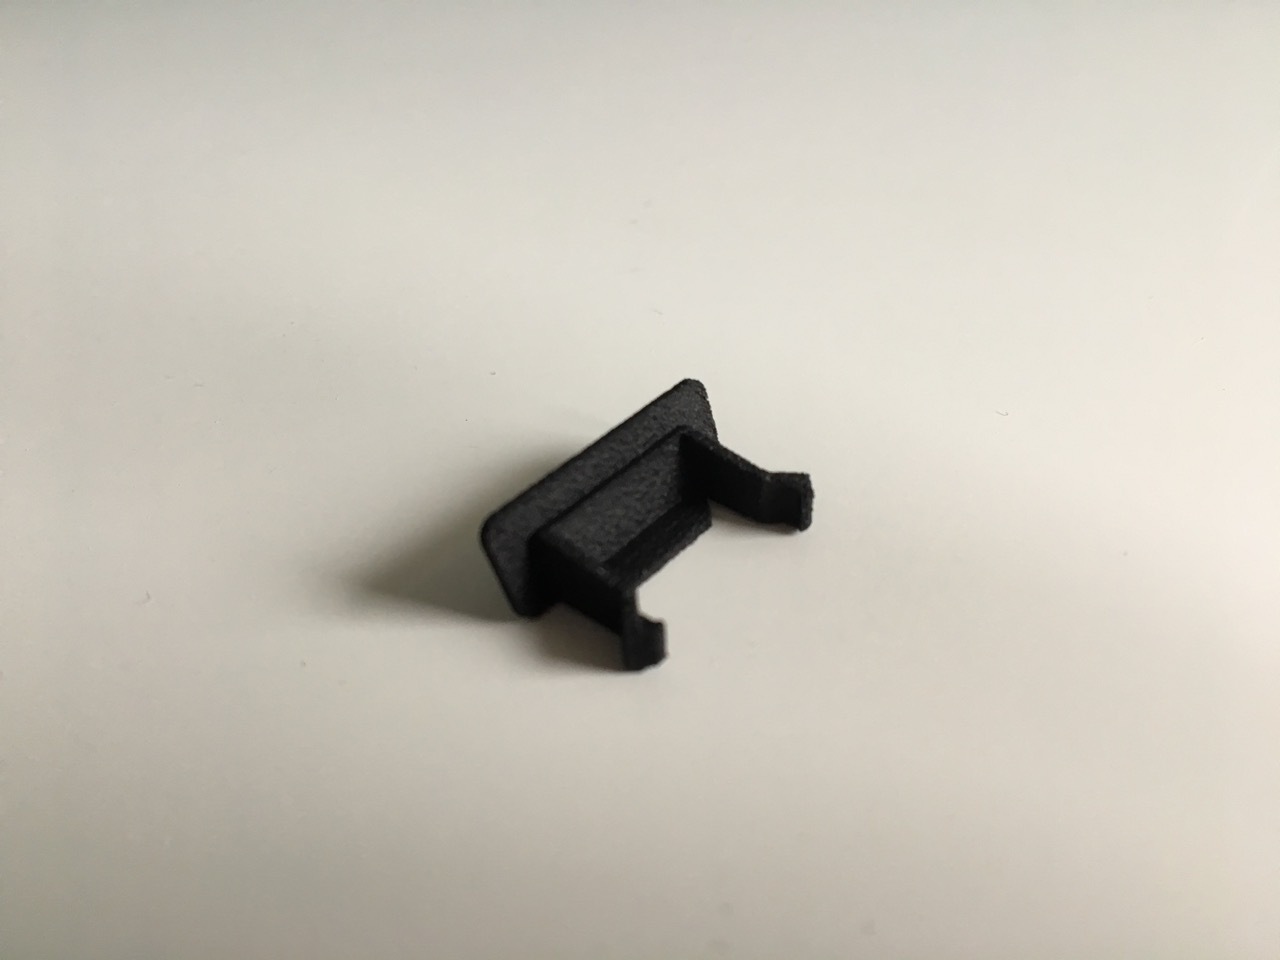
Pieza para reparar postes superiores
N.º de producto: UpperPostRepairTodavía en existencias
Formas de entrega disponibles: Courier España, Courier Zona 1, Courier Zone 2, Courier Zona 3, Courier Zone 4, Carta, Small item outside EU, Entrega Canarias/Baleares, Overseas traceable, Letter


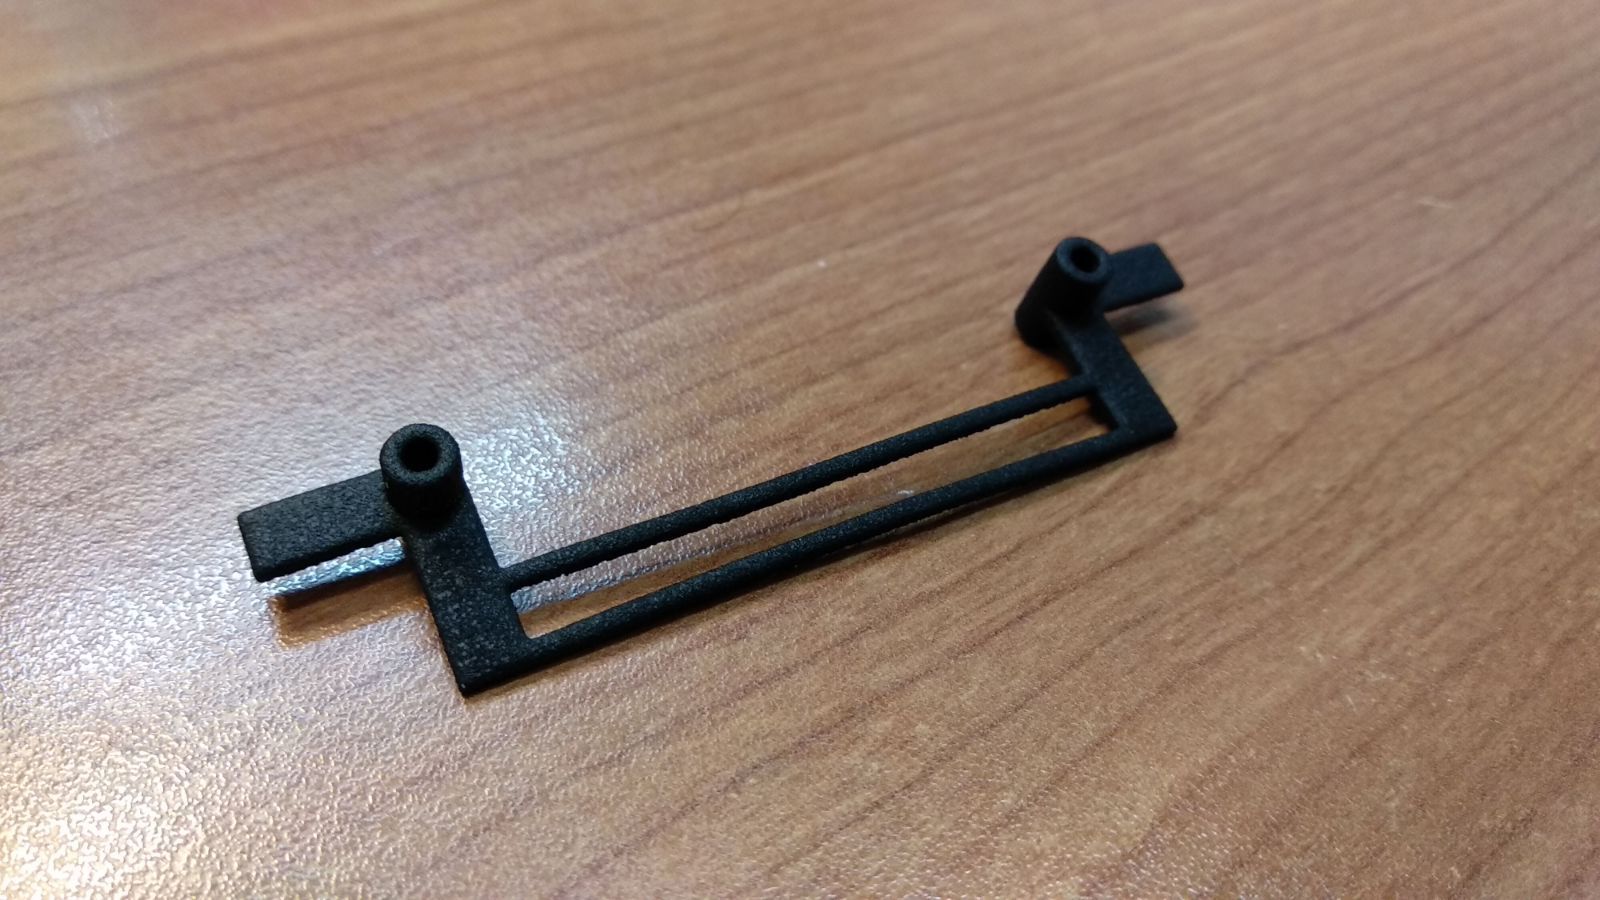
Upper Post repair
 Material needed
- Upper post repair piece (latest version in side picture, since previous version collided slightly with back case)
- Clothes' peg
Let's assume that both posts are broken or cracked. The effect of this cracking is that the screws do not do their job. Usually, using longer screws may help, but this typically is short lived since the cracks will continue downwards. Once the pressure between both halves is softened, the calculator doesn't work anymore. The solution is to repair the broken posts.
Old methods to repair broken post is to glue them (but this doesn't hold together too long) and to tie them down with very small gauge copper cable, applying pressure so that it holds together. This may solve some cases, but not when the screw path has been destroyed - maybe due to strong tightening of the screws.
Other repair methods have been proposed, including drilling down the screw and placing in its place a cylinder with screw path, glued in place. We tried this method but there was a problem: the torque used to screw resulted in cracked glue and the cylinder separating from the substrate - every time.
Our method was devised with three goals in mind:
- Try to avoid the torque from the screw forcing on the glue with the substrate
- Try to ensure that the front part of the calculator is pulled up when screwing the back side on.
- Try to be compatible with both fullnut and halfnut version
The piece that we have designed requires drilling the old posts to 3,5mm below the keyboard ciruit level. The design on the piece is such that the cylindrical body will be glued to the rest of the screw post; and the surface of the piece can be glued to the keyboard circuit, so that the torque on the substrate is avoided (it also helps that torque is also resisted by the other post, when using the full piece)
When gluing the piece, there are several precautions that need to be taken:
- Be sure of covering the zebra circuit part with tape -we don't want the glue to cover it.
- Cover also all nearby pin holes of the keyboard. If glue comes into one such hole, the key will not register. In severe cases, the key will be down all the time, glued in place!
- When applying pressure, use clothes' pegs to hold the piece in place, preferably on the outer side.
- Try to place the other side of the pegs away from the keys of the keyboard - it may damage them permanently.
- Use E6000 jewelry glue. We prefer black over clear just for clarity of repair.
- Let it cure overnight.
- Remove the tape.
- Assemble the calculator and test.
We recommend to repair both posts at the same time.
Alternatively, you can cut the other side of the 2 post piece with a tweezer and glue in place the rest of the piece.
Información de producto adicional
Accesorios
| Producto | Nota | Estado | Precio | ||
|---|---|---|---|---|---|
|
|
25,00 € * | |||
|
* Los precios incluyen el IVA
Mostrar detalles del accesorio
|
|||||
Los clientes que han comprado este producto también han comprado
|
|
|
|
|
|
 |
|
Examine también estas categorías: Accesorios, El Rincón de la HP41, Inicio, HP 41C Repair, Broken upper screw posts
Módulo conector de baterías y puertos de expansión de HP-41c/cv/cx Plano
N.º de producto: Flex-PCB AssembledFlatEn existencias
Formas de entrega disponibles: Entrega gratuita, Courier España, Courier Zona 1, Courier Zone 2, Courier Zona 3, Courier Zone 4, Carta, Small item outside EU, Entrega Canarias/Baleares, Overseas traceable, Letter, Entrega gratuita España


Accesorios
| Producto | Nota | Estado | Precio | ||
|---|---|---|---|---|---|
|
|
22,00 € * | |||
|
|
44,00 € * | |||
|
|
12,80 € * | |||
|
* Los precios incluyen el IVA
Mostrar detalles del accesorio
|
|||||
 Módulo conector de baterías y puertos de expansión de HP-41c/cv/cx
Los clientes que han comprado este producto también han comprado
|
|
|
|
|
|
|
|
Examine también estas categorías: Accesorios, Calculadoras Clásicas, El Rincón de la HP41, Inicio, Corroded Battery contacts, Corroded circuit paths, Damaged screen - not all segments light on, Científicas, HP 41C Repair, The Calculator Store Offers
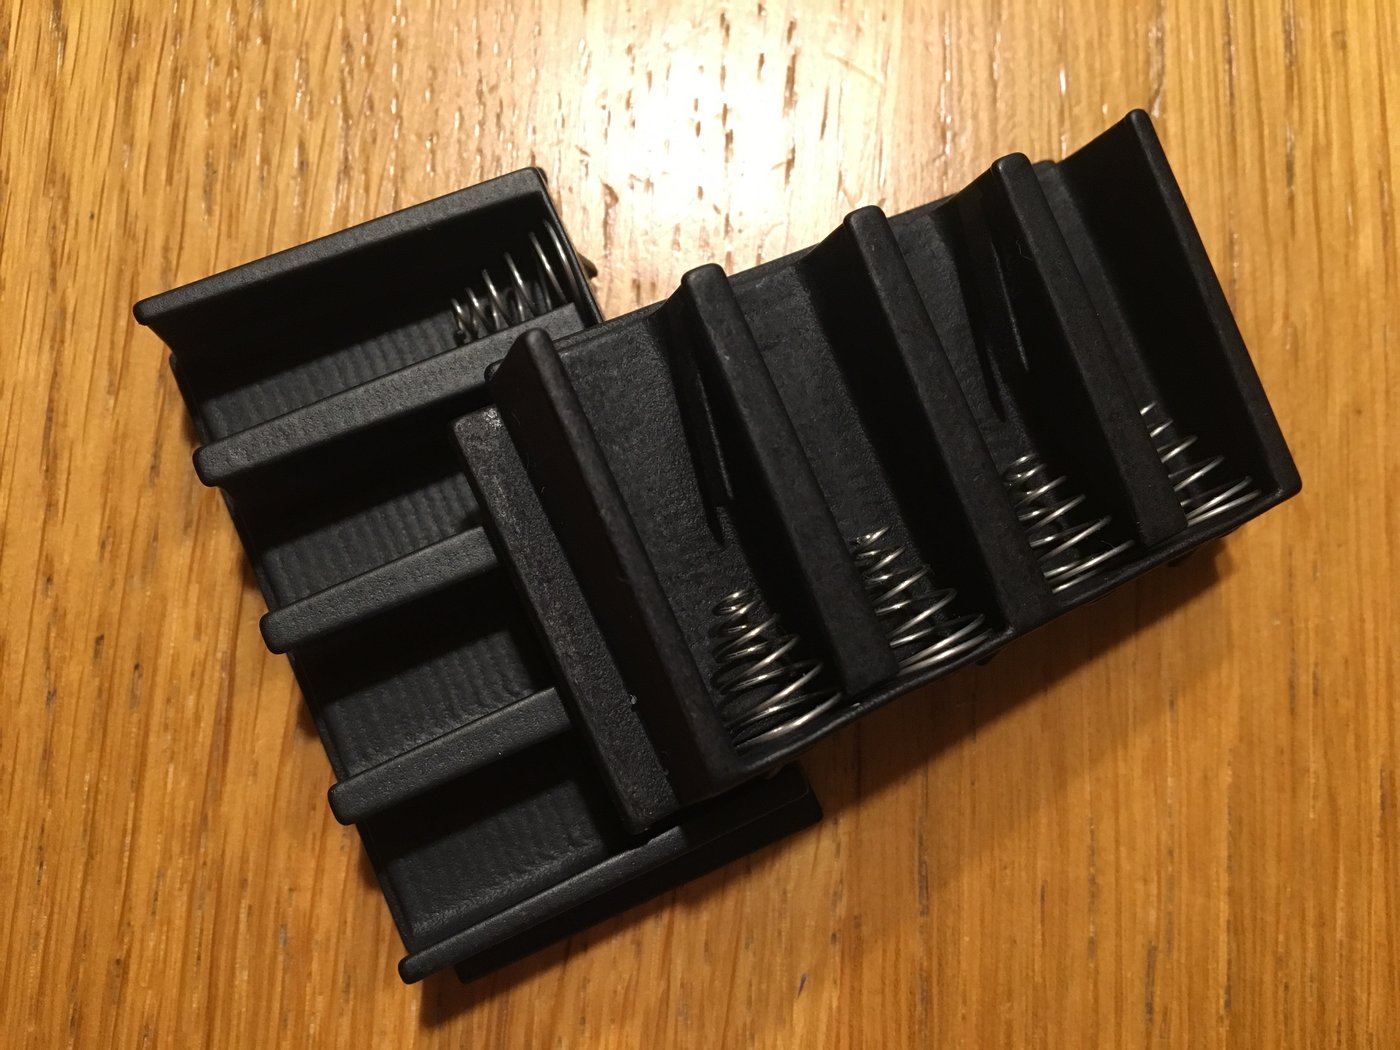
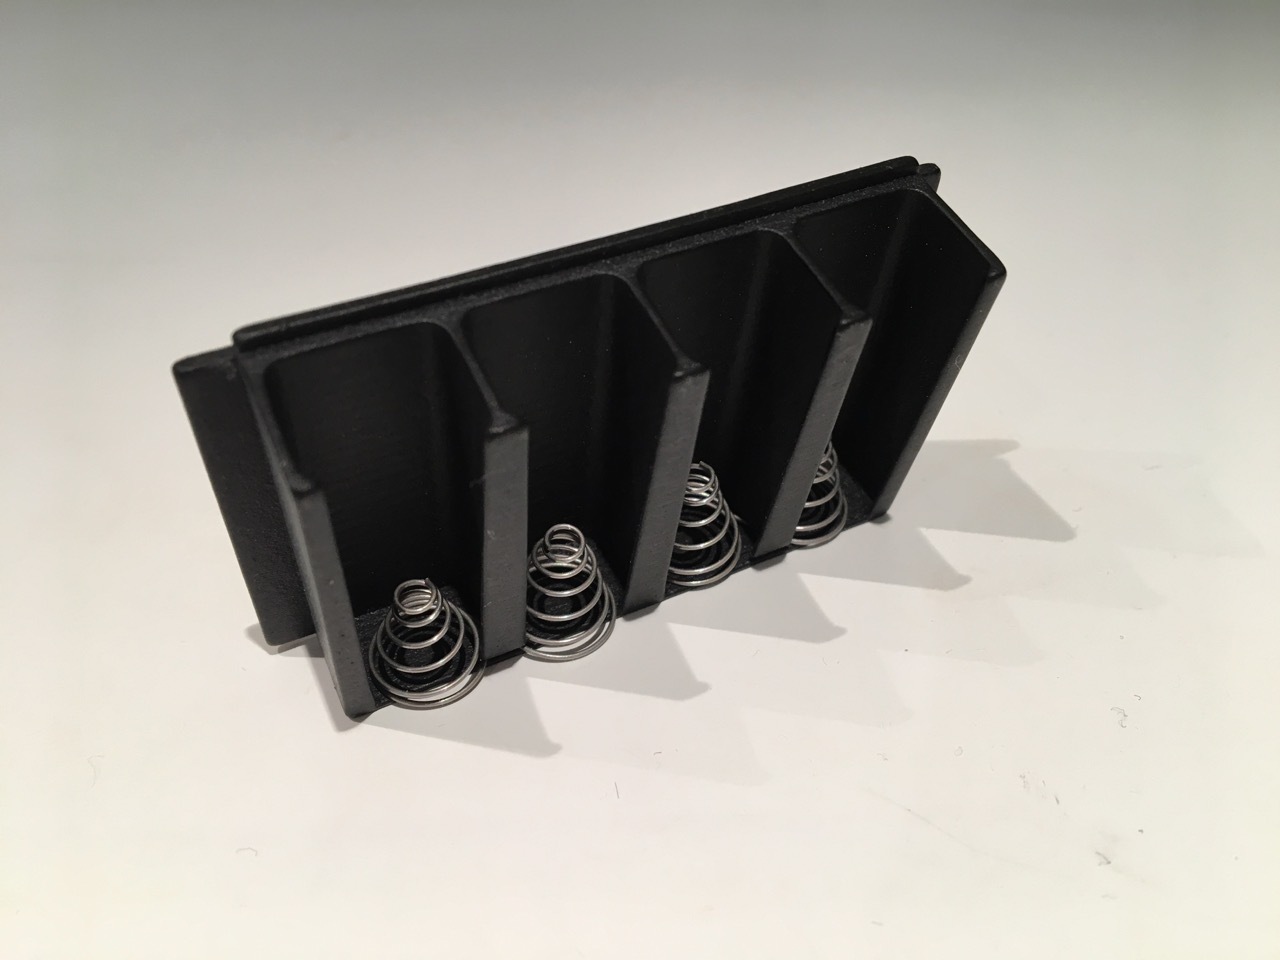
Porta baterías para HP41C 3D
N.º de producto: Battery holder 3DEn existencias
Formas de entrega disponibles: Courier España, Courier Zona 1, Courier Zone 2, Courier Zona 3, Courier Zone 4, Carta, Small item outside EU, Entrega Canarias/Baleares, Overseas traceable, Letter, Entrega gratuita España

Los clientes que han comprado este producto también han comprado
|
|
|
|
 |
|
|
Examine también estas categorías: El Rincón de la HP41, Accesorios, Inicio, The Calculator Store Offers
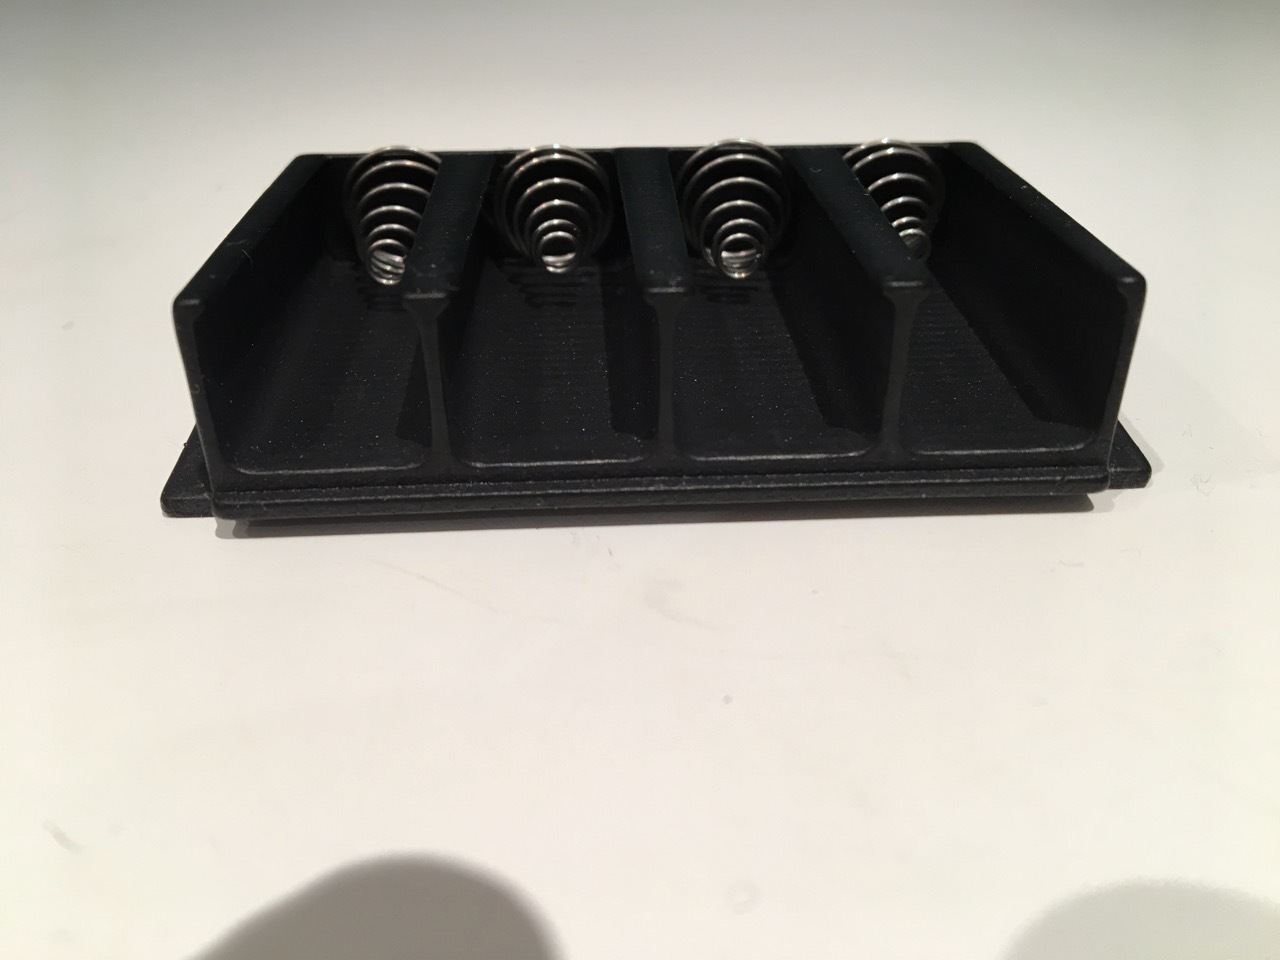
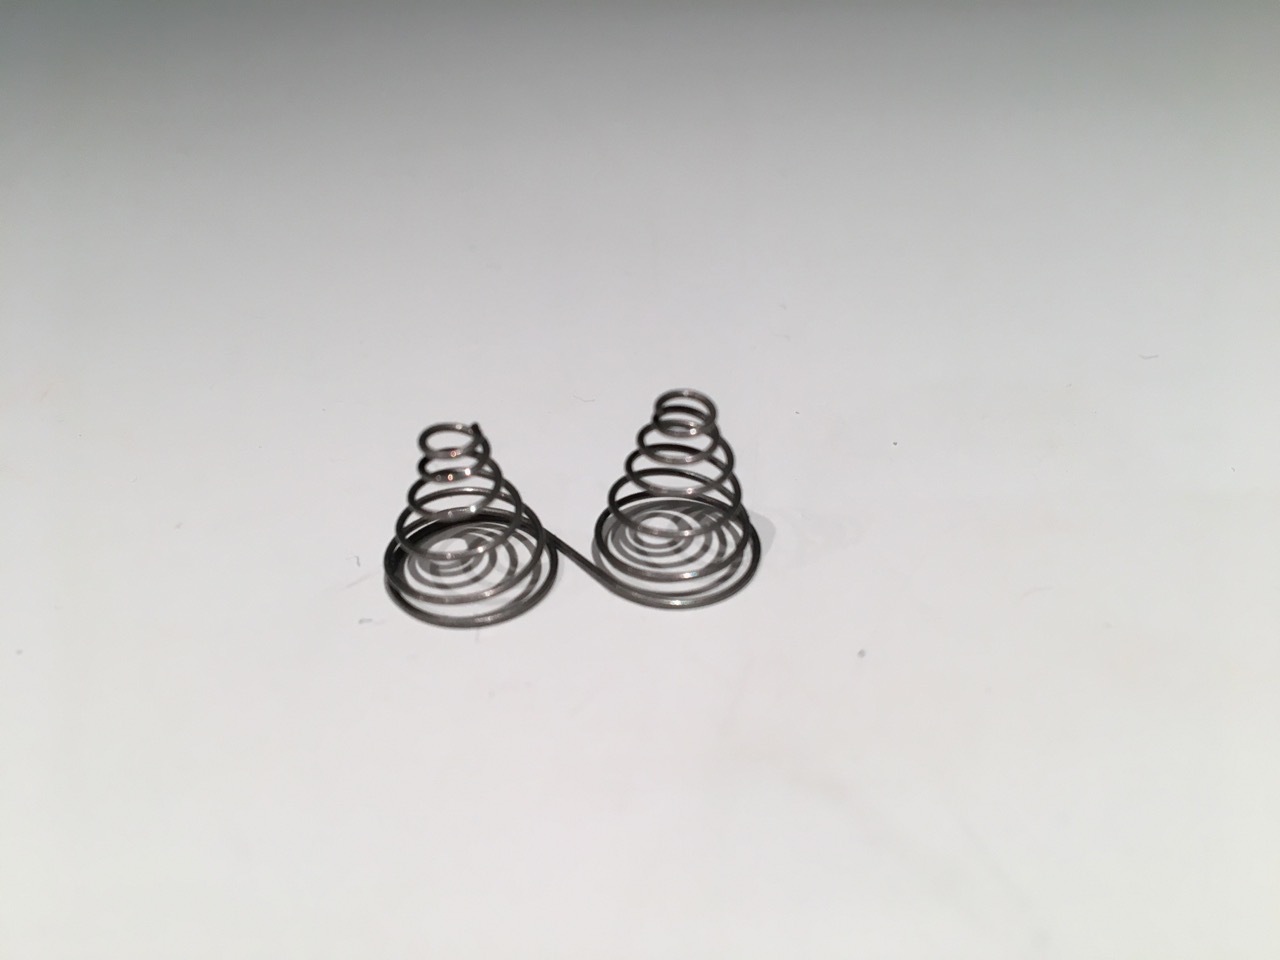
Muelle para cargador de HP41c
N.º de producto: SpringEn existencias
Formas de entrega disponibles: Courier España, Courier Zona 1, Courier Zone 2, Courier Zona 3, Courier Zone 4, Carta, Small item outside EU, Entrega Canarias/Baleares, Overseas traceable, Letter, Entrega gratuita España
Los clientes que han comprado este producto también han comprado
|
|
|
|
|
|
|
|
Examine también estas categorías: Accesorios, El Rincón de la HP41, HP 41C Repair
Esponja para las fundas de HP41c
N.º de producto: EsponjaEn existencias
Formas de entrega disponibles: Carta, Small item outside EU, Overseas traceable, Entrega gratuita España

Accesorios
| Producto | Nota | Estado | Precio | ||
|---|---|---|---|---|---|
|
|
4,00 € / 4 unidad(es) * | |||
|
* Los precios incluyen el IVA
Mostrar detalles del accesorio
|
|||||
 Pies para HP41c - pack de cuatro
Los clientes que han comprado este producto también han comprado
|
|
|
|
 |
|
|
Examine también estas categorías: Inicio, Accesorios, Calculadoras Clásicas, El Rincón de la HP41
Pieza para reparación de parte trasera de HP41c
N.º de producto: brokenbackEn existencias
Formas de entrega disponibles: Carta, Small item outside EU, Entrega Canarias/Baleares, Overseas traceable, Letter, Entrega gratuita España
1 Piece for repairing HP41c back cases.
As many units suffer from broken upper screw supports on the back side of the calculator, we have created pieces for the repair of the back side of the HP41C - which offer bigger surface for adherence and also serve to hold the battery assembly in case the little wings in the back side are broken.
Instructions for use of back side repair piece.
1. Be aware, before everything else, that the piece has a right side and a left side. This is due to the space for the tabs in the calculator that keep the battery-port assembly in place. You need to be aware of this at all times - more so if you want to cut it as explained below.
2. Decide whether you will replace both sides or just one. The decision is easy when both are broken, but if one is not, you'll have to check whether the old standing support will withstand the pressure for long. Our recommendation is to replace both sides. If later one of the sides breaks down, the repair will be much more difficult and probably less solid. And you have already paid for both sides!!
3. If you are going to replace just one side, cut with a hobbyist scissors just the side you don't need, according to picture enclosed, again, be careful of cutting the side you dont need, since the piece has a single correct orientation!. The rest of the piece will serve to increment the glued area, better align the piece in place and also to better support the battery-port assembly.
2. With a Dremel machine, file and level the area that had the support. You don't need to remove the tabs in between the two screw post, but you need to remove them if they are twisted or half-broken.
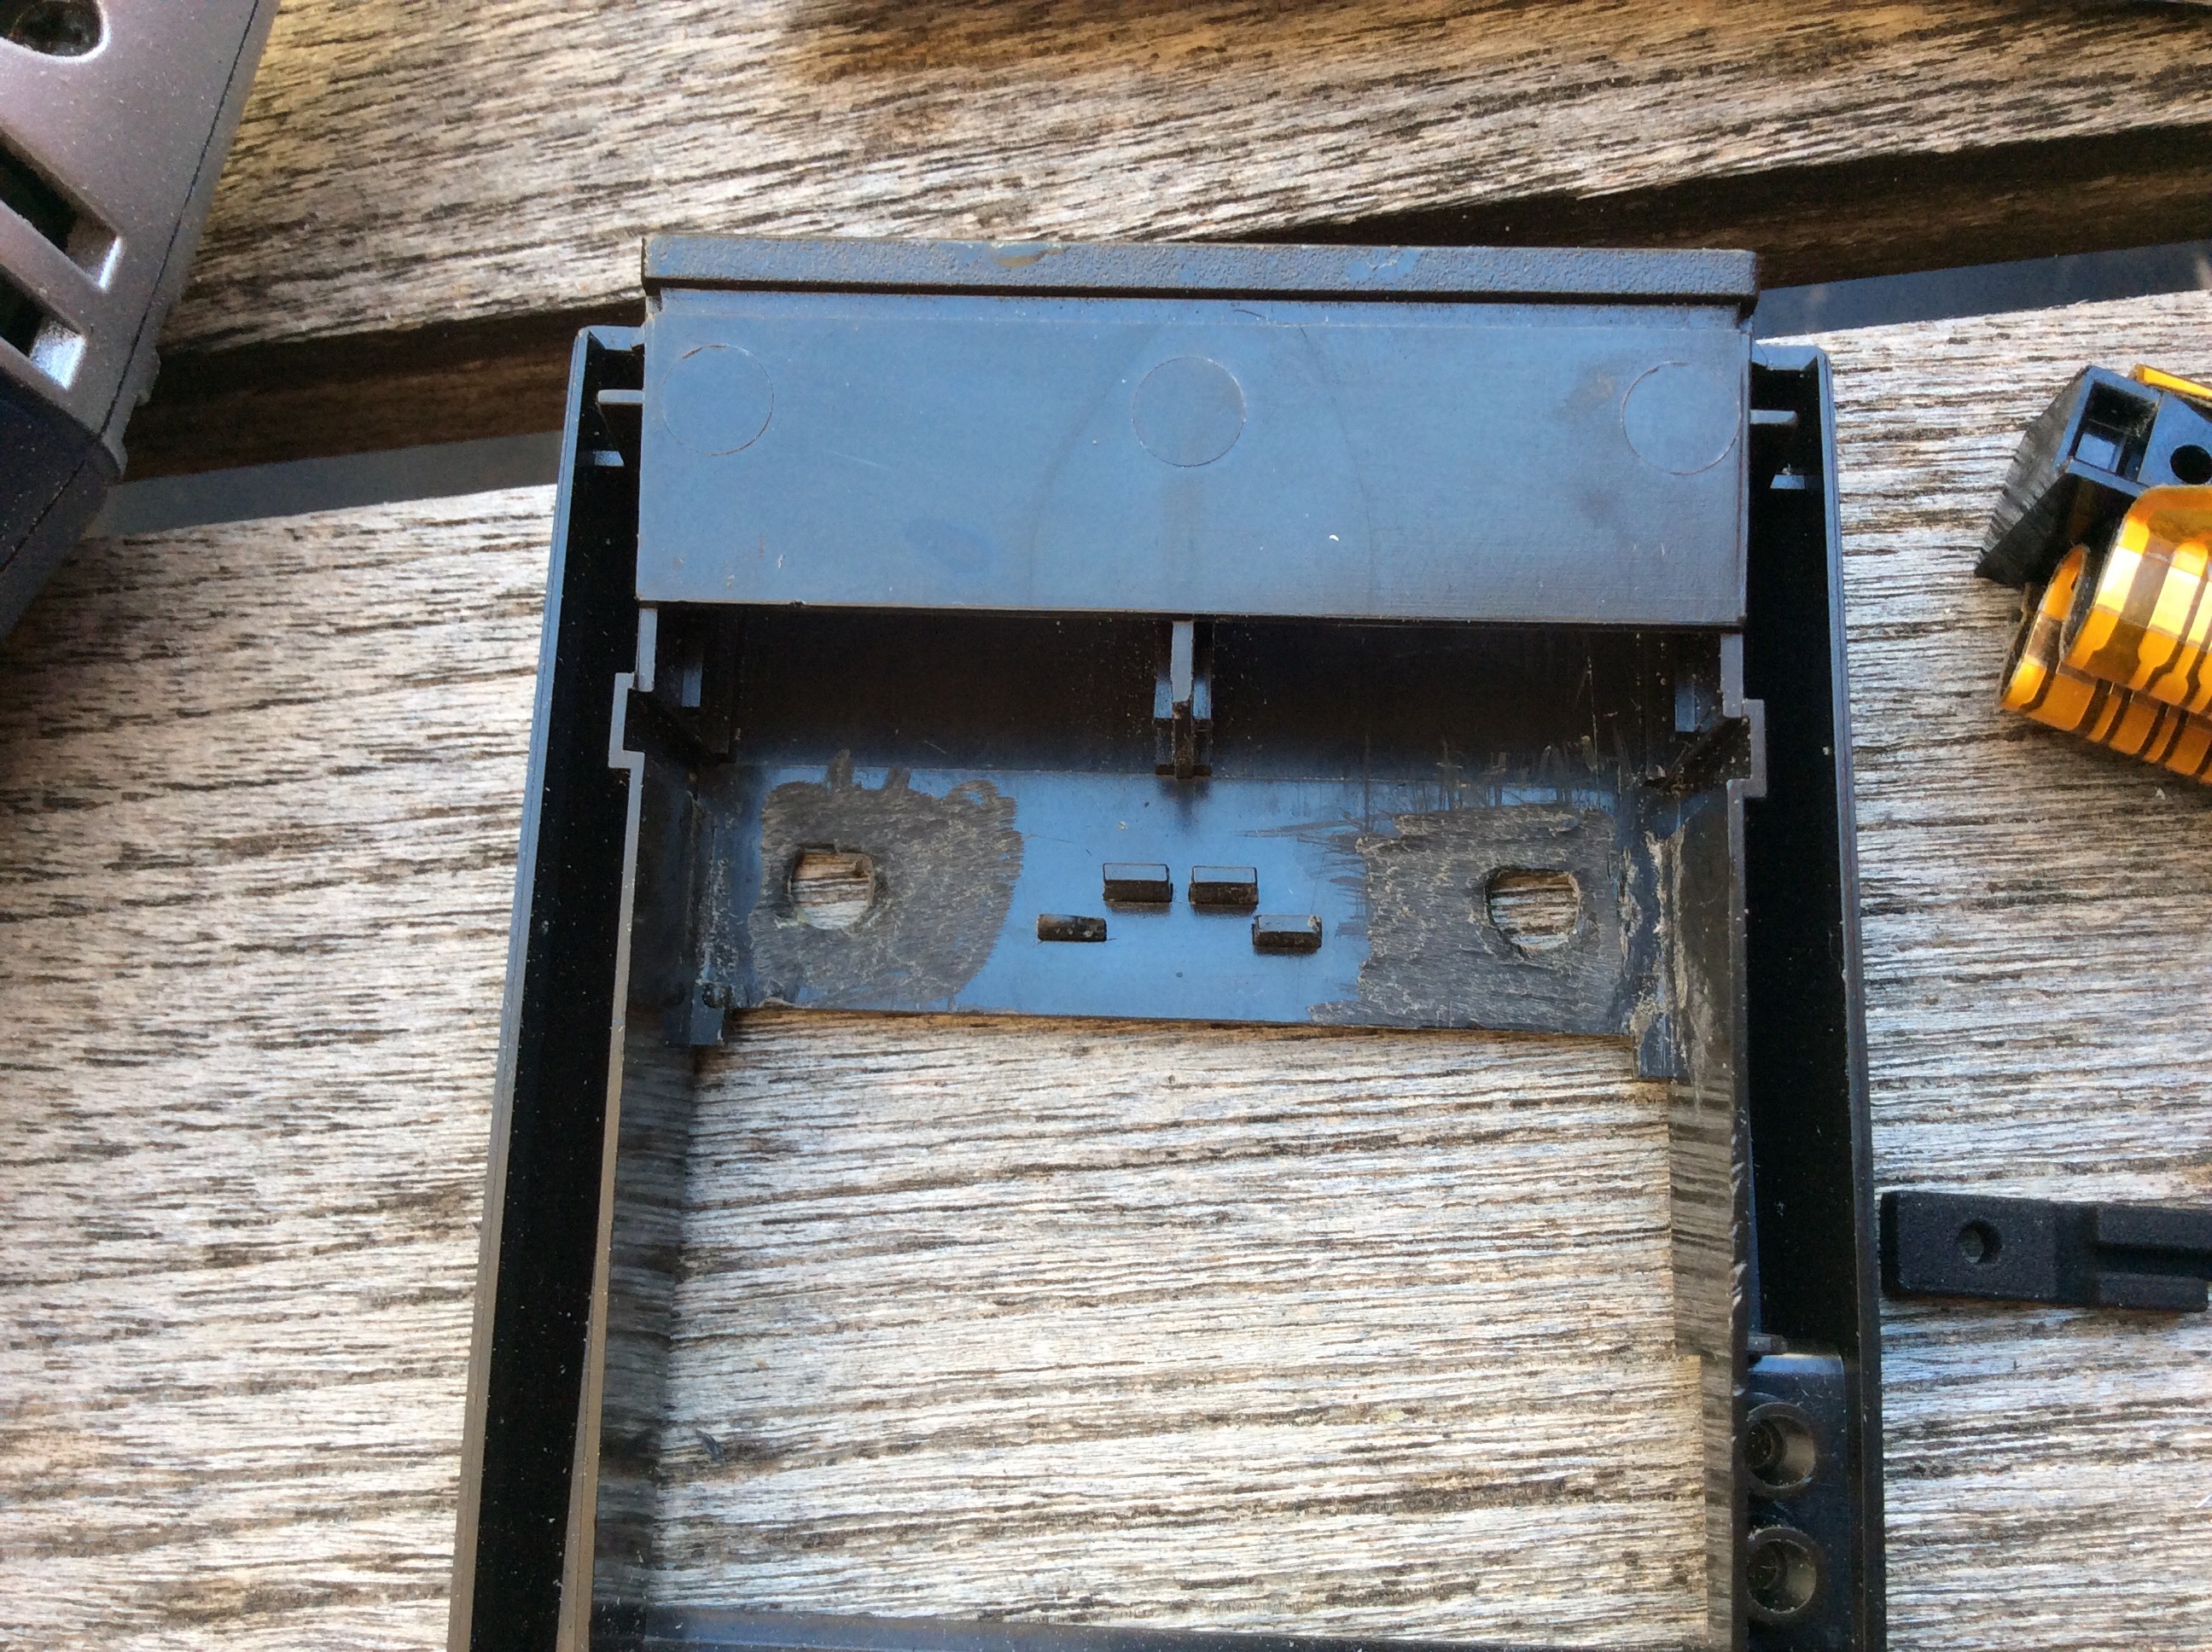
5. Put the piece in place. There is only one "right" way. The cross part is tight because it is needed to properly locate both holes at the extremes. Do not force it. Please make sure it is not bent downwards. Make sure it makes good contact. Remove the piece.
6. Put some glue in the bottom of the piece. Do not put too much or it will go out when pressed. We have used E6000 black glue with good results. Do not use cyanoacrylate glues. Put the piece back in place. Press and remove with a stick or a blade the excess glue, if any. If the screw holes are partially obstructed by glue, pass a screw in the opposite direction (to avoid separating the piece from the back side).
7. Secure the piece in place with a pair of clamps - lighter pressure like clothes' pegs will not be enough. Be careful that there is no excess glue from the other side of the case and the clamps are adhered to the piece! Leave for 24h for the glue to cure. And you're done! You have a repaired back that will withstand a lot of abuse again.
8. The piece is designed to accept both the original and the new battery-ports assembly - so you need to press it down to have it in place. The screw holes should fit a little bit tighter than in the original calculator, but should be perfectly aligned with the assemblies and the screw posts below.
Also, if you're buying from the US, it is maybe better to buy it directly from Shapeways there (just click on the link)
Información de producto adicional
Accesorios
| Producto | Nota | Estado | Precio | ||
|---|---|---|---|---|---|
|
|
44,00 € * | |||
|
|
22,00 € * | |||
|
|
50,00 € * | |||
|
* Los precios incluyen el IVA
Mostrar detalles del accesorio
|
|||||
 4 x Pieza para reparación de parte trasera de HP41c
Los clientes que han comprado este producto también han comprado
|
|
|
|
|
|
|
|
Examine también estas categorías: El Rincón de la HP41, Inicio, Accesorios, HP 41C Repair, Broken upper back case screw head supports
Tapa lateral para HP 41c
N.º de producto: Side CoverEn existencias
Formas de entrega disponibles: Carta, Small item outside EU, Entrega Canarias/Baleares, Overseas traceable, Letter, Entrega gratuita España

Accesorios
| Producto | Nota | Estado | Precio | ||
|---|---|---|---|---|---|
|
|
22,00 € * | |||
|
* Los precios incluyen el IVA
Mostrar detalles del accesorio
|
|||||
Los clientes que han comprado este producto también han comprado
|
|
|
|
|
|
|
|
Examine también estas categorías: Accesorios, Calculadoras Clásicas, El Rincón de la HP41, Inicio, The Calculator Store Offers