")
")
- The Calculator Store Offers
- Calculadoras cientificas
- Calculadoras financieras
- Calculadoras Gráficas
- Reparación de calculadoras HP
- Calculadoras HP Clásicas
- El Rincón de la HP41
- El Rincón de la HP Prime
- El Rincón de la HP15c
- El Rincón de la HP12c
- Calculator Accessories
- Guía de selección
- Productos en Promoción
- Calculator blog
- Blog en Español
- Mapa del sitio
- Comparativas
- Libros
- Education
- ¿Por qué RPN?
- Calculadoras baratas
-
The Calculator Store Club

- Audio

Calculadoras Calculator blog Mensajes sobre el tema: HP12c; HP15c CE; HP15c
Calculator blog
Musings and comments about our common interest
The innards of the new HP15c CE
Hi,
I tried to work on the keyboard of a HP15c CE. I opened it, taking out the 5 screws (do not forget the one beside the battery!). Here is what can be seen inside:
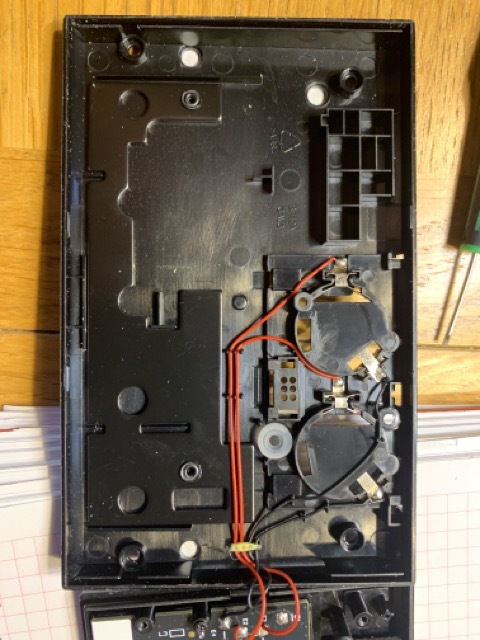
If you are DIY inclined, you could add a standard nano-USB on the left side of the calculator (which is on the right side in the picture). Beware: it requires drilling your precious unit!
On the other hand, no way to go into the keyboard: many permanente fixings, risking to break the calculator.
Battery door for new voyagers
 With the new voyagers you don't need to open the battery door for a long time. I am a heavy user of the HP15c Collector's Edition, and I have been using it from April when I received my test unit. It is still running on the original set of batteries (at least 7 months of testing and heavy use)
However, I am now using a lot its POGO connection in order to try new things firmware and other projects (of which you will know if they succeed), and I have to say that it is a real pain to use the screw all the time. It is also a little bit protruding and marking the nice leather cases we have.
We designed several years ago a battery door that never saw a lot of sales (as opposed to the battery door for the original HP12c - it seems that a sizeable number of them was lost and required replacement). Now I am travelling and unable to do any change since I have not a screwdriver with me - next time I will fit one of our doors instead of the screwed one!
Replacement cover for batteries
Now that I am frequently opening the calculator to put new firmware types I enjoy having the 3D-printed Voyager battery covers. We have it for the original calculators (the small door for three button batteries) but we also have it for the new models (compatible from the 2007 model onwards, including HP12c and HP15c CE). This is an advantage because it does not need the ugly screw, and you can just open it and reset it if needed. Much more comfortable !!

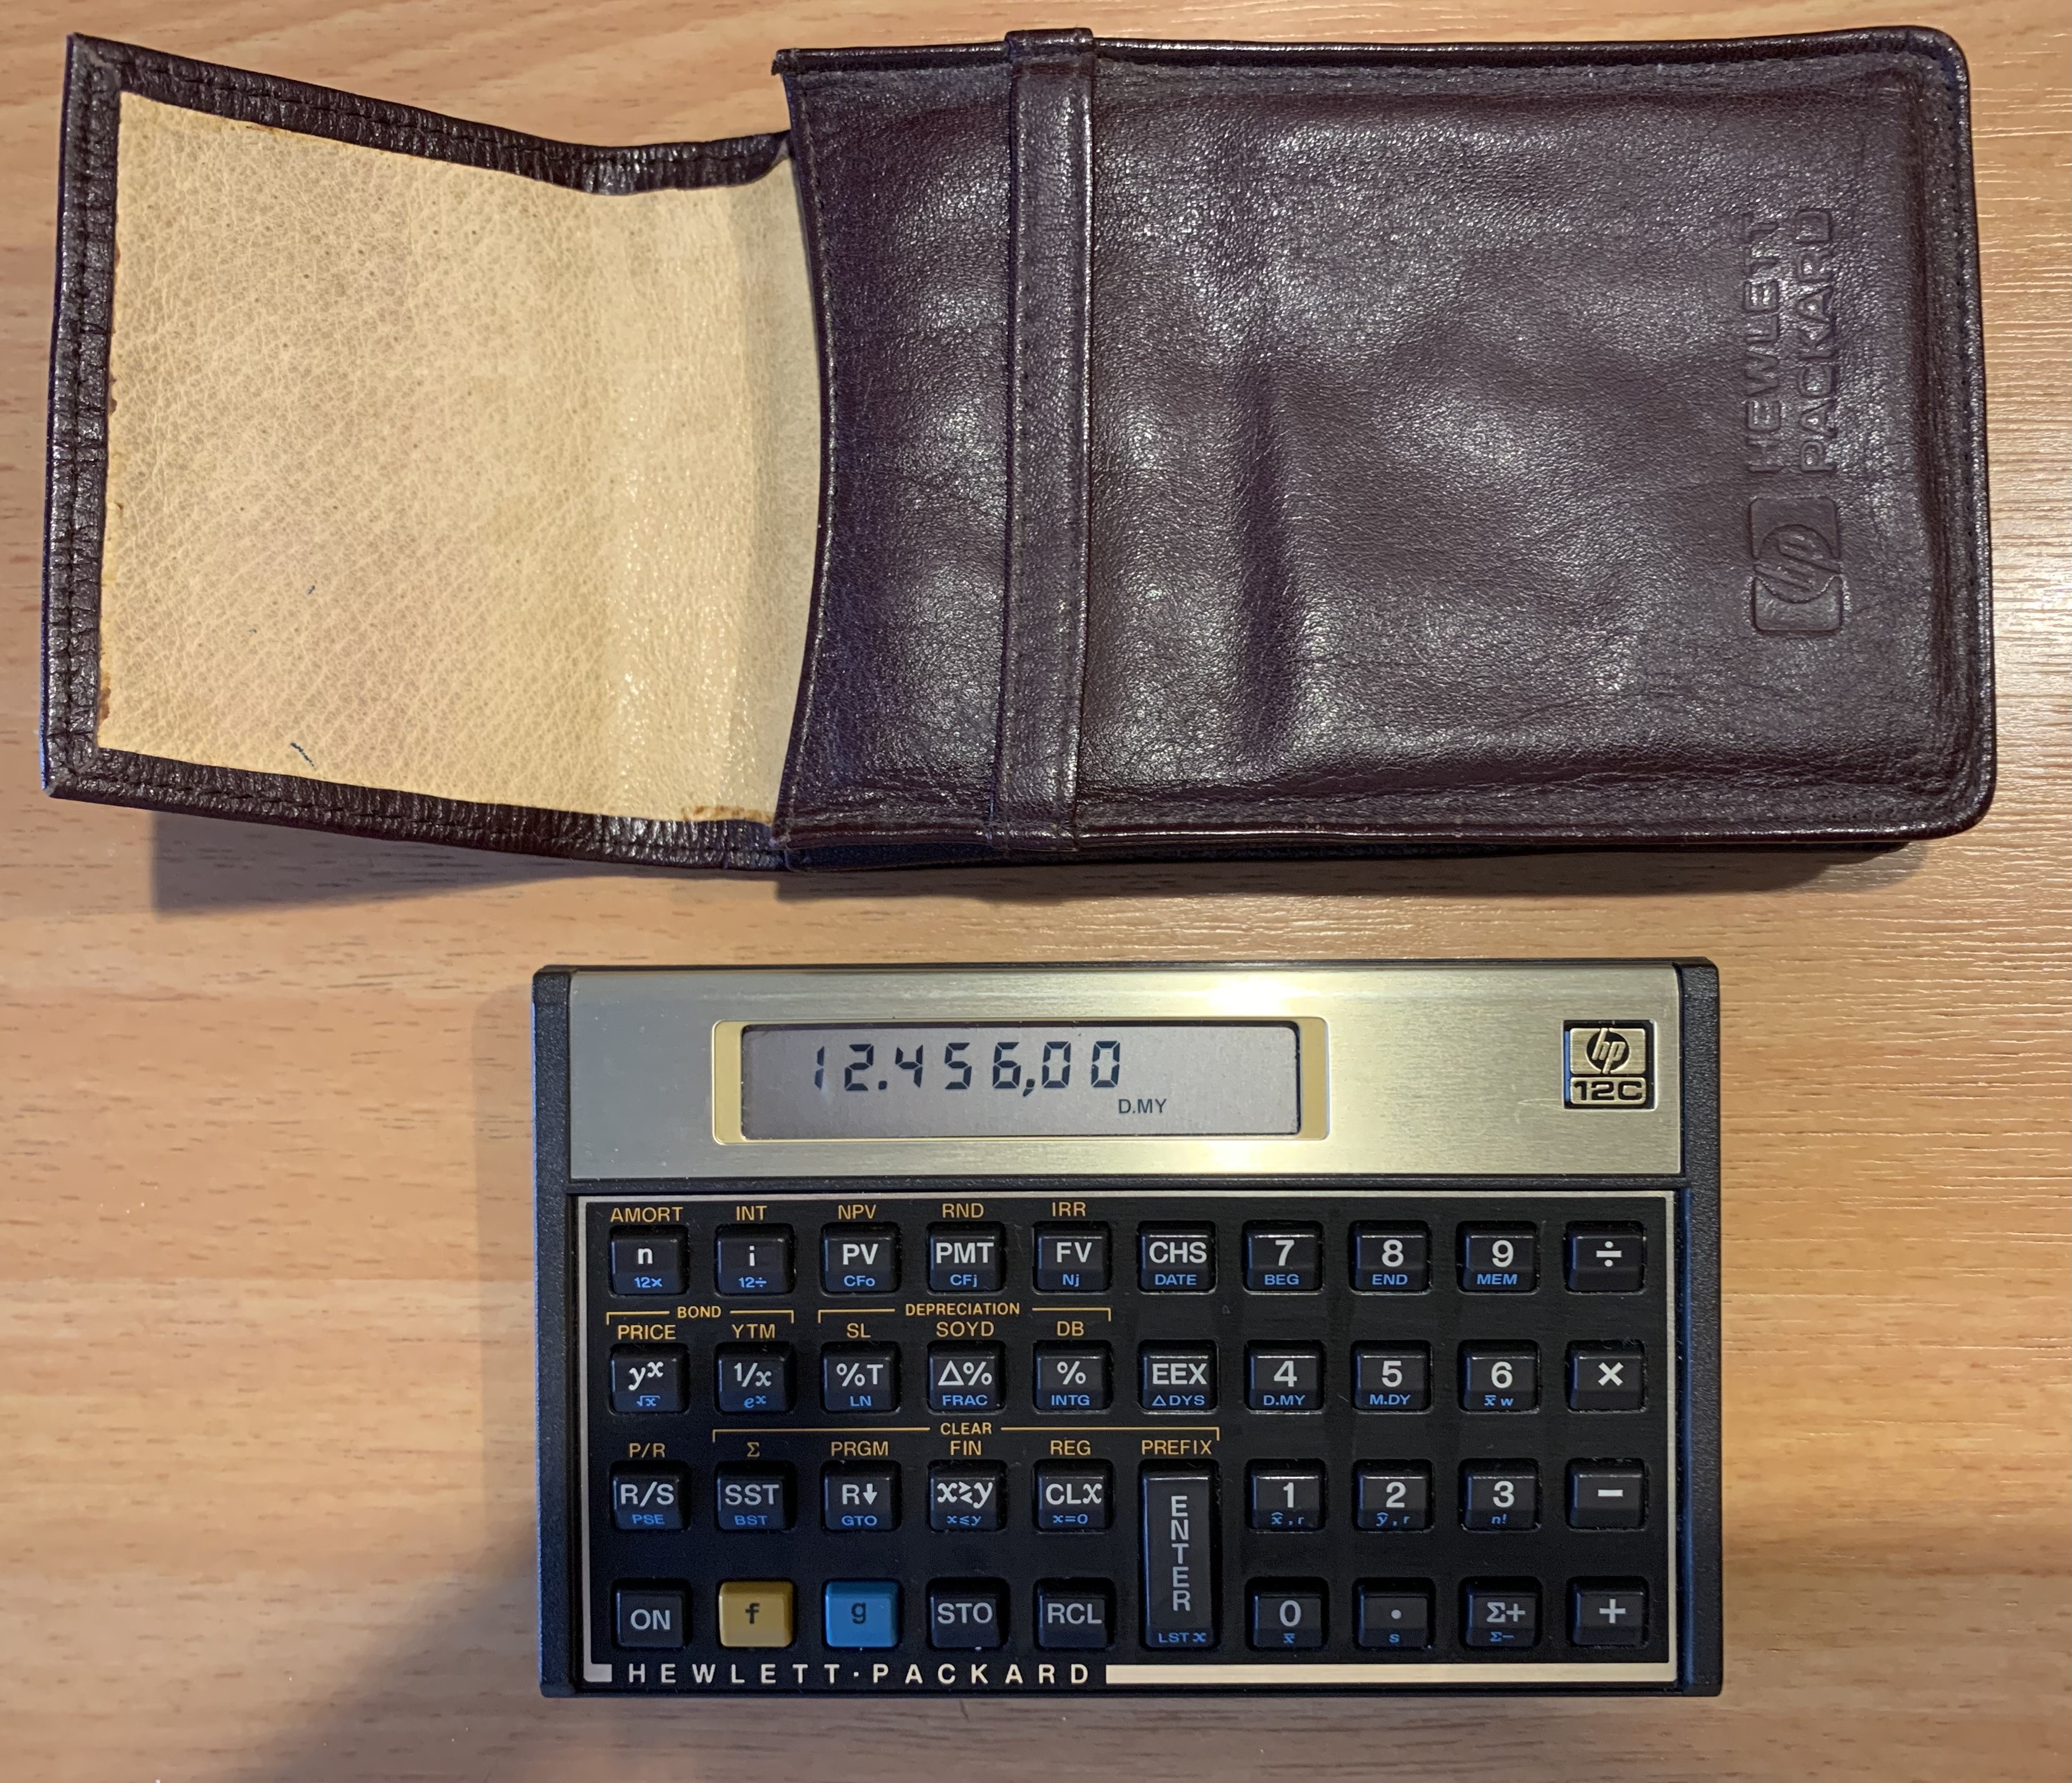
A new old HP12c
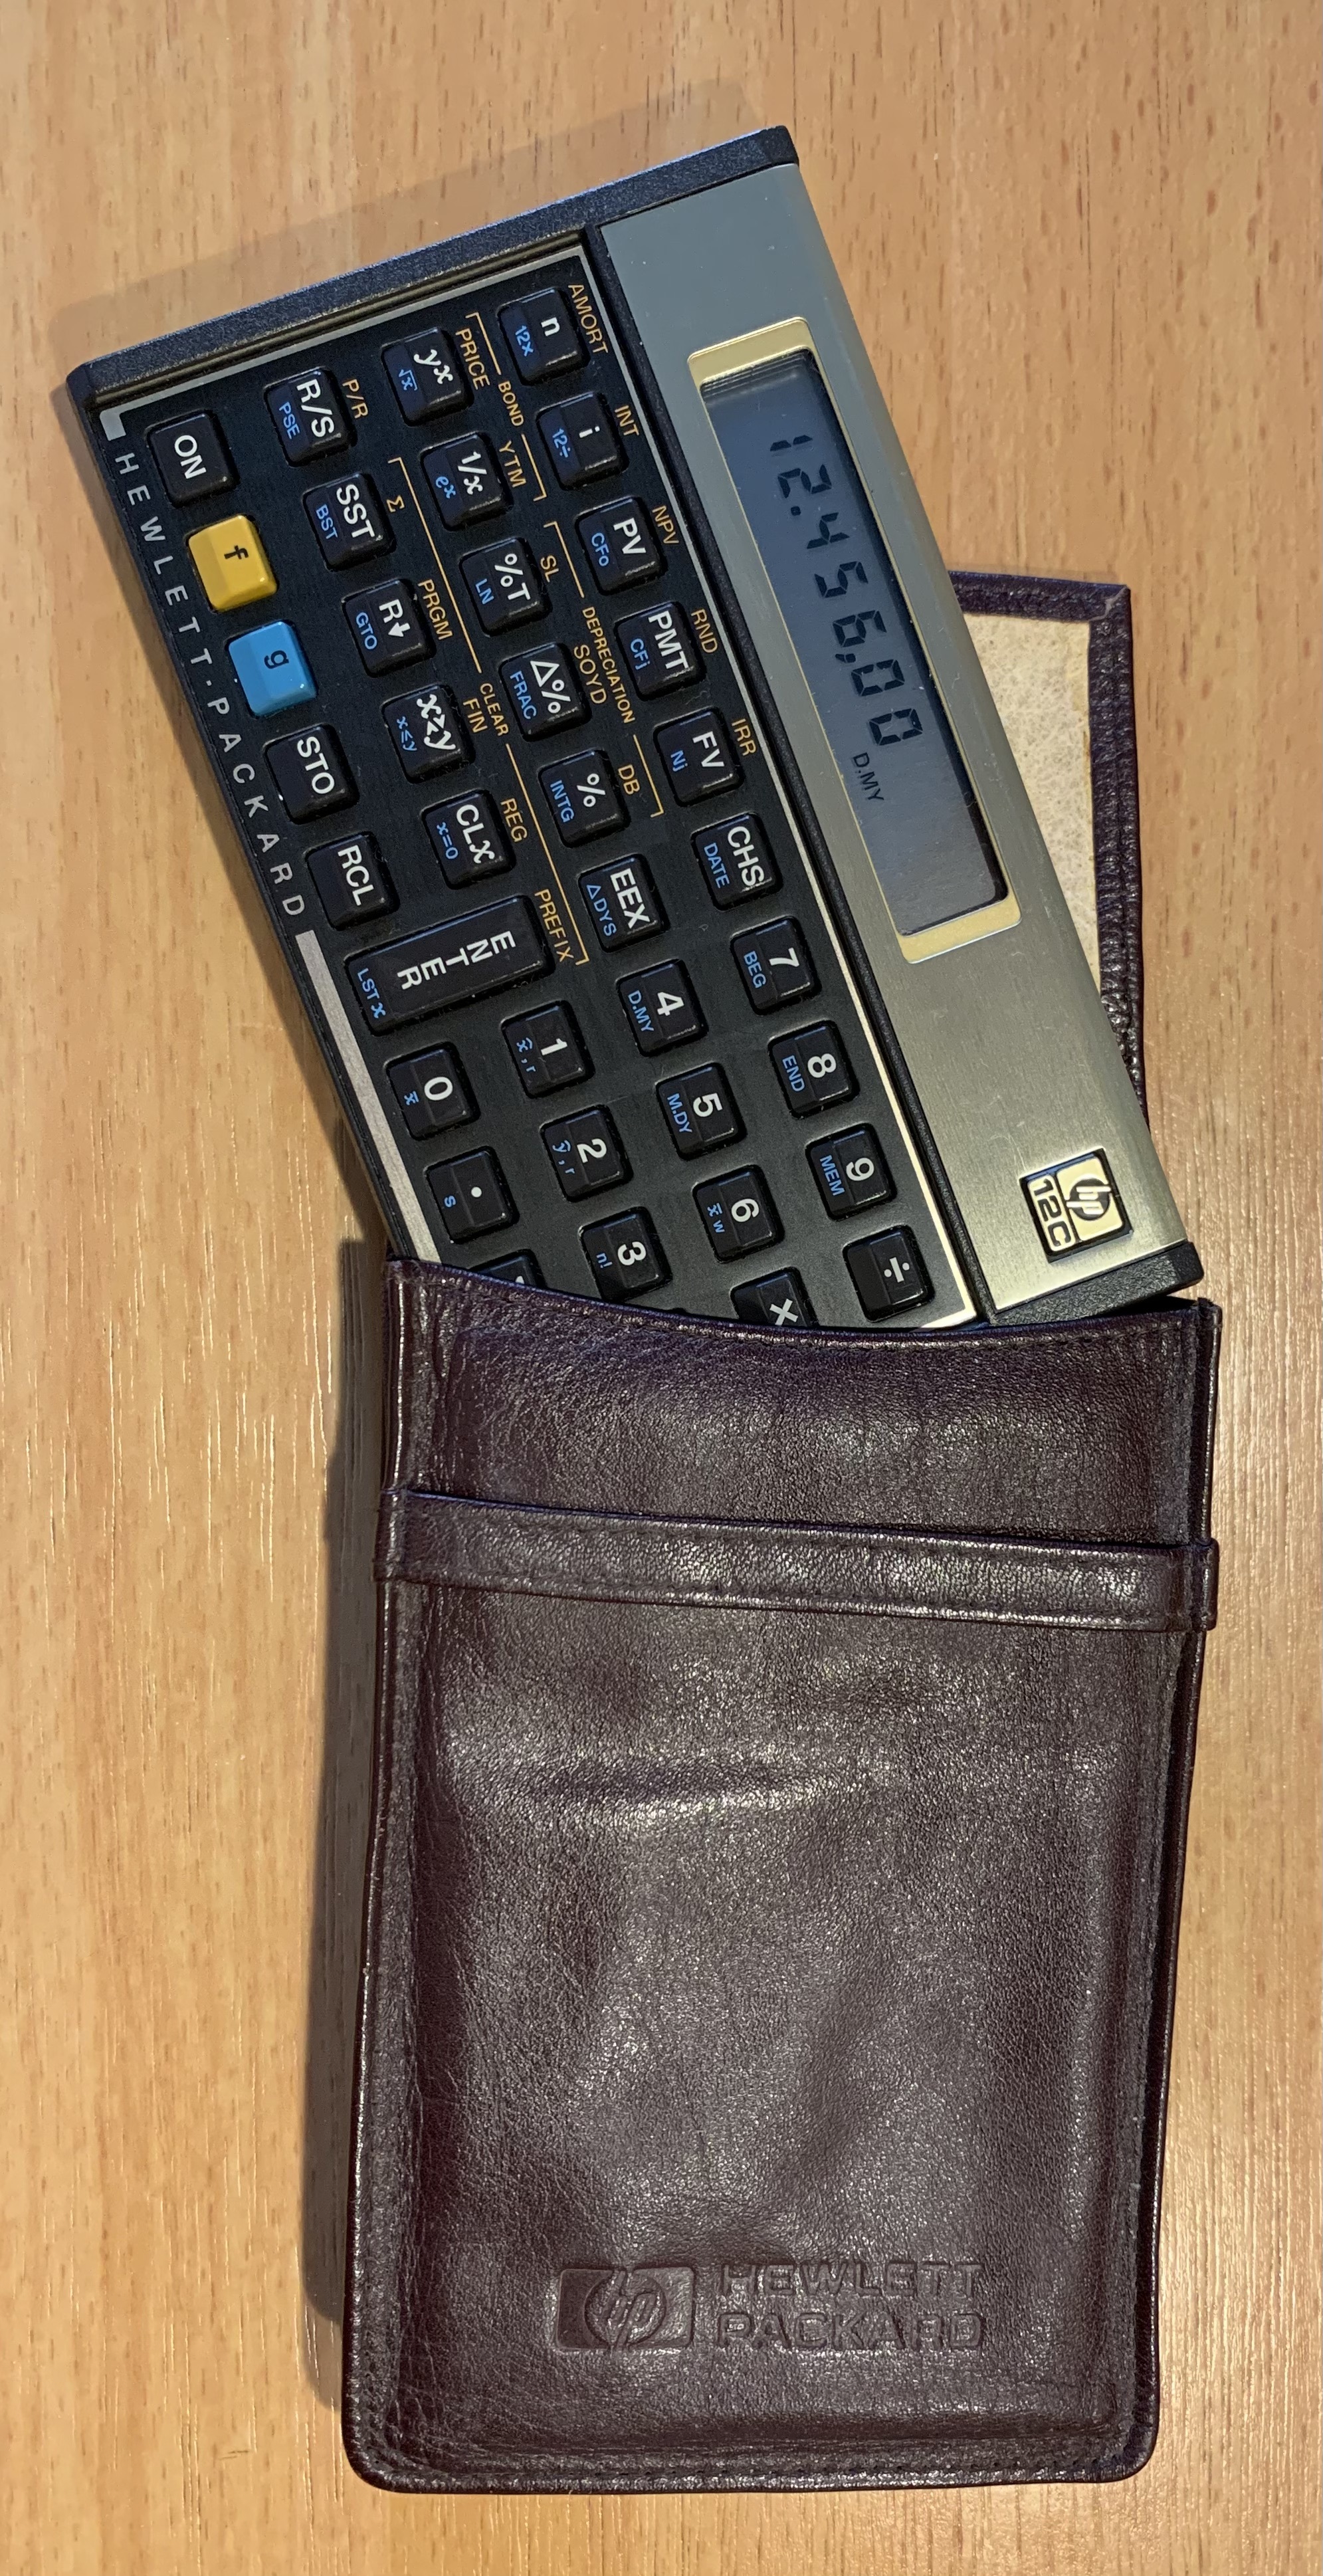 I cannot help but buy calculators that I like. The other day I spotted a 1987 HP12c calculator in quite good shape. It was still working, but the battery low indicator was blinking all the time. The way the calculator looked, it had not been used too often - so the batteries may have even been original! These calculators' batteries really lasted forever. Also the clicking of the buttons is like the original - clear clicking, but softer keys than the ones of the new HP12c.
But the nice thing of this calculator is that it came with the best leather case.
This time in Burgundy - I had it in the past in brown color, but never in Burgundy!
I still don't know if I'll put it up for sale, or with/without the case, or with my own leather case.
Repurposing the new HP Voyager calculators ?
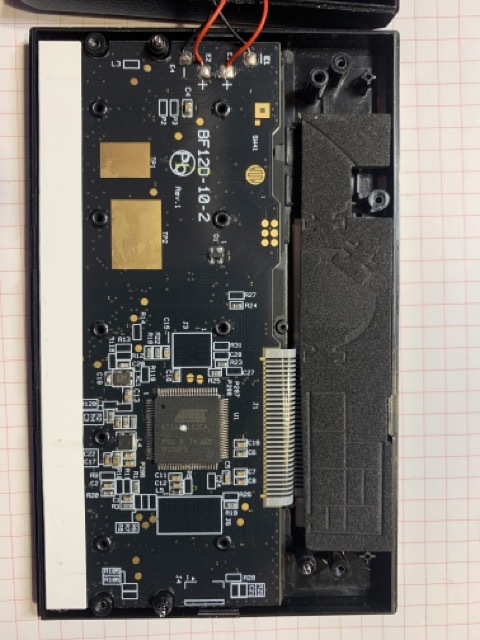
 The new HP Voyager (HP12c, HP15c Collector's Edition)calculators have a connector in the battery bay that can be used to change its firmware. Theconnector is that 6-pin set just below the batteries. The previous version had the same connector, and it needed a special cable to do programming with it; however, the previous version had a TTL-level adaptor chip, and is not pin-compatible with the current connector - which runs a USB protocal (albeit with a completely different connector!).
I have tried hard to find the connector to buy or produce such cable, but after looking everywhere for it, I've been unable to get one, or even to order one for production. Now, apparently, there were close to 1000 units of the previous version produced by HP for the 2011 production run. These can be used, but they need to be changed to use the new pin mapping required for the USB connection. I will describe the cable changes in a future blog issue.
there could be another solution, but that involves more effort: you need to open the machine and solder a USB connector in a place designed for it. Only the nano-connector applies!
Why all this fuzz? because using it, you can alter the original firmware to get more memory ! there are instructions of what positions to change in the program memory to increase the memory, and also the palces to tamper to avoid problems with the MEM screen and program limits. You can find them in hpmuseum.org . Be careful with what you do because you can brick the calculator !
PS: if anyone want more precisions, please contact us at jose@thecalculatorstore.com