")
")
Calculadoras
- The Calculator Store Offers
- Calculadoras cientificas
- Calculadoras financieras
- Calculadoras Gráficas
- Reparación de calculadoras HP
- Calculadoras HP Clásicas
- El Rincón de la HP41
- El Rincón de la HP Prime
- El Rincón de la HP15c
- El Rincón de la HP12c
- Calculator Accessories
- Guía de selección
- Productos en Promoción
- Calculator blog
- Blog en Español
- Mapa del sitio
- Comparativas
- Libros
- Education
- ¿Por qué RPN?
- Calculadoras baratas
-
The Calculator Store Club

- Audio

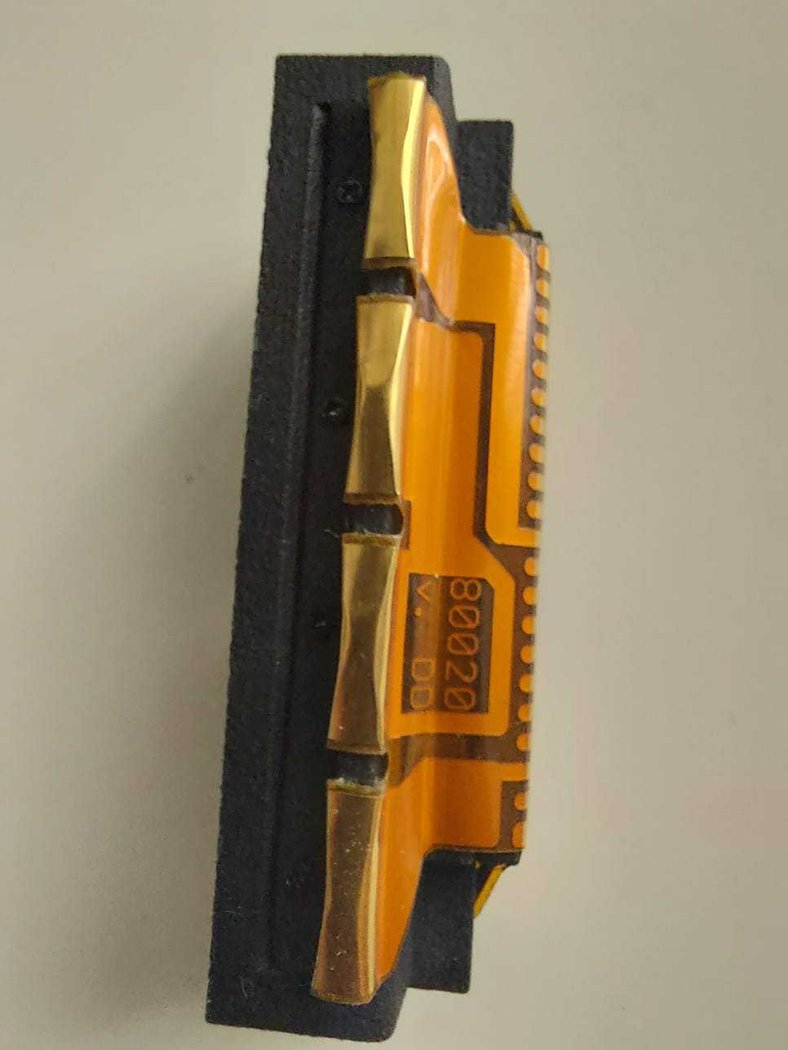
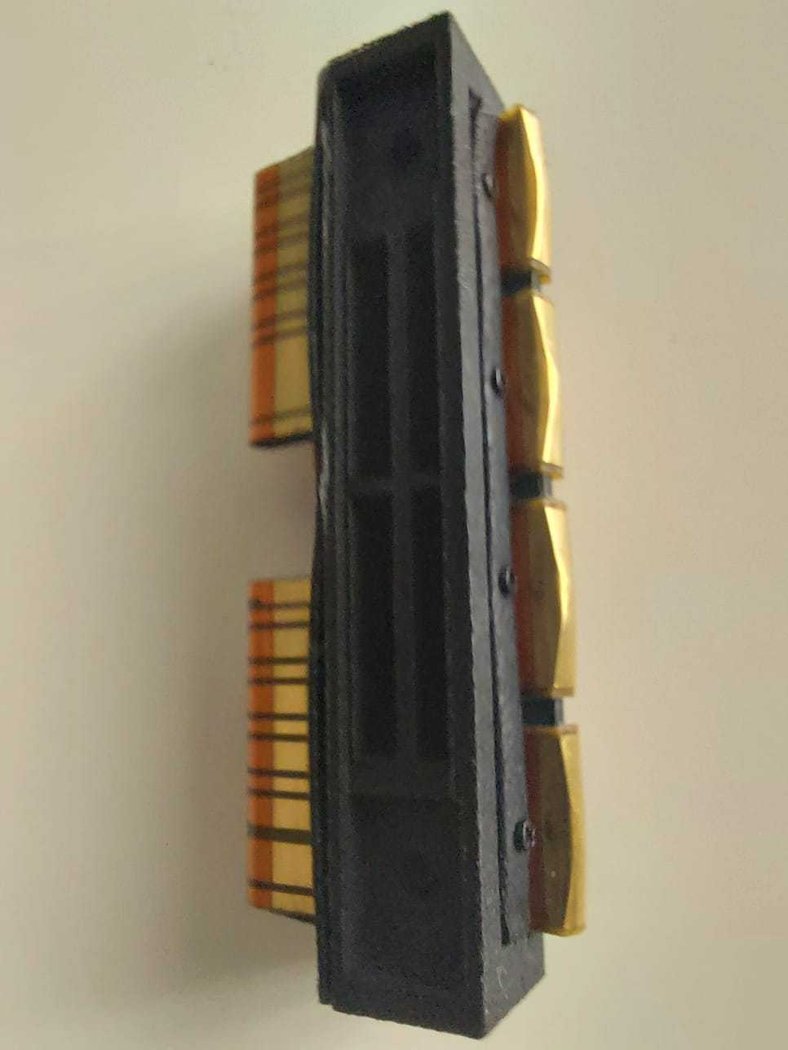
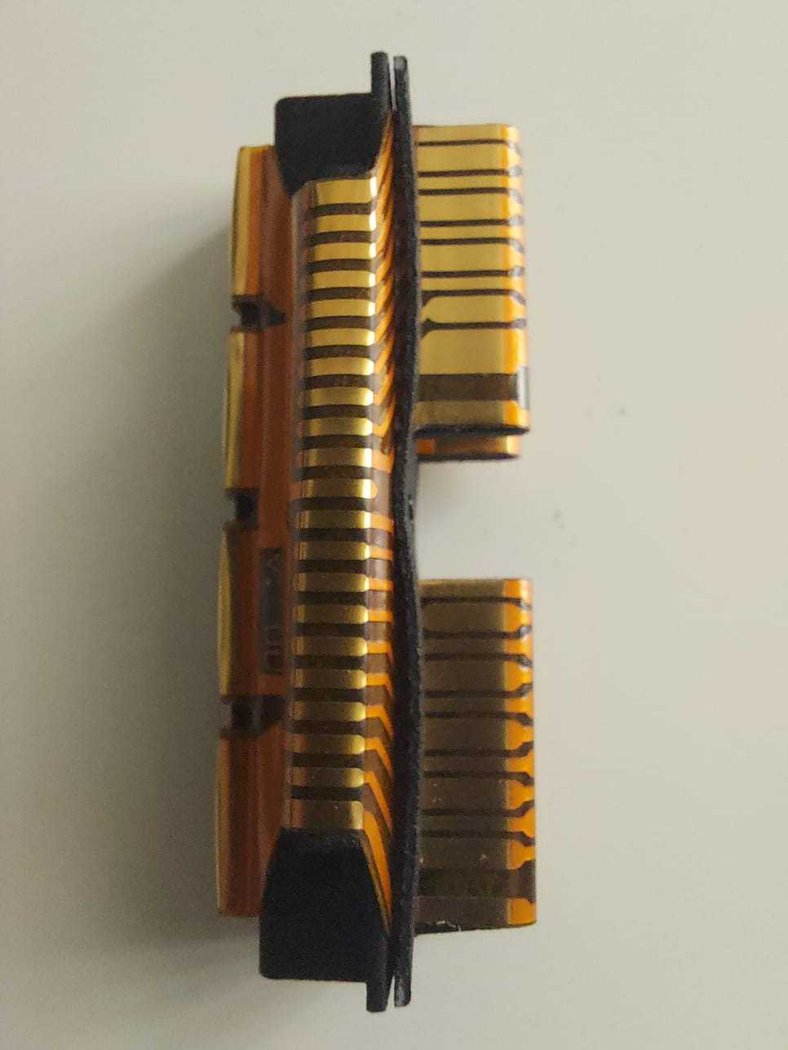
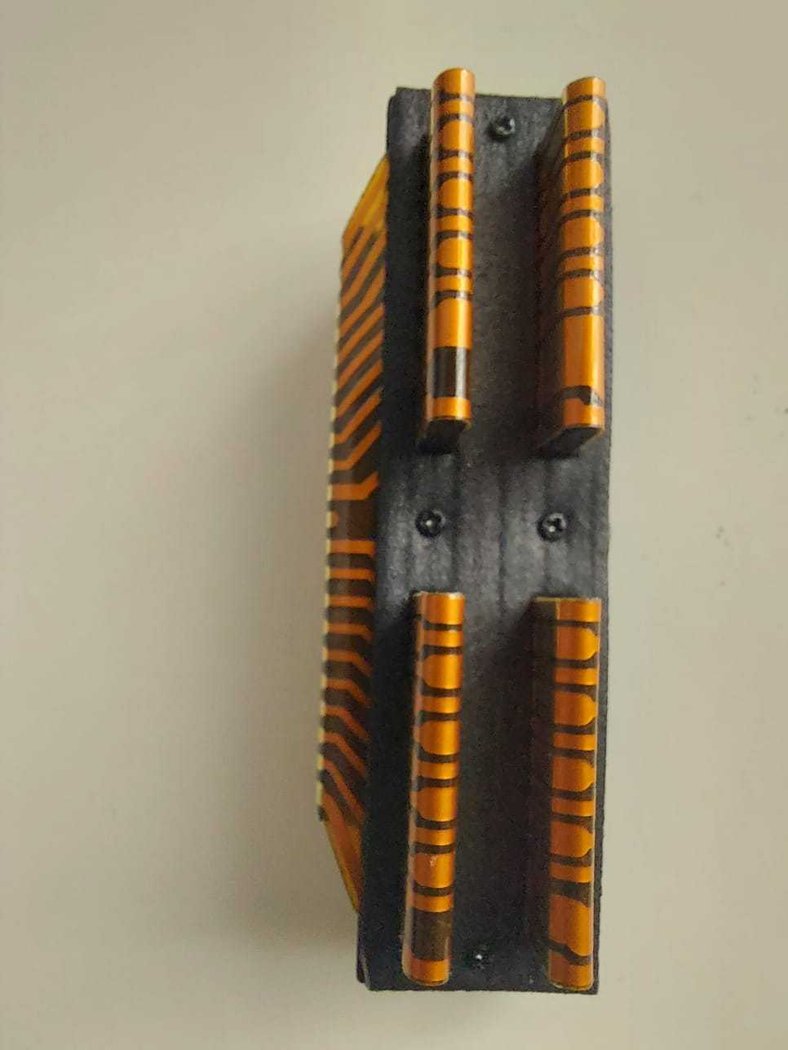
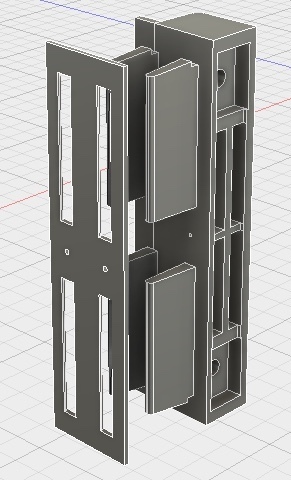
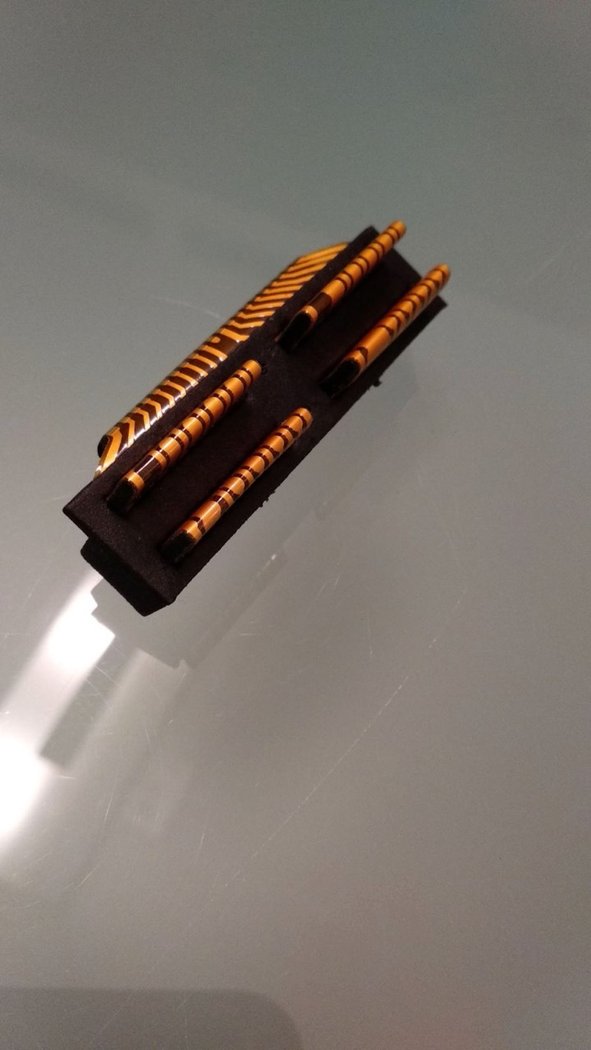
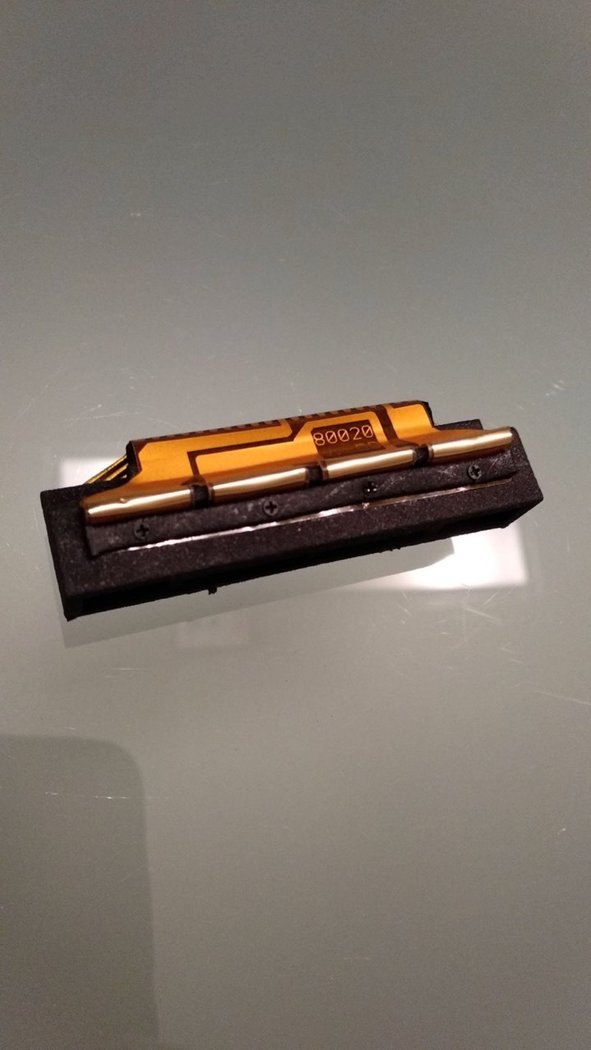
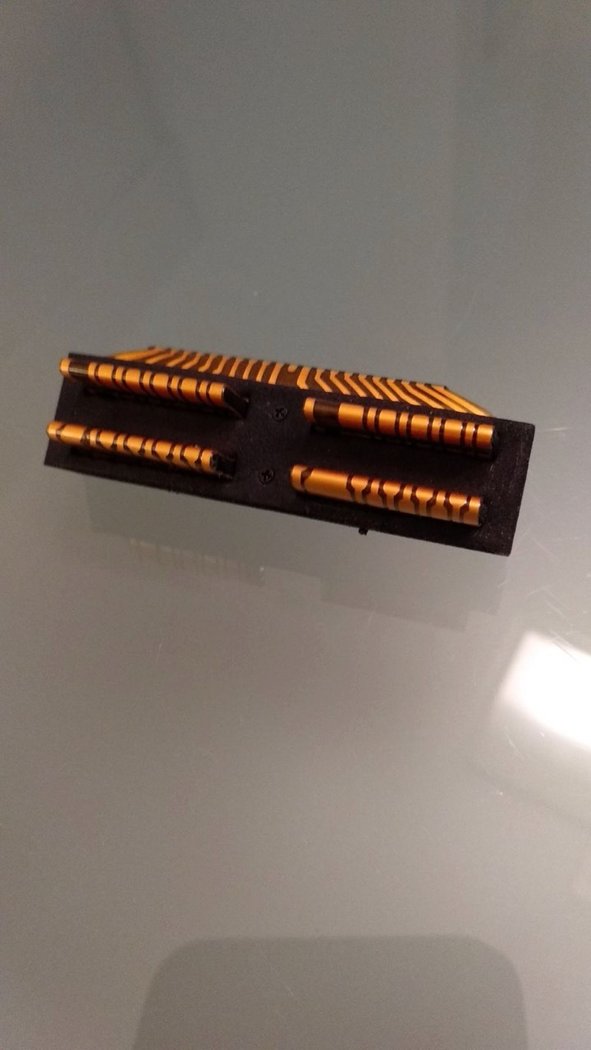
Calculadoras Calculator Accessories Módulo conector de baterías y puertos de expansión de HP-41c/cv/cx
Módulo conector de baterías y puertos de expansión de HP-41c/cv/cx
N.º de producto: Flex-PCB Assembled
En existencias
se puede enviar en 10 días
Precio anterior 55,00 €
44,00 €
El precio incluye el IVA
Formas de entrega disponibles: Courier España, Courier Zona 1, Courier Zone 2, Courier Zona 3, Courier Zone 4, Carta, Small item outside EU, Overseas traceable, Letter, Entrega gratuita España


Accesorios
| Producto | Nota | Estado | Precio | ||
|---|---|---|---|---|---|
|
|
22,00 € * | |||
|
|
44,00 € * | |||
|
* Los precios incluyen el IVA
Mostrar detalles del accesorio
|
|||||
 Kit de reparación para conector de baterías y puertos de expansión de las HP-41c/cv/cx
 Módulo conector de baterías y puertos de expansión de HP-41c/cv/cx Plano
Los clientes que han comprado este producto también han comprado
 |
 |
 |
 |
 |
 |
* Los precios incluyen el IVA
Examine también estas categorías: Accesorios, Calculadoras Clásicas, El Rincón de la HP41, Inicio, Corroded Battery contacts, Corroded circuit paths, Damaged screen - not all segments light on, HP 41C Repair, Científicas, The Calculator Store Offers