")
")
- The Calculator Store Offers
- Scientific calculators
- Financial calculators
- Graphical Calculators
- HP Calculator Repair Service
- Classical HP Calculators
- The HP41 Corner
- The HP Prime Corner
- The HP15c Corner
- The HP12c Corner
- Calculator Accessories
- Selection guide
- Special offers
- Calculator blog
- Blog in Spanish
- Site Map
- Calculator Reviews
- Books
- Education
- why RPN?
- Cheap&cheerful calculators
-
The Calculator Store Club

- Audio

Calculator Types Calculator blog Posts on topic: Repair kit
Calculator blog
Musings and comments about our common interest
HP41c types of repair
We usually get questions about repairing defective HP41c. It is usually Ignacio who repairs them, since he is much more knowledgeable than any other I know; but there are many repairs that can be performed by anyone of you - if you just dared to open the calculator. Let’s discuss the different cases, and tell what is difficult to repair from what is easy.
Rust in the battery contacts. This is one of the repairs that I would consider easy, and that can be done by any of you. Please refer to this product in the website
Calculator would not start, but the battery contacts are OK. First check battery polarity. Second, is your calculator a full nut (square screen corners) or half nut (round screen corners). If full nut (meaning it has two circuits, pressed one agains the other by the two lower screws that are hidden by the rubber pieces. This is by far the most frequent problem, and it is called “broken lower posts”. These can be easily repaired by yourself (unless someone else tried before and destroyed the assembly). This is many times one of the most satisfactory repair: a little glue, a little time waiting for it to cure, assemble it back, and voilà - a previously lost calculator is back at work
Screen problems. It can be easy or difficult. If there is a black part of the screen, consider it difficult - you’ll have to get a donor for the screen, and the soldering and desoldering involved is not for the faint-hearted. If there is a blurred set of segments, it may suffice with cleaning the PCB and making sure that the circuit connects well to the main board - that may solve the issue.
Keyboard issues. Can be easy or difficult, but it is worth trying it yourself to check. There are different kind of issues: bad contacts and bad clicking action of the keys (some times can be cured with cleaning -easy- but other times the key dome is broken -difficult and a donor is required). In general, opening, cleaning and adjusting it is good practice and doesn’t damage anything.
Finally, if the repair didn’t work, or you feel you can’t do it yourself, you can always contact Ignacio through us: sales@thecalculatorstore.com
Repair kit is back
We have just been informed that the repair kits are ready for shipment. We have a limited supply, and some of our customers that asked to be informed of the arrival of the kits have already placed an order for it.
But as the number of units is relatively low, you would better place the order soon.
Regarding installation, I have learned several tricks the hard way:
- It is extremely important to file away all the rest of the rivets from the original film. If not, it won’t adhere well.
- In order to do a proper bending, you need to punch little holes in the non-copper parts of the film.
- If at all possible, do the “cooking” suggested in the manual
- Patience, patience…
hp41 battery repair pack
We have heard from the producer that we will receive the next batch of repair packs for the HP41c battery bay will arrive mid November. The designer and producer ended the last batch some time ago, and ordered another.
You can bet that order sizes are small, and priority chez the factory is low. There are not too many users willing to repair their HP41c. Most of them don't know that a proper solution exists for their crippled calculators.
Also, there are only 4 units left worldwide of CL circuits of the latest version (v4): Monte has 3, and I have one. It is already installed in a wonderful HP41c, and waiting for a customer. This is the last I'll create in a lot of time!
Monte has not decided yet if to produce more boards, and if so, which changes from V4.
Comments on HP41c battery repair kit

The repair kit for the battery bay of the HP41c (flex kit) is having good acceptance among users, but it is important to know several things upfront to avoid failing:
- The first consideration is that this is a DIY undertaking. Some users have been put off when receiving the adhesive sheet - they expected to receive the assembled thing that you can see in the picture.
- While it is not difficult, and it is quite short to do, don’t try to do it if you have always failed when DiY’ing! You will need to have some steady handling when adhering the film to the substrate. It is not difficult, but forget it if you suffer from Parkinson!
- The second: you need to follow through the instructions of the installation manual, that you can find in the article. Please read them through.
- Please make sure that you do good bends. Spend your time there and you will be rewarded with a good fit. Specially important are the negative bends, that will ensure adherence in the difficult-to-reach cavities.
- Avoid the desire to use a sharp object to push the film to reach the bottom of the corners. You should have done better bends instead. The danger with the sharp object is that you can easily break one copper line - it has happened to me once and you will only notice it when you connect the module in the affected hole. I have it affecting module 4 in my HP41CL, but I am using only modules 1 and 2 (time and infrared, if you wanted to know). As the machine is a HP41CL, I don’t need anything else - and I still have bay three for the HP-IL when I need connection to my multimeter.
- There is a recommendation to heat it at low temperature in an oven to get a better long term fit. It is a little more effort, but try it too.
- The flex film is not immune to rusting. Don’t leave the machine with the batteries if you’re not using it - just like any other HP41c! The only good thing in that case is that, now, you know how to repair it!!
Repair in old HPs - things to avoid
Due to our work in converting HP41c into HP41CL, we have had to buy many calculators in internet. This has resulted in a number of calculators that were in less than pristine state. In fact, many of them had been repaired, and had fallen in the same traps again and again (by the way, the same traps I fell myself when starting, until a friend took me out of that ignorance!)
The typical part that always breaks first in a HP41 is the lower screw posts. The second is -guess it?- the upper screw post, but this time not the support in the main body of the calculator, but the part that supports the head of the screw in the back side of the calculator.
The third part that tends to be damaged is the battery bay contacts - but we have discussed it already - see our Repair kit page for more detail and how to solve the problem.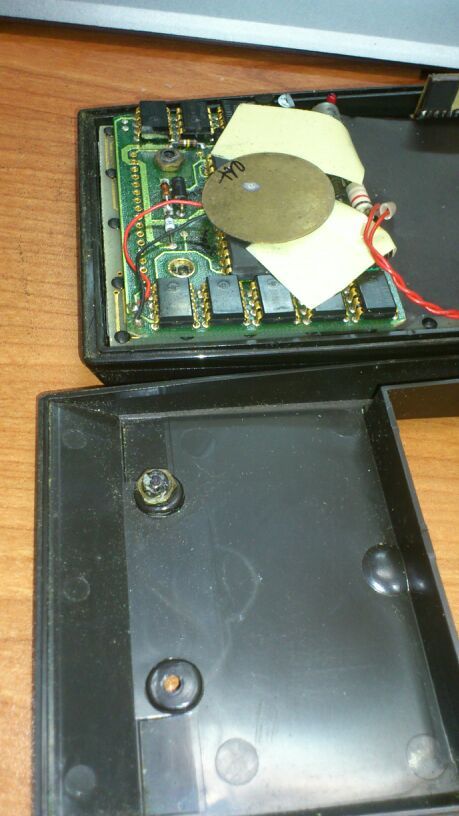
And when the problem happens, everyone retorts to the typical glue these days: a Cyanoacrylate compound, that dissolves plastic and makes a mess of the rest (apart from not being too good in resistance once dried, due to the damaging of the plastic used by HP. Here is an example on our right: you can see the state in which the posts are now.
In the versions of the HP41c that can be converted in HPCL, these posts are abosolutely critical to ensure that the board and the main body of the calculator make good contact.
On the other hand, a calculator that seems to be completely broken can in many cases be repaired with just putting good attention in fixing the posts, so that even pressure is achieved.
It is good practice not to tighten too much the screws once repaired. No only due to the possibility of breaking them beyond repair (you need to be aware that these calculators are 30 years old already!), but because it affect the much-loved HP keyboard feel! The difference can be appreciated between keys in the middle of the keyboard and keys just above the posts. This is not too agreable!
Coming back to the repair. The key for avoiding the problem just cited is to use a "hybrid" type of glue. Here below you can see an example that works well:
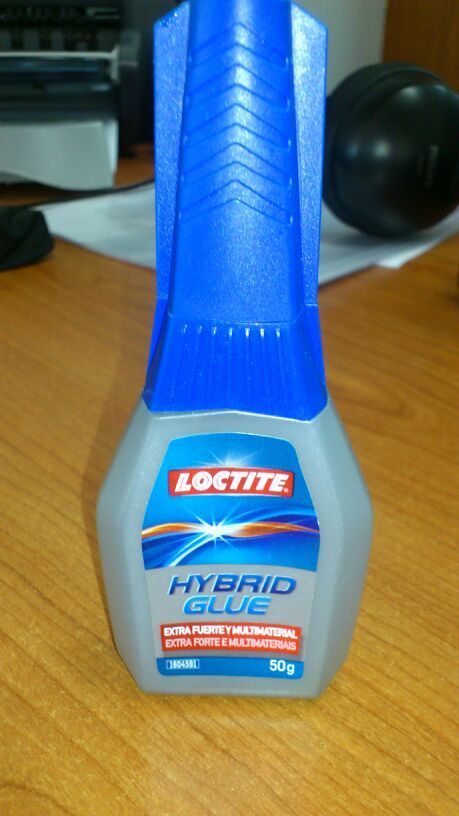 This product does not dissolve the plastic and creates a lasting bond. Test it!
The HP41c repair kit is back!
This is just to inform that we have received a new lot of HP41c battery bay repair kits!
The production lots take some time to produce, but still it is a magnificent product that allows your loved calculator to have a new lease of life. It also can give you the feeling of achievement when you are able to revive a 30-year old workhorse instead of disposing of it and buying one new - as it is the case with the rest of the electronics nowadays.
The HP41c repair kit stock finished in 4 hours
I had just received 10 more units of the flexible adhesive circuit used to repair the destroyed battery bays of many HP41c machines. I put it up in the website at 3h15. The 10 units had flown by 19h00 !
When talking with the producer, I asked him for 15 units more - but he only has 10 for me. I have ordered them immediately.
This is a fantastic part, that has helped to revive many calculators. It is a pity that so many HP41c, for many the best calculator ever, are in non-working condition due to rust contacts. This product is well conceived, elengant in its application, works well and lasts long..
HP 41c battery bay repair kit
The current batch of HP 41c battery connector repair kit are leaving us much faster than the first time. There was a comment in the web, whereby the user found that it was quite difficult to find the product in the search engines. I will now put it as first in the accessories list, so that it is easier to find it in the web; and also will announce it in google adwords.
If you have not seen it, I will make a brief description of it. If you have seen HP 41c/cv/cx in internet, you will find that a good number of them have rusted connectors. In many cases, this rusting impedes connection and therefore the calculator does not function. Many otherwise good HP 41c are not used and sold at discount prices, while the rest of the circuit does work (there are very few calculators that have a real circuit failure - it is either the connectors or the screw posts that are broken and do not provide enough pressure)
Diego Diaz designed a printed circuit in a foldable, adhesive material, that can be used to replace the original, rusted one. He has also prepared a short instruction sheet that make clear how to do it. So far, all users that have bought it from us have succeeded. The HP 41c repair kit is for everyone!
Be sure to download the instruction sheet that you can find in our website to make sure you don’t spoil your repair kit circuit.
You can see in the pictures that the result is impressive. However, I think that it is important to follow the instruction to “cook” it at 90º, so that the bends in the flexible circuit remain.
It is a pity that so many calculators are thrown out and discarded, when a fast, clean and elegant solution is available.
Should you think that it is still too much for you, you can try contacting us to do the repair for you at sales@thecalculatorstore.com, if you are in Europe, or to www.fixthatcalc.com if you are located in the US. They have fixed rates for repair, while we do prefer to see the calculator and then quote (in many cases a few pictures will suffice)
The HP 41c is the most successful calculator in HP’s history. While HP has never revealed the total number of 41s produced, it seems to be week over the million. Due to their robustness, many of the are still in use. And due to its easy programmability, they can still be used successfully for many applications where a graphic calculator is not required.