11 - 20 de 61 resultados

Nuevo

Conector zebra para la reparación del las HP41c full nut

N.º de producto: Zebra PCB

En existencias

Precio anterior 16,00 €
12,80
El precio incluye el IVA


Formas de entrega disponibles: Courier Zona 1, Courier Zone 2, Courier Zona 3, Courier Zone 4, Carta, Small item outside EU, Entrega Canarias/Baleares, Overseas traceable, Letter, Entrega gratuita España

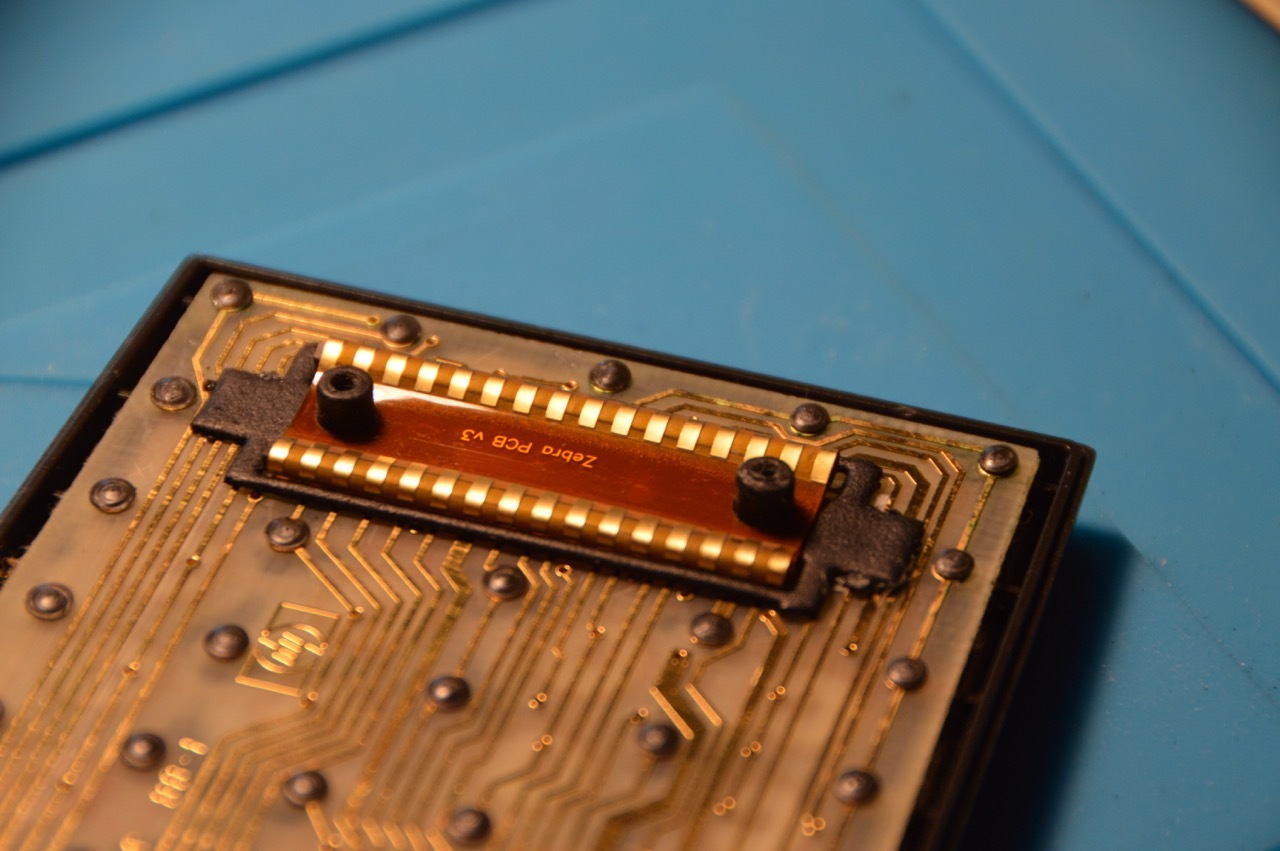
This piece is for repair of HP41c full nut calculator, substituting the damaged or corroded zebra connector that links the main board with the processor circuit. New design in a single piece, with 50 times more conductivity than elastomeric contacts.

Installation instructions

Open the calculator

First remove the rubber feet. To do so, use a small, flat screwdriver and introduce it beneath the rubber, taking care of pulling also the adhesive sheet that glues the rubber to the calculator. Try to make here a good job because usually you will have to reuse the rubber feet when you're done. Put the rubber feet aside so that they don't hinder the work (they have an uncanny ability to adhere to shirts, tools, calculators and eventually get lost.

Unscrew carefully and slowly the four screws beneath the rubber feet. Turn gently the screws: they operate on plastic that, after 30 years, is very brittle and fragile. It is very easy to break a screw post or "overdo" the thread.

Remove the back side of the calculator and put it aside. For comfort, remove also the intermediate piece between backside and main body. Later we will take care of putting it the right way, since it has two ways.

Remove the processor.

There are two possible cases:

  • In the old calculators the processor circuit is pressed down to the main circuit by a couple of nuts screwed on the plastic posts. The post do not have any thread themselves - the thread is carved by the nut itself. These have to be removed with care because you risk to break the post, by unscrewing counterclockwise. More than a couple of in and outs and the post will break for sure. Once done, lif the circuit. 
  • In the newer ones, this pressure is exerted by two cylinders around the screw holes in the back side of the case. These are not present in the old models. You just need to lift the circuit.

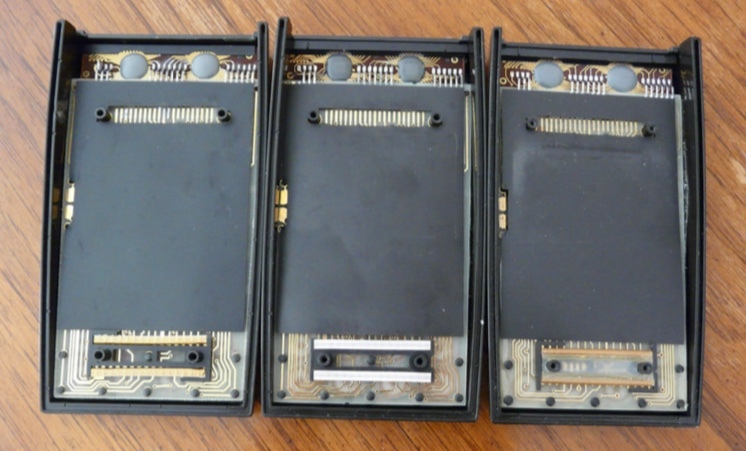
Once the circuit is lifted, you will see the zebra connectors. These may be of three different types (thanks to monte Dalrymple for the image)

zebra_types

  • The left one can be reused if treated with care and not corroded - clean it with paper embedded in Caig Deoxit. However, it doesn't work in some circumstances and there is no clear reason why.
  • The second is completely useless and will need to be replaced. Every time.
  • The thirs type is the best of the lot and can be reused with care if not corroded. It is also sensitive to friction and can be easily damaged. Discard if corroded.
 
Now you have to lay the new zebra. As it is simmetrical, it works all 4 ways. Make sure it goes to the end of the tubes on both sides. All circuit lanes should line up perfectly with the circuit pad below. Once laid down the zebra, put the processor circuit on top and press down to ensure contact.
 
manuales_-_3
 
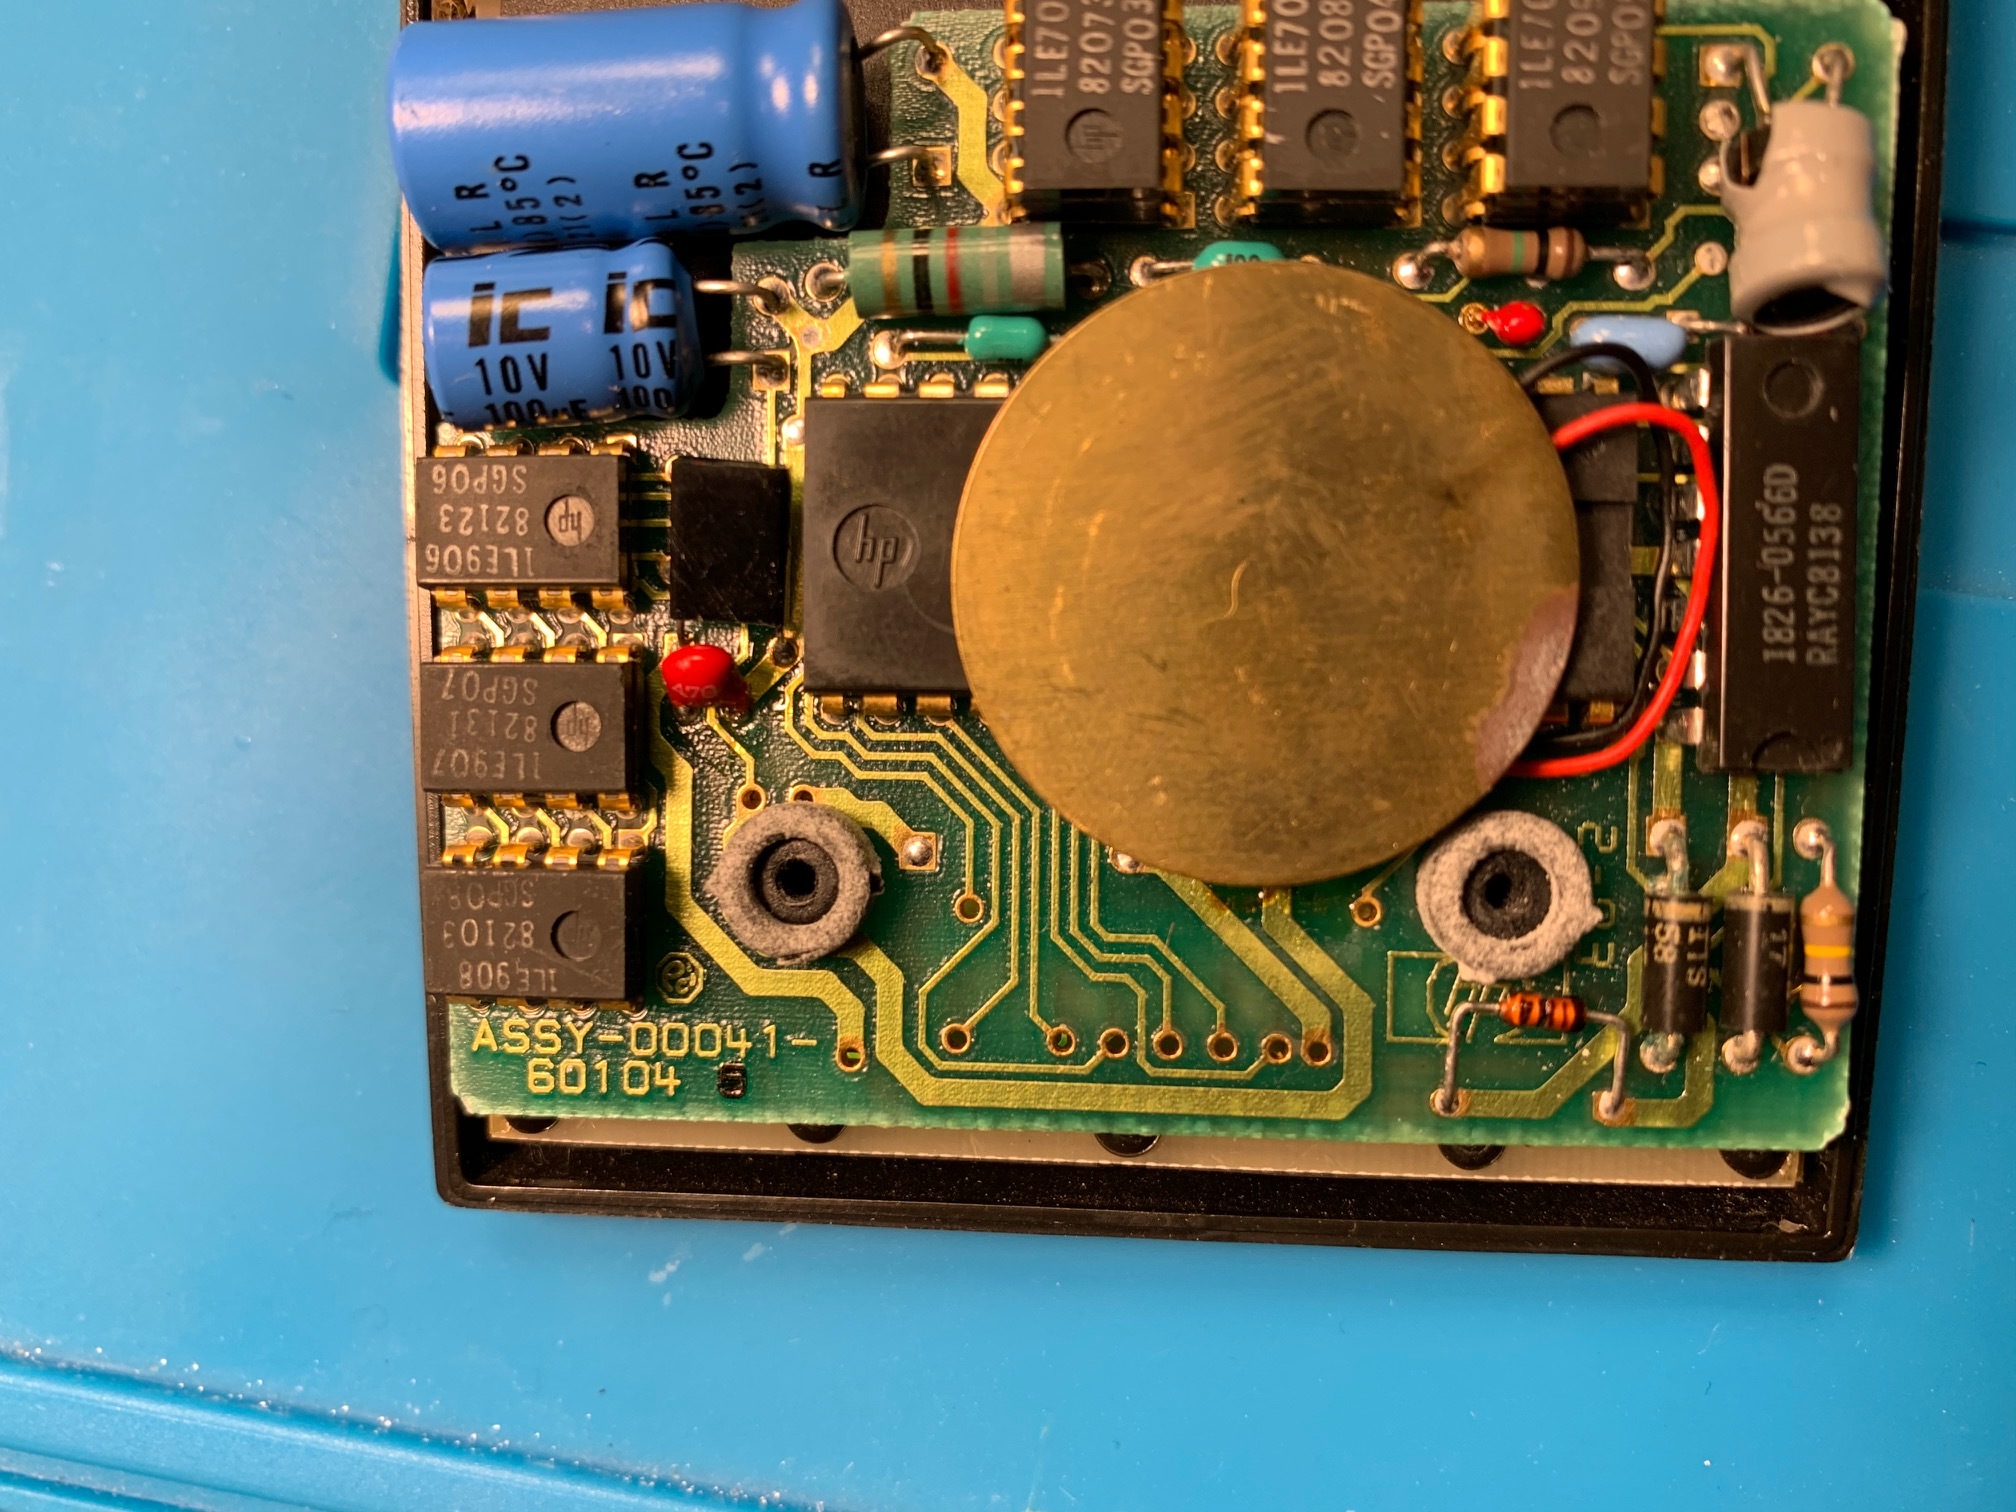
For the cases where there were nuts, we recommend not using the nuts anymore and replace them by one of our spacers. You can try several height measures until you find the one that closes perfectly the calculator and yet pushes down the circuit to ensure good contact.
 
image2-4

Reassembling - closing the calculator

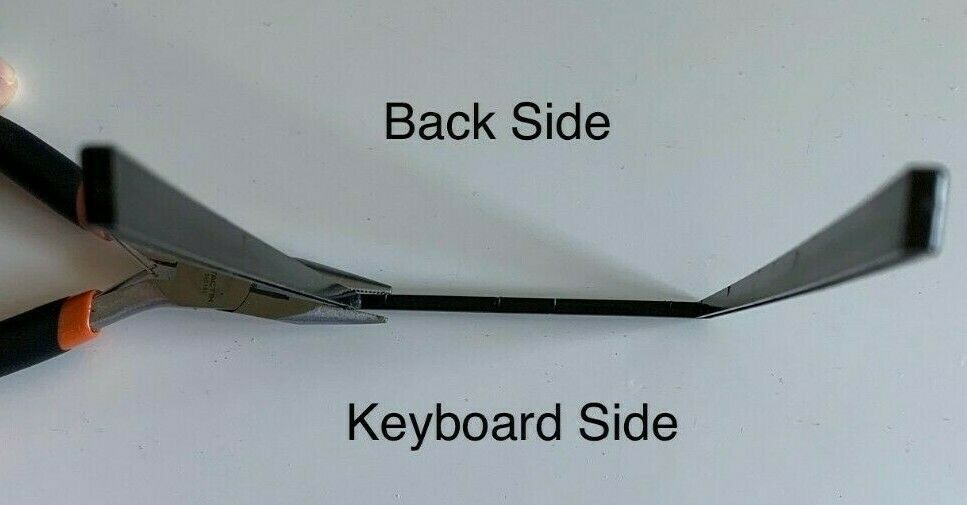
You can now reassemble the calculator. Put the keyboard face down on the table. Then, put the intermediate piece with the open side upwards, taking care that the wider part is up, like "opening up"  (this piece has a slight angle when looked from the front of the open side). This is important for the calculator to close properly. See picture.

intermediario

Then put the back side on top. You can start by any screw - I usually start by the upper ones. If everything is ok, you will be able to screw through the piece and into the calculator. Screw carefully not to break the threads. If that happens, repair will be substantially more complex and will need the upper post repair piece and some drilling.

And that's it!!


Información de producto adicional


Accesorios

Producto Nota Estado Precio
Zebra + Lower post Zebra + Lower post
26,00 € *
Módulo conector de baterías y puertos de expansión de HP-41c/cv/cx Módulo conector de baterías y puertos de expansión de HP-41c/cv/cx
44,00 € *
Kit de reparación para conector de baterías y puertos de expansión de las HP-41c/cv/cx Kit de reparación para conector de baterías y puertos de expansión de las HP-41c/cv/cx
22,00 € *
Spacer set para reparar HP41c Spacer set para reparar HP41c
10,00 € *
Módulo conector de baterías y puertos de expansión de HP-41c/cv/cx Plano Módulo conector de baterías y puertos de expansión de HP-41c/cv/cx Plano
44,00 € *
* Los precios incluyen el IVA
Mostrar detalles del accesorio

Los clientes que han comprado este producto también han comprado

Pies para HP41c - pack de cuatro
4,00 / 4 unidad(es) *
Kit de reparación para conector de baterías y puertos de expansión de las HP-41c/cv/cx
22,00 *
Módulo conector de baterías y puertos de expansión de HP-41c/cv/cx
44,00 *
Muelle para cargador de HP41c
3,00 *
Conjunto de tornillos para HP41
3,00 / 4 unidad(es) *
Tapa lateral para HP 41c
6,00 *
* Los precios incluyen el IVA

Examine también estas categorías: El Rincón de la HP41, Accesorios, Inicio, HP 41C Repair, Corroded or broken zebra contacts, Corroded circuit paths, Damaged screen - not all segments light on, The Calculator Store Offers

Módulo conector de baterías y puertos de expansión de HP-41c/cv/cx

N.º de producto: Flex-PCB Assembled

En existencias
se puede enviar en 10 días

Precio anterior 55,00 €
44,00
El precio incluye el IVA


Formas de entrega disponibles: Courier España, Courier Zona 1, Courier Zone 2, Courier Zona 3, Courier Zone 4, Carta, Small item outside EU, Overseas traceable, Letter, Entrega gratuita España

Kit de reparación para los conectores de batería y puertos de expansión de la HP-41c.

Módulo ya montado en bastidor de impresión 3D para los conectores de batería y puertos de expansión de la HP-41c. Envío incluído en el precio para Unión Europea. La opción Parts incluye el circuito flex, pieza para módulos, pieza para sujetar el circuito, pieza para clipar, 6 tornillos.

El circuito impreso adhesivo viene ya montado en un módulo de batería y puertos de expansión impreso en 3D. El color estándar es negro, pero se puede pedir en blanco, como en las fotos.

Envío incluído en el precio para dentro de la Unión Europea

Please be sure to eliminate rusting from the main board with Caig DeOxit (best), WD-40 (not as good) or other suitable cleaner, applied with cotton buds.

Save your HP41c !!


Instructions for battery and ports module

Open the calculator

First remove the rubber feet. To do so, use a small, flat screwdriver and introduce it beneath the rubber, taking care of pulling also the adhesive sheet that glues the rubber to the calculator. Try to make here a good job because usually you will have to reuse the rubber feet when you're done. Put the rubber feet aside so that they don't hinder the work (they have an uncanny ability to adhere to shirts, tools, calculators and eventually get lost.

Unscrew carefully and slowly the four screws beneath the rubber feet. Turn gently the screws: they operate on plastic that, after 30 years, is very brittle and fragile. It is very easy to break a screw post or "overdo" the thread.

Remove the back side of the calculator and put it aside. For comfort, remove also the intermediate piece between backside and main body. Later we will take care of putting it the right way, since it has two ways.

Remove the old piece

Now it is the time to remove the damaged battery-ports module. To do that, first remove all 4 module covers or modules; then pull the module vertically and carefully, since there are four plastic tabs in the calculator used to secure it, and it you do horizontal movements you can bend or break them. Yes, they have also became brittle!

Sometimes grit and grease have "glued" the old piece to the backside. It will be very difficult to remove it. Be aware that it is NOT glued by design - this is an unwanted effect of grease, grit and time. To remove the piece in this case, try pushing up with a screwdriver on the back module connectors. Increase upward force until eventually it separates from the body. Clean the backside plastic with water and soap or a lenses cleaner. It may happen that one or both of the screw supports are broken. You will have to repair it beforehand with the broken back repair piece.

Once the backside is clean and free from the old battery module, insert the new one carefully, making sure that the 4 vertical tabs are not bent. This is done without the module covers in. Be sure that it goes down to the calculator body. 

After it has been installed, put the module covers or modules so that they push the piece in place.

Reassembling

You can now reassemble the calculator. Put the keyboard face down on the table. Then, put the intermediate piece with the open side upwards, taking care that the wider part is up, like "opening up"  (this piece has a slight angle when looked from the front of the open side). This is important for the calculator to close properly. See picture.

Then put the back side on top. You can start by any screw - I usually start by the upper ones. If everything is ok, you will be able to screw through the piece and into the calculator. Screw carefully not to break the threads. If that happens, repair will be substantially more complex and will need the upper post repair piece and some drilling.

And that's it!!


Información de producto adicional


Accesorios

Producto Nota Estado Precio
Kit de reparación para conector de baterías y puertos de expansión de las HP-41c/cv/cx Kit de reparación para conector de baterías y puertos de expansión de las HP-41c/cv/cx
22,00 € *
Módulo conector de baterías y puertos de expansión de HP-41c/cv/cx Plano Módulo conector de baterías y puertos de expansión de HP-41c/cv/cx Plano
44,00 € *
* Los precios incluyen el IVA
Mostrar detalles del accesorio

Los clientes que han comprado este producto también han comprado

Pies para HP41c - pack de cuatro
4,00 / 4 unidad(es) *
Tapa lateral para HP 41c
6,00 *
Muelle para cargador de HP41c
3,00 *
Pieza para reparación de parte trasera de HP41c
17,00 *
Kit de reparación para conector de baterías y puertos de expansión de las HP-41c/cv/cx
22,00 *
Conjunto de tornillos para HP41
3,00 / 4 unidad(es) *
* Los precios incluyen el IVA

Examine también estas categorías: Accesorios, Calculadoras Clásicas, El Rincón de la HP41, Inicio, Corroded Battery contacts, Corroded circuit paths, Damaged screen - not all segments light on, HP 41C Repair, Científicas, The Calculator Store Offers

Módulo conector de baterías y puertos de expansión de HP-41c/cv/cx Plano

N.º de producto: Flex-PCB AssembledFlat

En existencias

Precio anterior 55,00 €
44,00
El precio incluye el IVA


Formas de entrega disponibles: Entrega gratuita, Courier España, Courier Zona 1, Courier Zone 2, Courier Zona 3, Courier Zone 4, Carta, Small item outside EU, Entrega Canarias/Baleares, Overseas traceable, Letter, Entrega gratuita España

Kit de reparación para los conectores de batería y puertos de expansión de la HP-41c.

Módulo ya montado en bastidor de impresión 3D para los conectores de batería y puertos de expansión de la HP-41c. Envío incluído en el precio para Unión Europea. La opción Parts incluye el circuito flex, pieza para módulos, pieza para sujetar el circuito, pieza para clipar, 6 tornillos.

Esta es la version plana, cuando las cúpulas de los tornillos están rotas y se liman a ras.

El circuito impreso adhesivo viene ya montado en un módulo de batería y puertos de expansión impreso en 3D. El color estándar es negro, pero se puede pedir en blanco, como en las fotos.

Envío incluído en el precio para dentro de la Unión Europea

Please be sure to eliminate rusting from the main board with Caig DeOxit (best), WD-40 (not as good) or other suitable cleaner, applied with cotton buds.

Save your HP41c !!


Instructions for battery and ports module

Open the calculator

First remove the rubber feet. To do so, use a small, flat screwdriver and introduce it beneath the rubber, taking care of pulling also the adhesive sheet that glues the rubber to the calculator. Try to make here a good job because usually you will have to reuse the rubber feet when you're done. Put the rubber feet aside so that they don't hinder the work (they have an uncanny ability to adhere to shirts, tools, calculators and eventually get lost.

Unscrew carefully and slowly the four screws beneath the rubber feet. Turn gently the screws: they operate on plastic that, after 30 years, is very brittle and fragile. It is very easy to break a screw post or "overdo" the thread.

Remove the back side of the calculator and put it aside. For comfort, remove also the intermediate piece between backside and main body. Later we will take care of putting it the right way, since it has two ways.

Remove the old piece

Now it is the time to remove the damaged battery-ports module. To do that, first remove all 4 module covers or modules; then pull the module vertically and carefully, since there are four plastic tabs in the calculator used to secure it, and it you do horizontal movements you can bend or break them. Yes, they have also became brittle!

Sometimes grit and grease have "glued" the old piece to the backside. It will be very difficult to remove it. Be aware that it is NOT glued by design - this is an unwanted effect of grease, grit and time. To remove the piece in this case, try pushing up with a screwdriver on the back module connectors. Increase upward force until eventually it separates from the body. Clean the backside plastic with water and soap or a lenses cleaner. It may happen that one or both of the screw supports are broken. You will have to repair it beforehand with the broken back repair piece.

Once the backside is clean and free from the old battery module, insert the new one carefully, making sure that the 4 vertical tabs are not bent. This is done without the module covers in. Be sure that it goes down to the calculator body. 

After it has been installed, put the module covers or modules so that they push the piece in place.

Reassembling

You can now reassemble the calculator. Put the keyboard face down on the table. Then, put the intermediate piece with the open side upwards, taking care that the wider part is up, like "opening up"  (this piece has a slight angle when looked from the front of the open side). This is important for the calculator to close properly. See picture.

Then put the back side on top. You can start by any screw - I usually start by the upper ones. If everything is ok, you will be able to screw through the piece and into the calculator. Screw carefully not to break the threads. If that happens, repair will be substantially more complex and will need the upper post repair piece and some drilling.

And that's it!!


Información de producto adicional


Accesorios

Producto Nota Estado Precio
Kit de reparación para conector de baterías y puertos de expansión de las HP-41c/cv/cx Kit de reparación para conector de baterías y puertos de expansión de las HP-41c/cv/cx
22,00 € *
Módulo conector de baterías y puertos de expansión de HP-41c/cv/cx Módulo conector de baterías y puertos de expansión de HP-41c/cv/cx
44,00 € *
Conector zebra para la reparación del las HP41c full nut Conector zebra para la reparación del las HP41c full nut
12,80 € *
* Los precios incluyen el IVA
Mostrar detalles del accesorio

Los clientes que han comprado este producto también han comprado

Pieza para reparar postes superiores
16,00 *
Pies para HP41c - pack de cuatro
4,00 / 4 unidad(es) *
Pieza para reparar postes inferiores
16,00 *
Pieza para reparación de parte trasera de HP41c
17,00 *
Kit de reparación para conector de baterías y puertos de expansión de las HP-41c/cv/cx
22,00 *
Conjunto de tornillos para HP41
3,00 / 4 unidad(es) *
* Los precios incluyen el IVA

Examine también estas categorías: Accesorios, Calculadoras Clásicas, El Rincón de la HP41, Inicio, Corroded Battery contacts, Corroded circuit paths, Damaged screen - not all segments light on, Científicas, HP 41C Repair, The Calculator Store Offers
Nuevo

Pieza para reparar postes superiores

N.º de producto: UpperPostRepair

En existencias

16,00
El precio incluye el IVA


Formas de entrega disponibles: Carta, Small item outside EU, Entrega Canarias/Baleares, Overseas traceable, Entrega gratuita España

Upper Post repair 

IMG_4690Material needed

  • Upper post repair piece (latest version in side picture, since previous version collided slightly with back case)
  • Clothes' peg

Let's assume that both posts are broken or cracked. The effect of this cracking is that the screws do not do their job. Usually, using longer screws may help, but this typically is short lived since the cracks will continue downwards. Once the pressure between both halves is softened, the calculator doesn't work anymore. The solution is to repair the broken posts. 

Old methods to repair broken post is to glue them (but this doesn't hold together too long) and to tie them down with very small gauge copper cable, applying pressure so that it holds together. This may solve some cases, but not when the screw path has been destroyed - maybe due to strong tightening of the screws.

Other repair methods have been proposed, including drilling down the screw and placing in its place a cylinder with screw path, glued in place. We tried this method but there was a problem: the torque used to screw resulted in cracked glue and the cylinder separating from the substrate - every time.

Our method was devised with three goals in mind:

  1. Try to avoid the torque from the screw forcing on the glue with the substrate
  2. Try to ensure that the front part of the calculator is pulled up when screwing the back side on.
  3. Try to be compatible with both fullnut and halfnut version

The piece that we have designed requires drilling the old posts to 3,5mm below the keyboard ciruit level. The design on the piece is such that the cylindrical body will be glued to the rest of the screw post; and the surface of the piece can be glued to the keyboard circuit, so that the torque on the substrate is avoided (it also helps that torque is also resisted by the other post, when using the full piece)

When gluing the piece, there are several precautions that need to be taken:

80806dea-8f86-418a-ac37-128e1b53086b

  • Be sure of covering the zebra circuit part with tape -we don't want the glue to cover it.
  • Cover also all nearby pin holes of the keyboard. If glue comes into one such hole, the key will not register. In severe cases, the key will be down all the time, glued in place!
  • When applying pressure, use clothes' pegs to hold the piece in place, preferably on the outer side.
  • Try to place the other side of the pegs away from the keys of the keyboard - it may damage them permanently.
  • Use E6000 jewelry glue. We prefer black over clear just for clarity of repair.
  • Let it cure overnight.
  • Remove the tape.
  • Assemble the calculator and test.


We recommend to repair both posts at the same time. 

Alternatively, you can cut the other side of the 2 post piece with a tweezer and glue in place the rest of the piece.

Información de producto adicional


Accesorios

Producto Nota Estado Precio
Soporte teclado para reparaciones Soporte teclado para reparaciones
25,00 € *
* Los precios incluyen el IVA
Mostrar detalles del accesorio

Los clientes que han comprado este producto también han comprado

Pies para HP41c - pack de cuatro
4,00 / 4 unidad(es) *
Pieza para reparar postes inferiores
16,00 *
Conjunto de tornillos para HP41
3,00 / 4 unidad(es) *
Pieza para reparación de parte trasera de HP41c
17,00 *
Zebra + Lower post
26,00 *
Módulo conector de baterías y puertos de expansión de HP-41c/cv/cx
44,00 *
* Los precios incluyen el IVA

Examine también estas categorías: Accesorios, El Rincón de la HP41, Inicio, HP 41C Repair, Broken upper screw posts

Muelle para cargador de HP41c

N.º de producto: Spring

En existencias

3,00
El precio incluye el IVA


Formas de entrega disponibles: Courier España, Courier Zona 1, Courier Zone 2, Courier Zona 3, Courier Zone 4, Carta, Small item outside EU, Entrega Canarias/Baleares, Overseas traceable, Letter, Entrega gratuita España

Muelle en acero inoxidable 304 para reemplazar muelles rotos o oxidados en portabaterías de HP41c

Información de producto adicional


Los clientes que han comprado este producto también han comprado

Pies para HP41c - pack de cuatro
4,00 / 4 unidad(es) *
Módulo conector de baterías y puertos de expansión de HP-41c/cv/cx
44,00 *
Tapa lateral para HP 41c
6,00 *
Kit de reparación para conector de baterías y puertos de expansión de las HP-41c/cv/cx
22,00 *
Conector zebra para la reparación del las HP41c full nut
12,80 *
Conjunto de tornillos para HP41
3,00 / 4 unidad(es) *
* Los precios incluyen el IVA

Examine también estas categorías: Accesorios, El Rincón de la HP41, HP 41C Repair

HP41 overlays

N.º de producto: HP41cOverlay

En existencias

desde 25,00
El precio incluye el IVA
Formas de entrega disponibles: Carta, Small item outside EU, Entrega gratuita España

Información de producto adicional


Los clientes que han comprado este producto también han comprado

Conjunto de tornillos para HP41
3,00 / 4 unidad(es) *
Pies para HP41c - pack de cuatro
4,00 / 4 unidad(es) *
Tapa lateral para HP 41c
6,00 *
Módulo conector de baterías y puertos de expansión de HP-41c/cv/cx
44,00 *
Muelle para cargador de HP41c
3,00 *
Stat module
45,00 *
* Los precios incluyen el IVA

Examine también estas categorías: Accesorios, El Rincón de la HP41, Calculadoras Clásicas, Inicio
Nuevo

HP12c tapa de baterías

N.º de producto: HP12c cover

En existencias

Precio anterior 12,00 €
9,00
El precio incluye el IVA


Formas de entrega disponibles: Courier España, Courier Zona 1, Courier Zone 2, Courier Zona 3, Courier Zone 4, Carta, Small item outside EU, Entrega Canarias/Baleares, Entrega gratuita España

Tapa de baterías de HP12C (para modelo de 3 pilas botón LR44, modelo original)

Impresión 3D. Vale también para HP10C, HP11C, HP15C, HP16C.

No vale para HP12c Platinum, HP12C con pilas CR2032, o HP15C Limited Edition.

Información de producto adicional


Los clientes que han comprado este producto también han comprado

Tapa lateral para HP 41c
6,00 *
Pila LR44 para HP17BII, HP12c antiguas - pack de 3
3,00 / 3 unidad(es) *
Funda de cuero para HP17bII y otras Pioneer
21,00 *
Porta baterías para serie Spice 3D
21,00 *
Test overlay for HP Voyager calculators
30,00 *
* Los precios incluyen el IVA

Examine también estas categorías: Accesorios, Calculadoras Clásicas, El Rincón de la HP15c, El Rincón de la HP12c

Tornillo inferior largo - inox

N.º de producto: lowerscrew

En existencias

1,00 / 2 unidad(es)
El precio incluye el IVA


Formas de entrega disponibles: Courier España, Courier Zona 1, Courier Zone 2, Courier Zona 3, Courier Zone 4, Carta, Small item outside EU, Entrega Canarias/Baleares, Overseas traceable, Letter, Entrega gratuita España

Dos tornillos largos para los postes inferiores de la calculadora HP41C. Al ser un poco más largos, "agarran" en la parte baja de los posts cuando estos han dejado de funcionar con los tornillos de origen.

Los tornillos son autorroscantes y están hechos de acero 304 inoxidable.

Información de producto adicional


Los clientes que han comprado este producto también han comprado

Pies para HP41c - pack de cuatro
4,00 / 4 unidad(es) *
Conjunto de tornillos para HP41
3,00 / 4 unidad(es) *
Spacer set para reparar HP41c
10,00 *
Kit de reparación de postes de HP41c
40,00 *
Muelle para cargador de HP41c
3,00 *
Módulo conector de baterías y puertos de expansión de HP-41c/cv/cx
44,00 *
* Los precios incluyen el IVA

Examine también estas categorías: Accesorios, El Rincón de la HP41, HP 41C Repair, Broken lower screw posts, Corroded or broken zebra contacts, Inicio
Nuevo

Conjunto de tornillos para HP41

N.º de producto: Screwset

En existencias

3,00 / 4 unidad(es)
El precio incluye el IVA


Formas de entrega disponibles: Courier España, Courier Zona 1, Courier Zone 2, Courier Zona 3, Courier Zone 4, Carta, Small item outside EU, Entrega Canarias/Baleares, Overseas traceable, Letter, Entrega gratuita España

Dos tornillos largos para los postes inferiores de la calculadora HP41C. Al ser un poco más largos, "agarran" en la parte baja de los posts cuando estos han dejado de funcionar con los tornillos de origen.

+ dos tornillos para los puertos superiores - tamaño normal

Los tornillos son autorroscantes y están hechos de acero 304 inoxidable.

Información de producto adicional


Los clientes que han comprado este producto también han comprado

Pies para HP41c - pack de cuatro
4,00 / 4 unidad(es) *
Pieza para reparar postes superiores
16,00 *
Módulo conector de baterías y puertos de expansión de HP-41c/cv/cx
44,00 *
Spacer set para reparar HP41c
10,00 *
Pieza para reparación de parte trasera de HP41c
17,00 *
Conector zebra para la reparación del las HP41c full nut
12,80 *
* Los precios incluyen el IVA

Examine también estas categorías: Accesorios, El Rincón de la HP41, HP 41C Repair, Broken lower screw posts, Corroded or broken zebra contacts, Inicio

Tornillo inferior largo - par negro

N.º de producto: lowerscrewblack

En existencias

4,00 / 2 unidad(es)
El precio incluye el IVA


Formas de entrega disponibles: Carta, Small item outside EU, Entrega Canarias/Baleares, Entrega gratuita España

Dos tornillos largos para los postes inferiores de la calculadora HP41C. Al ser un poco más largos, "agarran" en la parte baja de los posts cuando estos han dejado de funcionar con los tornillos de origen.

Los tornillos son autorroscantes y están hechos de acero 314 inoxidable negro. (A4)

Información de producto adicional


Los clientes que han comprado este producto también han comprado

Spacer set para reparar HP41c
10,00 *
Muelle para cargador de HP41c
3,00 *
Conjunto de tornillos para HP41
3,00 / 4 unidad(es) *
Kit de reparación de postes de HP41c
40,00 *
Tornillo inferior largo - inox
1,00 / 2 unidad(es) *
Conector zebra para la reparación del las HP41c full nut
12,80 *
* Los precios incluyen el IVA

Examine también estas categorías: Accesorios, El Rincón de la HP41, HP 41C Repair, Broken lower screw posts, Corroded or broken zebra contacts, Inicio
11 - 20 de 61 resultados