")
")
- The HP15c Corner
- The HP41 Corner
- The HP Prime Corner
- The HP12c Corner
- The Calculator Store Offers
- Scientific calculators
- Financial calculators
- Graphical Calculators
- HP Calculator Repair Service
- Classical HP Calculators
- Calculator Accessories
- Selection guide
- Special offers
- Calculator blog
- Blog in Spanish
- Site Map
- Calculator Reviews
- Books
- Education
- why RPN?
- Cheap&cheerful calculators
-
The Calculator Store Club

- Audio

Calculator Types Calculator Accessories Zebra + Lower post
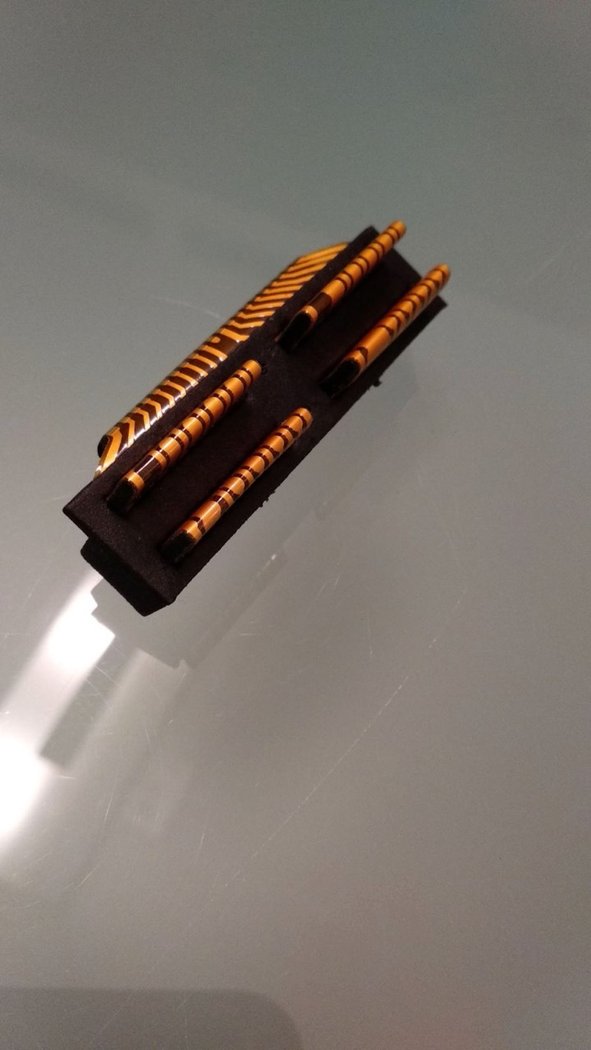
Calculator Types Calculator Accessories Assembled HP-41c battery bay and expansion ports module
Calculator Types Calculator Accessories Lower Post Repair part
Calculator Types Calculator Accessories Upper Post Repair part
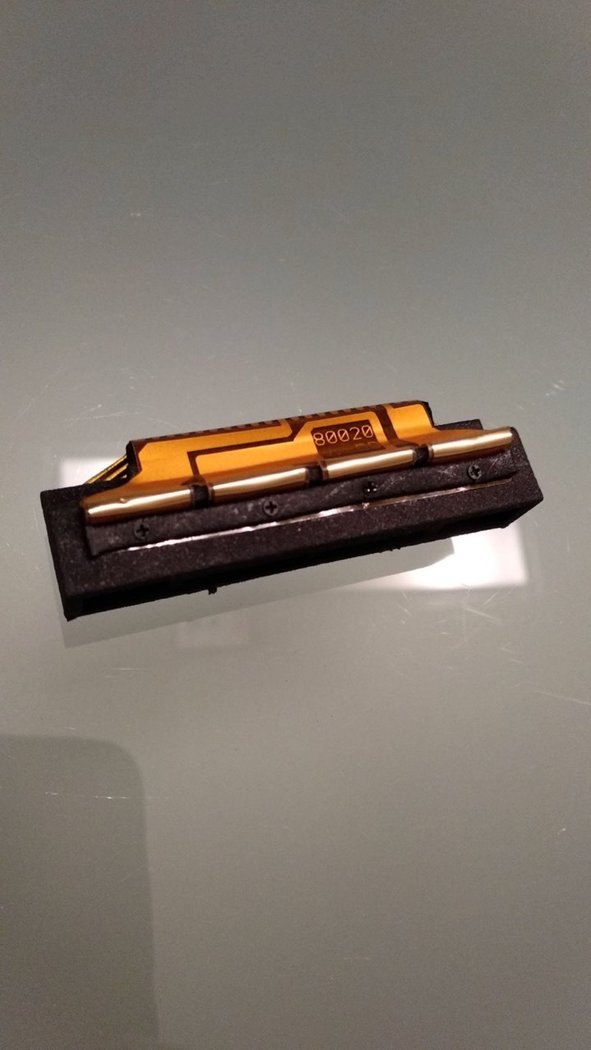
Calculator Types Calculator Accessories Assembled HP-41c battery bay and expansion ports module Flat
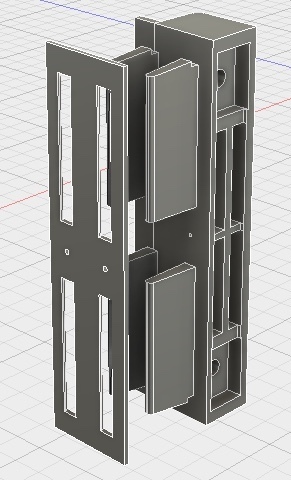
Calculator Types The HP41 Corner Battery holder 3D
Calculator Types Calculator Accessories HP41c battery holder spring
Calculator Types Calculator Accessories Sponge for HP41c standard case
Calculator Types The HP41 Corner Piece for repair of back case of HP41C
Calculator Types Calculator Accessories HP41c side cover
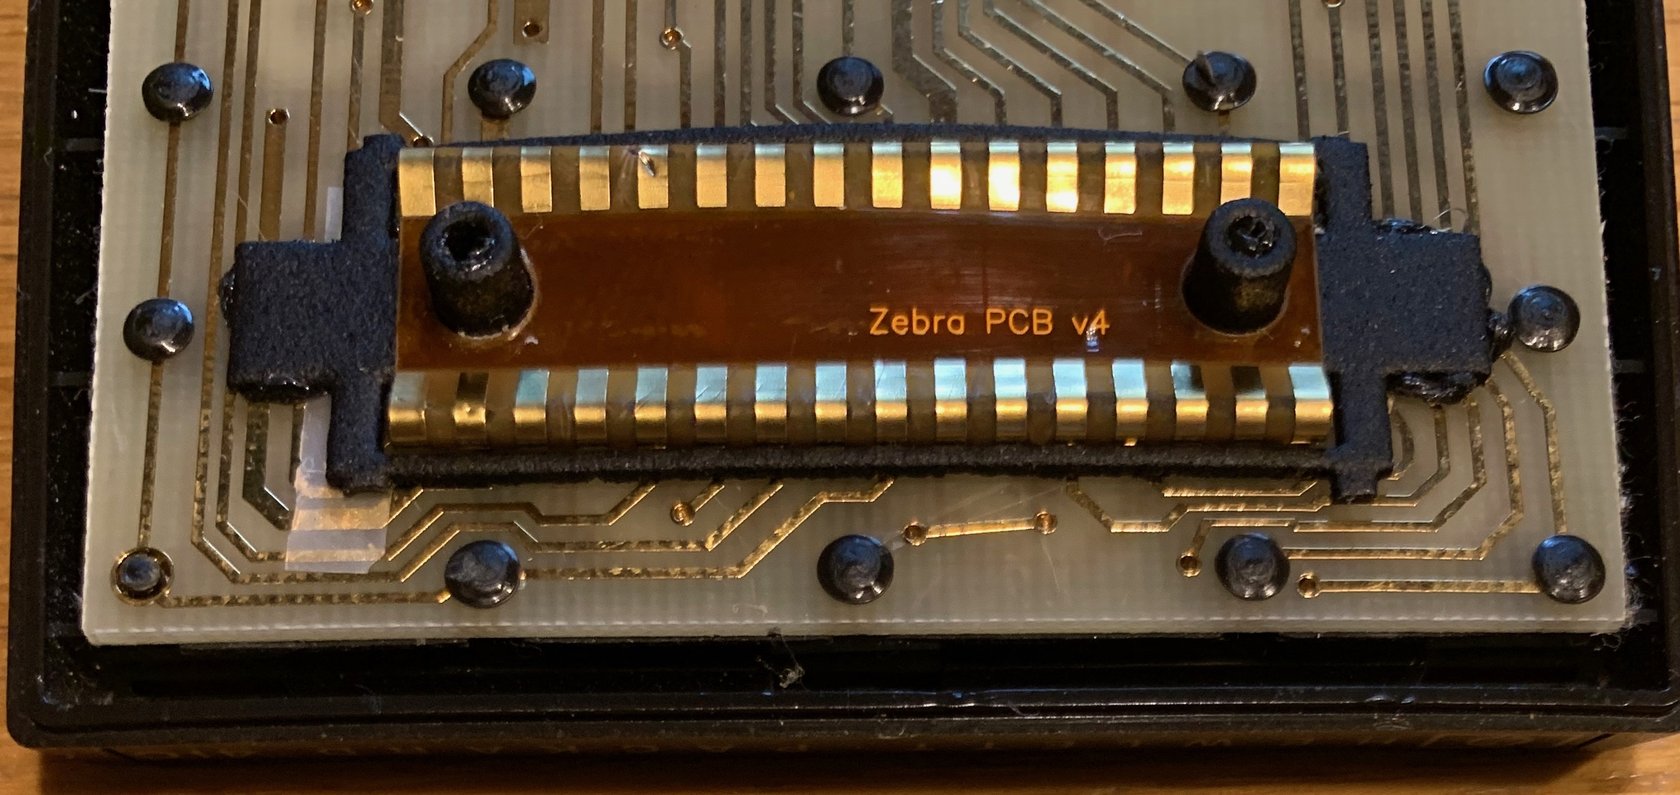
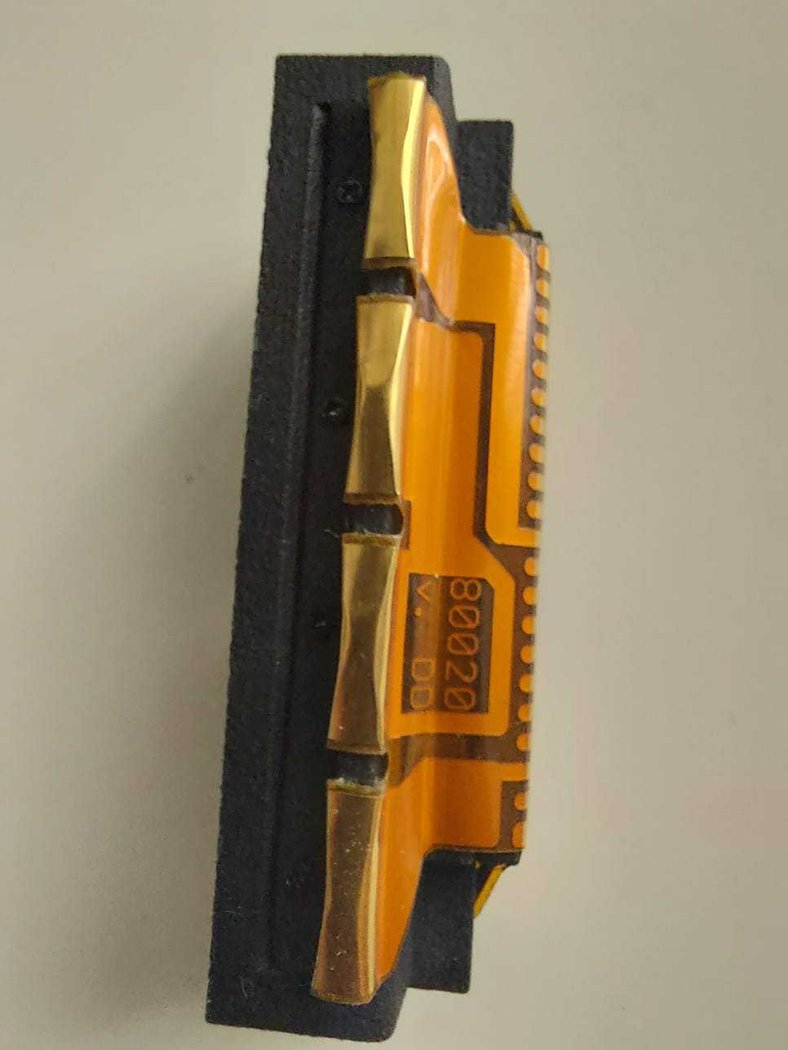
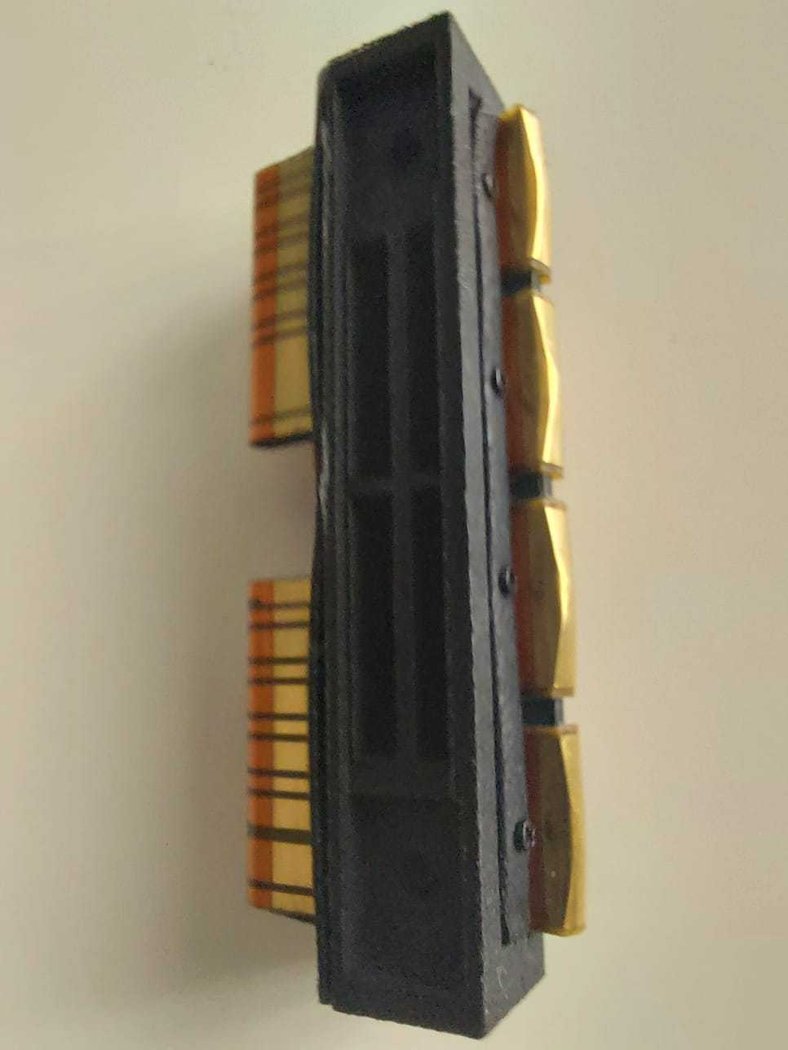
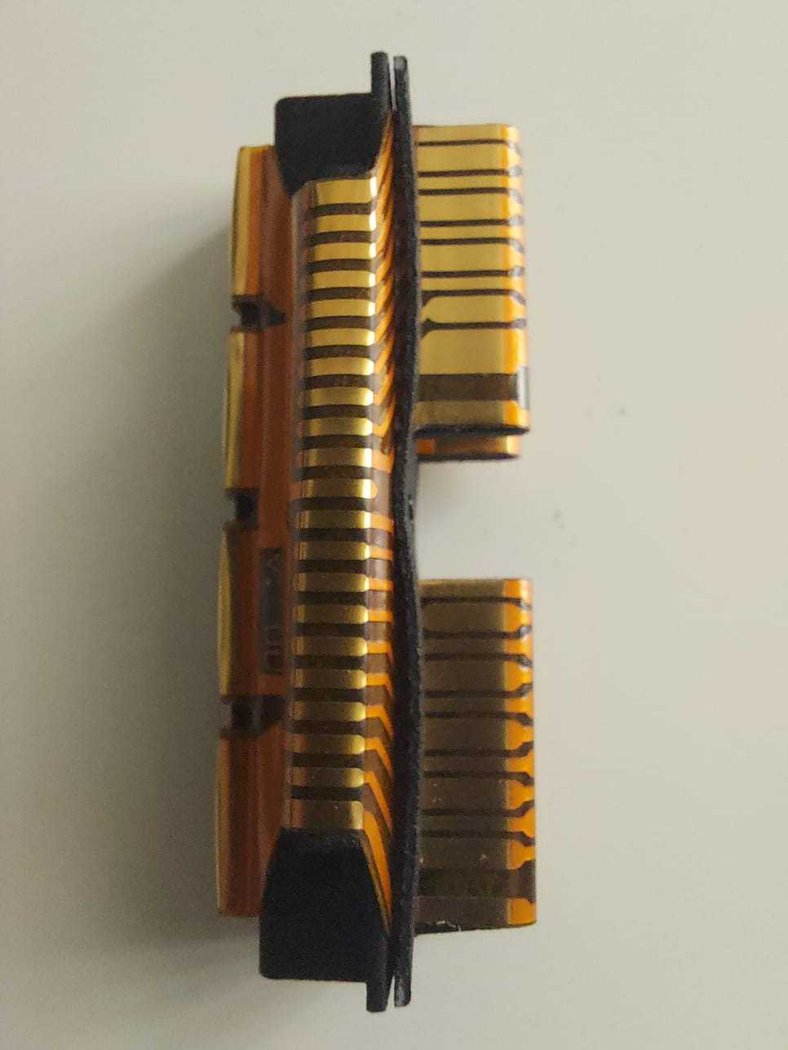
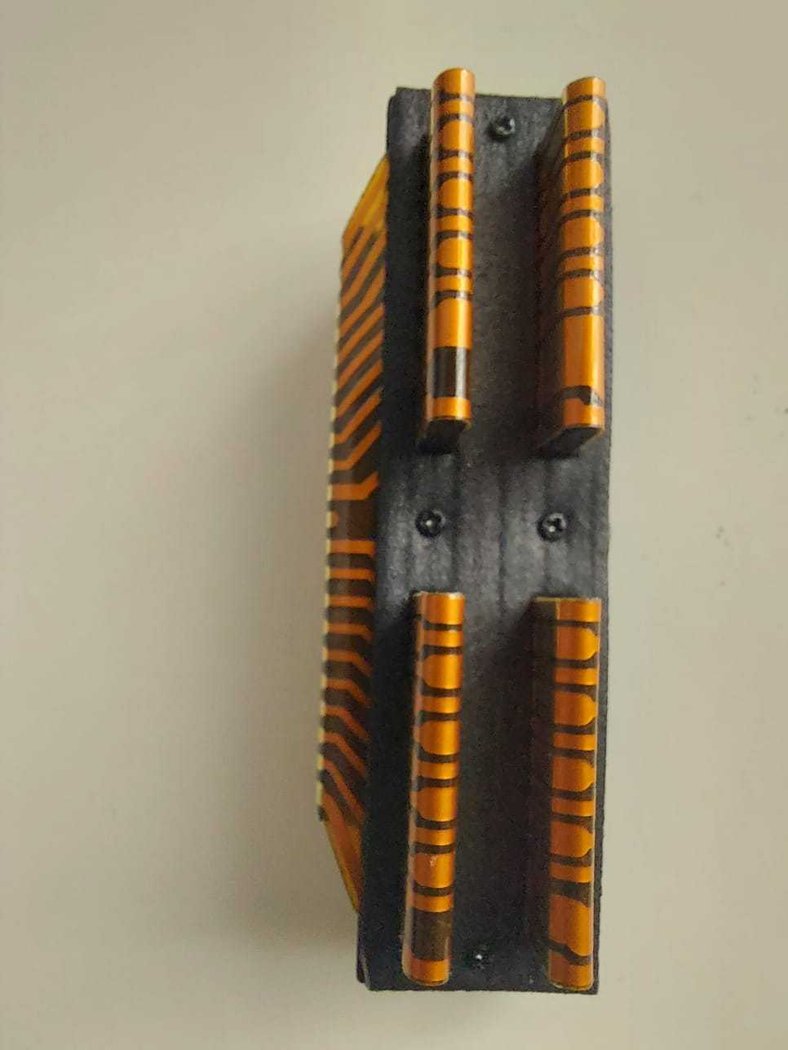
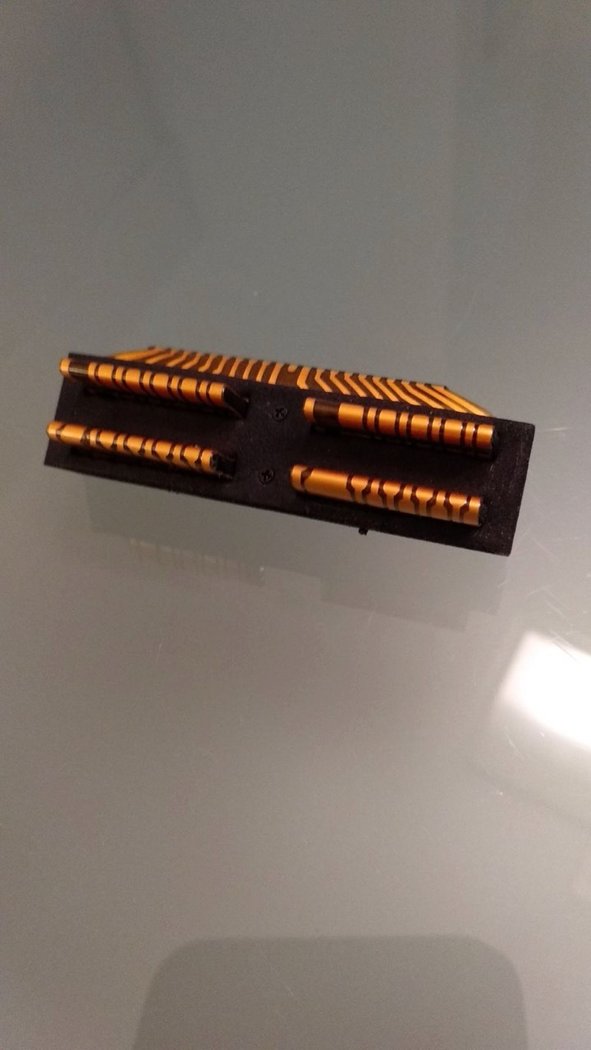
Zebra + Lower post
Product no.: zebra+lowerpostIn stock
Available delivery methods: Courier Zone 1, Courier Zone 2, Courier Zone 3, Courier Zone 4, Light package, Shipping small items region 2, Entrega Canarias/Baleares, Overseas traceable, Letter, Entrega gratuita España
This includes the following individual products

|
Product no.: Lowpostrepair
Piece to repair HP41c full nut series lower screw posts |
1 piece(s)
16.00 €
*
|
|
|
|

|
Product no.: Zebra PCB
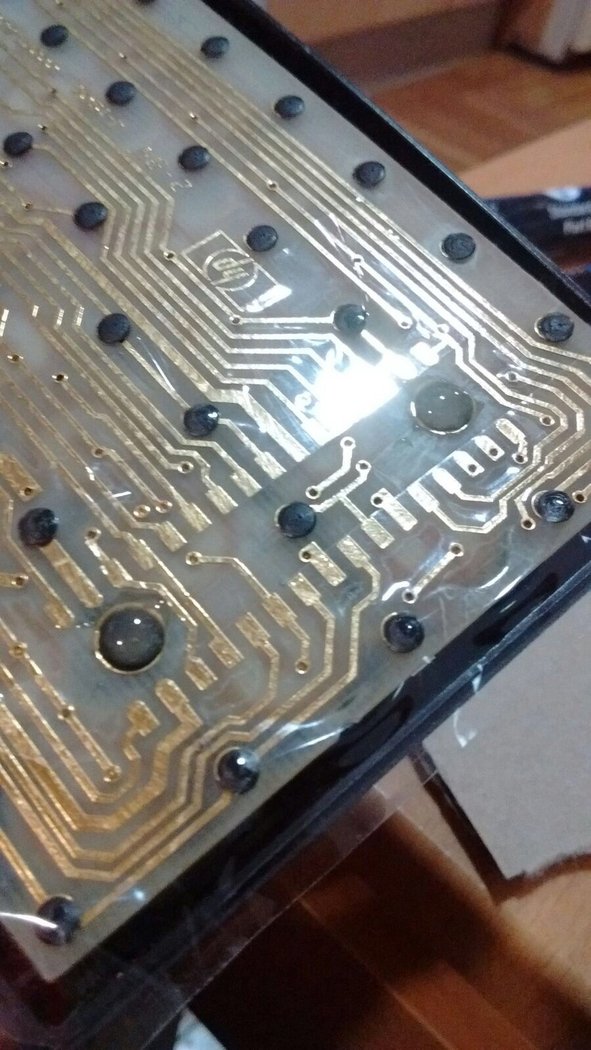
This piece is for repair of HP41c full nut calculator, substituting the damaged or corroded zebra connector that links the main board with the processor circuit. New design. Black Friday: 20% off |
1 piece(s)
Old price 16.00 €
12.80 €
*
|
|
|
|
Accessories
| Product | Note | Status | Price | ||
|---|---|---|---|---|---|
|
|
12.80 € * | |||
|
* Prices include VAT
Display accessory details
|
|||||
 Zebra connector for HP41C repair
Customers who bought this product also bought
 |
 |
 |
 |
 |
 |
Browse these categories as well: Home, Accessories and spares, Classic Calculators, The HP41 Corner, HP 41C Repair, Broken lower screw posts, Corroded or broken zebra contacts
Assembled HP-41c battery bay and expansion ports module
Product no.: Flex-PCB Assembled
In stock
can be shipped within 10 days
Available delivery methods: Courier Spain, Courier Zone 1, Courier Zone 2, Courier Zone 3, Courier Zone 4, Light package, Shipping small items region 2, Overseas traceable, Letter, Entrega gratuita España


Accessories
| Product | Note | Status | Price | ||
|---|---|---|---|---|---|
|
|
22.00 € * | |||
|
|
44.00 € * | |||
|
* Prices include VAT
Display accessory details
|
|||||
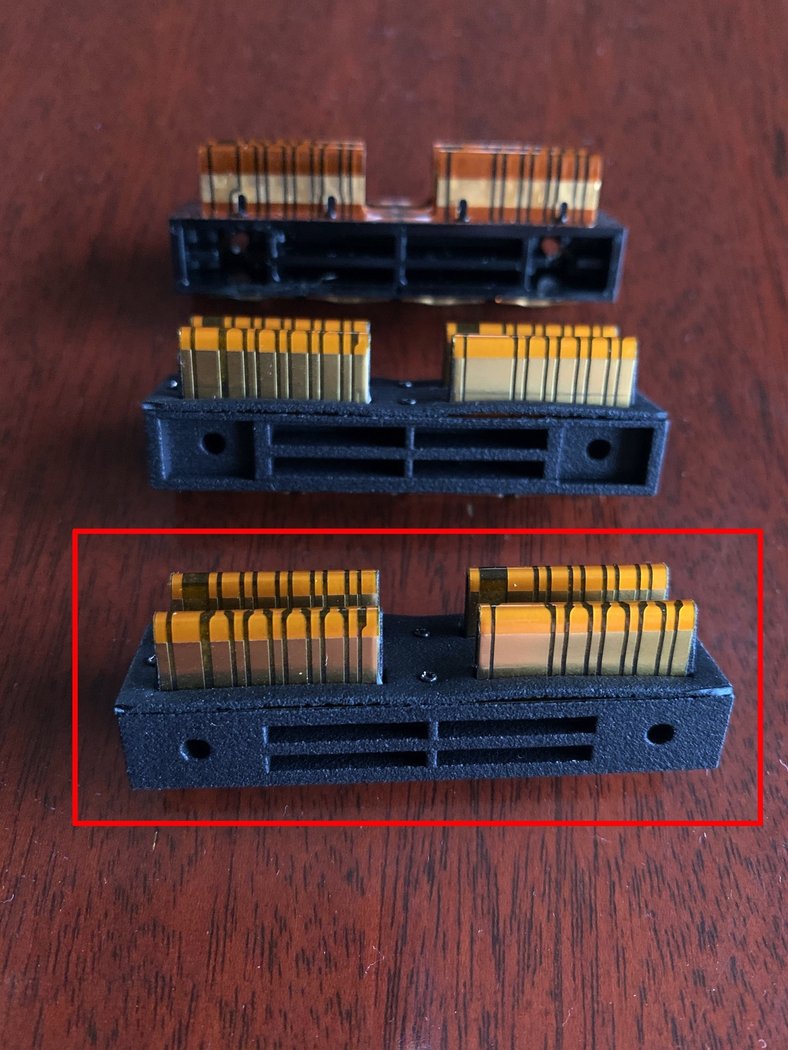
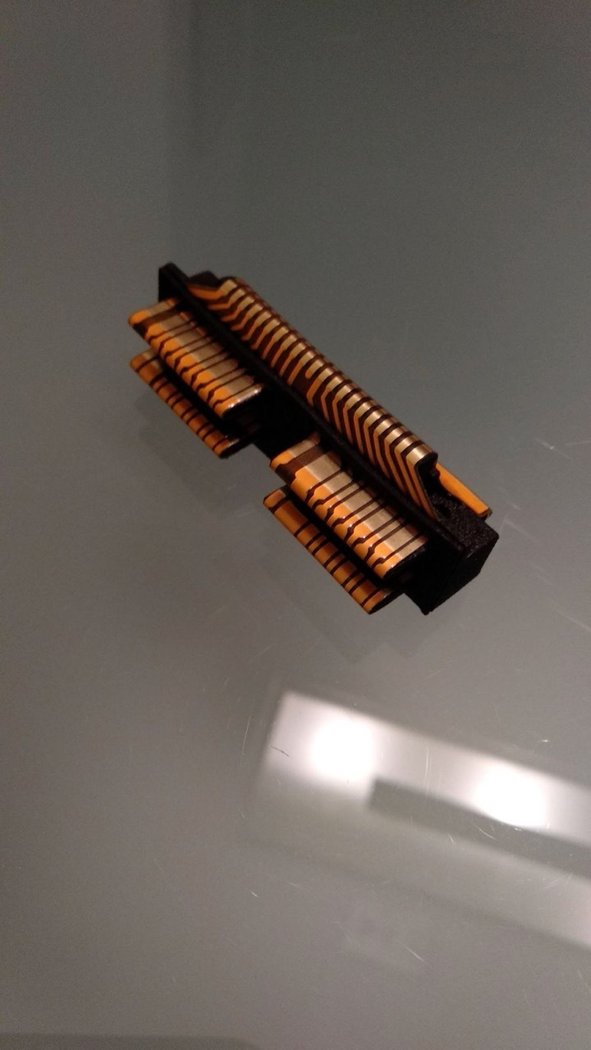
 Repair kit for HP-41c battery bay and expansion ports
 Assembled HP-41c battery bay and expansion ports module Flat
Customers who bought this product also bought
|
|
 |
 |
|
|
 |
|
Browse these categories as well: Accessories and spares, Classic Calculators, The HP41 Corner, Home, Corroded Battery contacts, Corroded circuit paths, Damaged screen - not all segments light on, HP 41C Repair, Scientific, The Calculator Store Offers
Lower Post Repair part
Product no.: LowpostrepairIn stock
Available delivery methods: Courier Spain, Courier Zone 1, Courier Zone 2, Courier Zone 3, Courier Zone 4, Light package, Shipping small items region 2, Entrega Canarias/Baleares, Overseas traceable, Letter, Entrega gratuita España
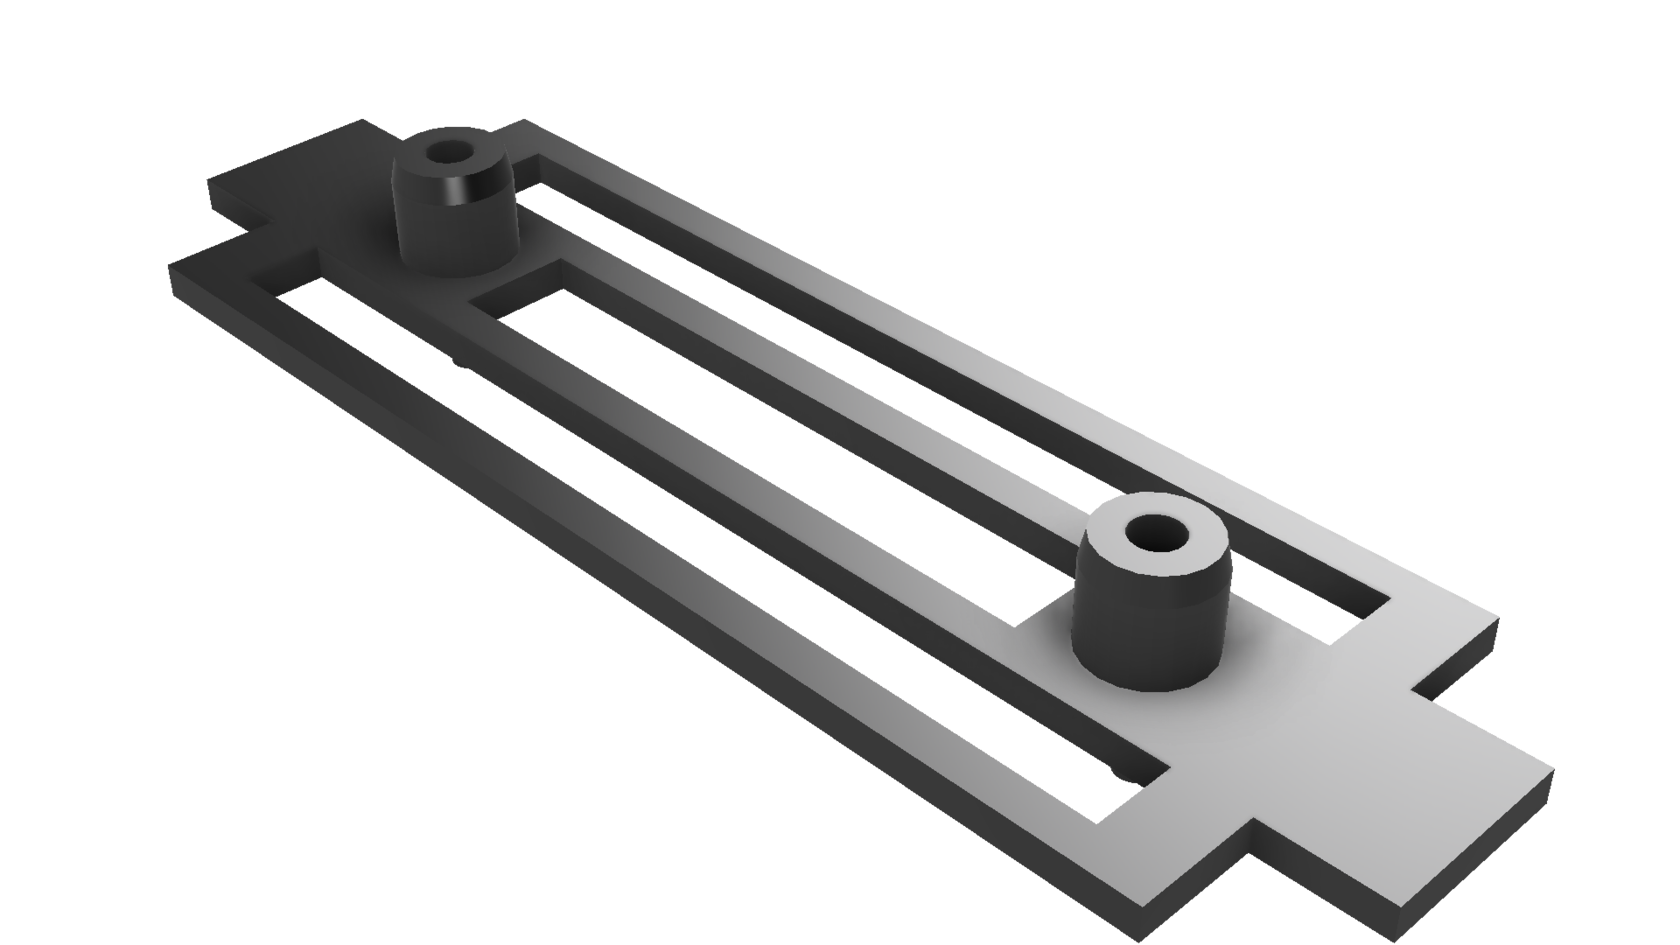


Lower Post repair
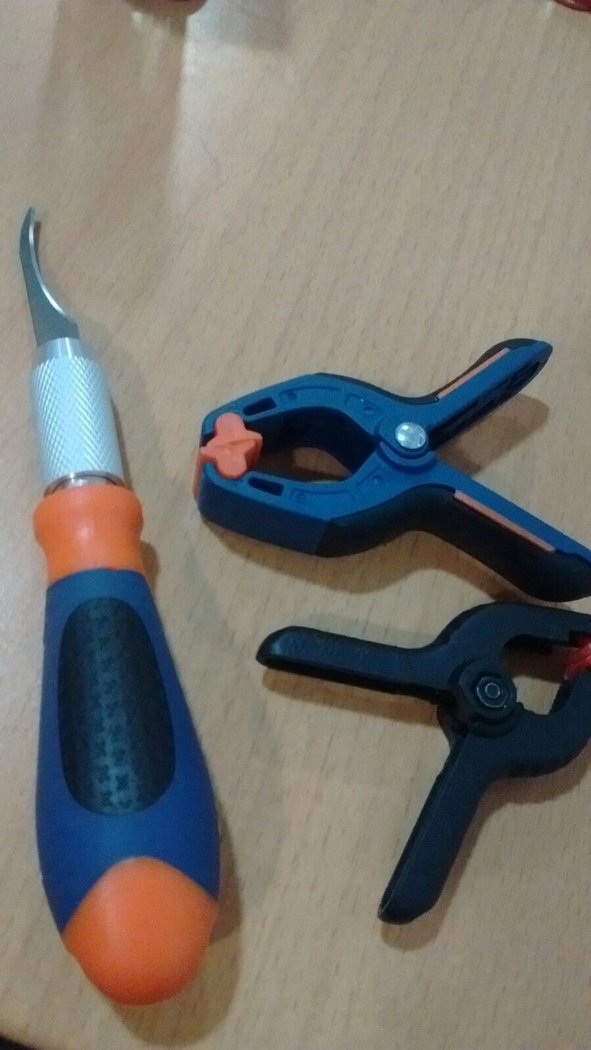
Material needed
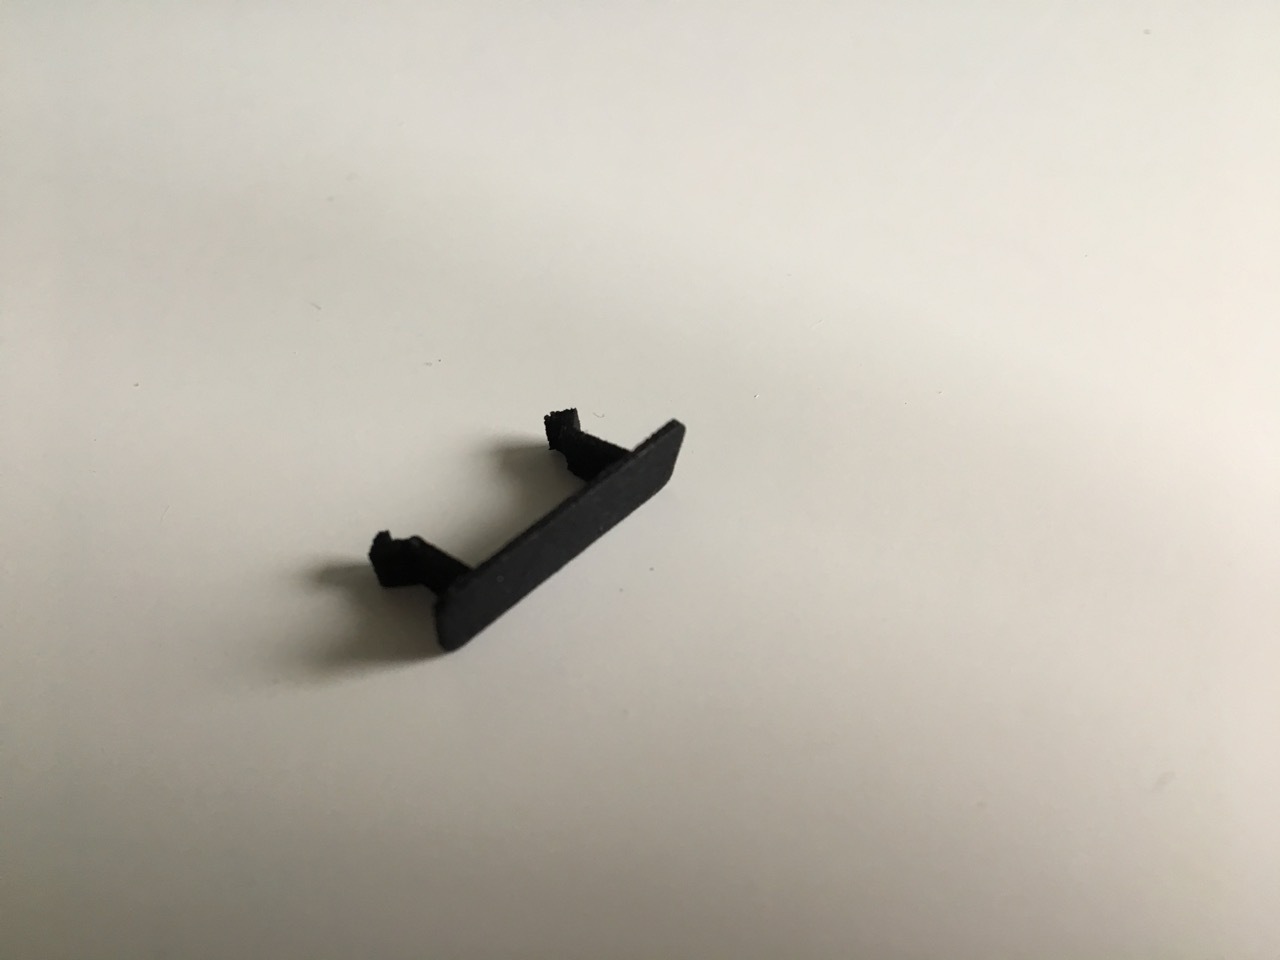
- Lower post repair piece
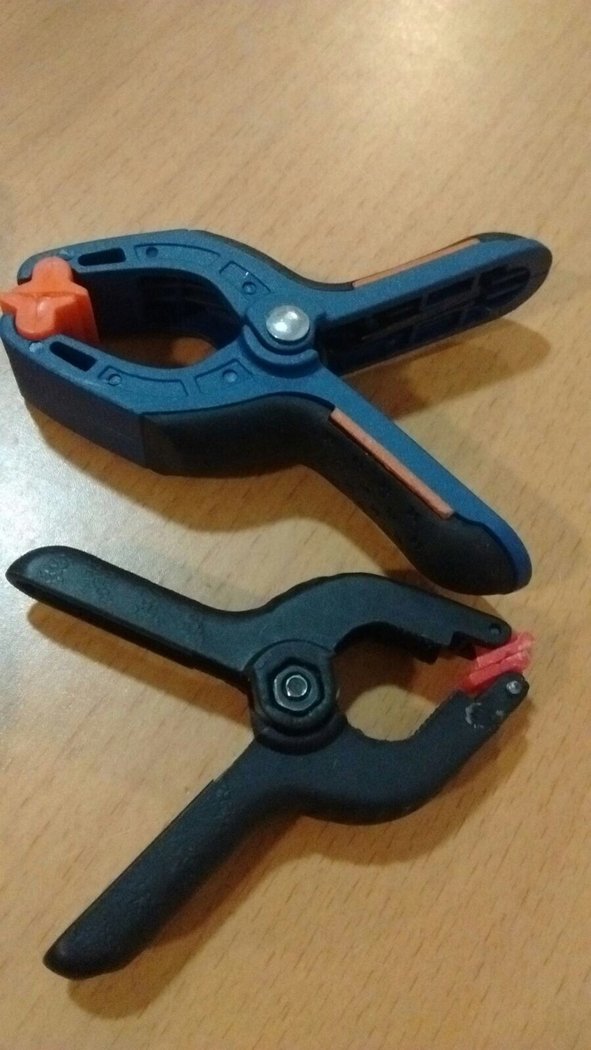
- Clothes' peg
- Keyboard support for clothes' pegs
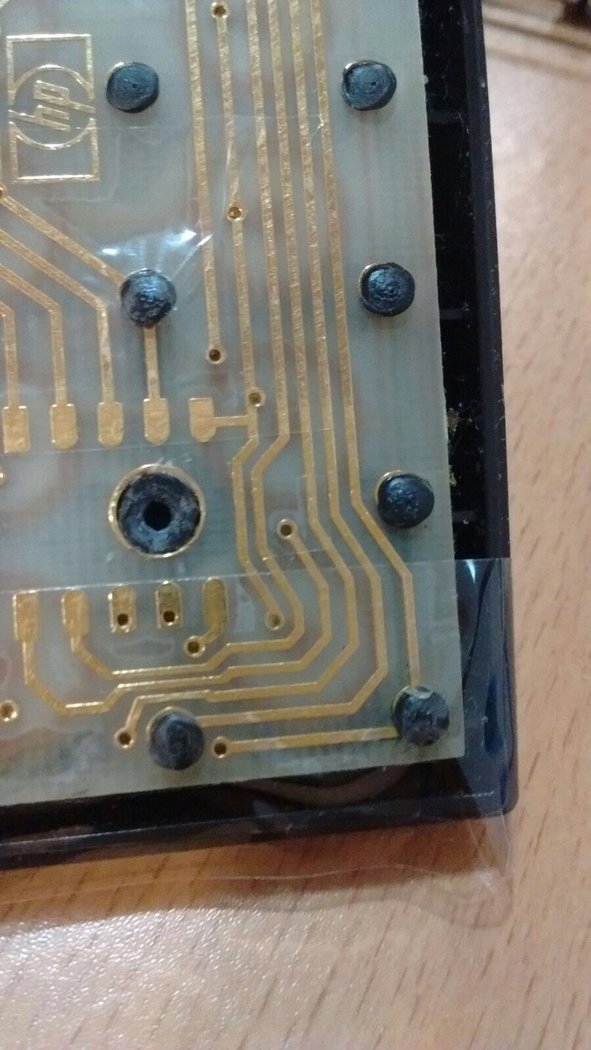
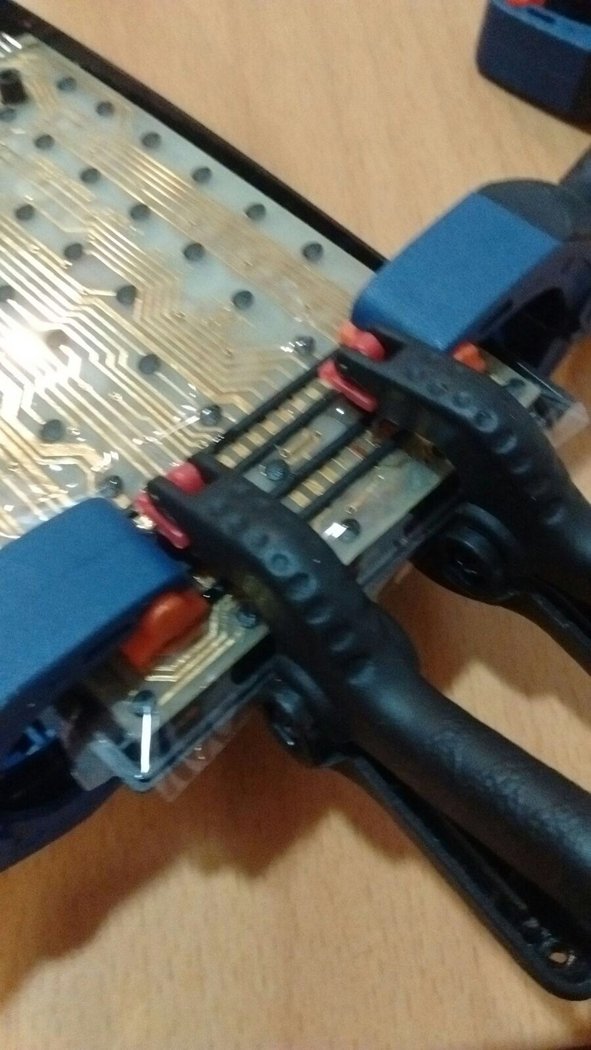
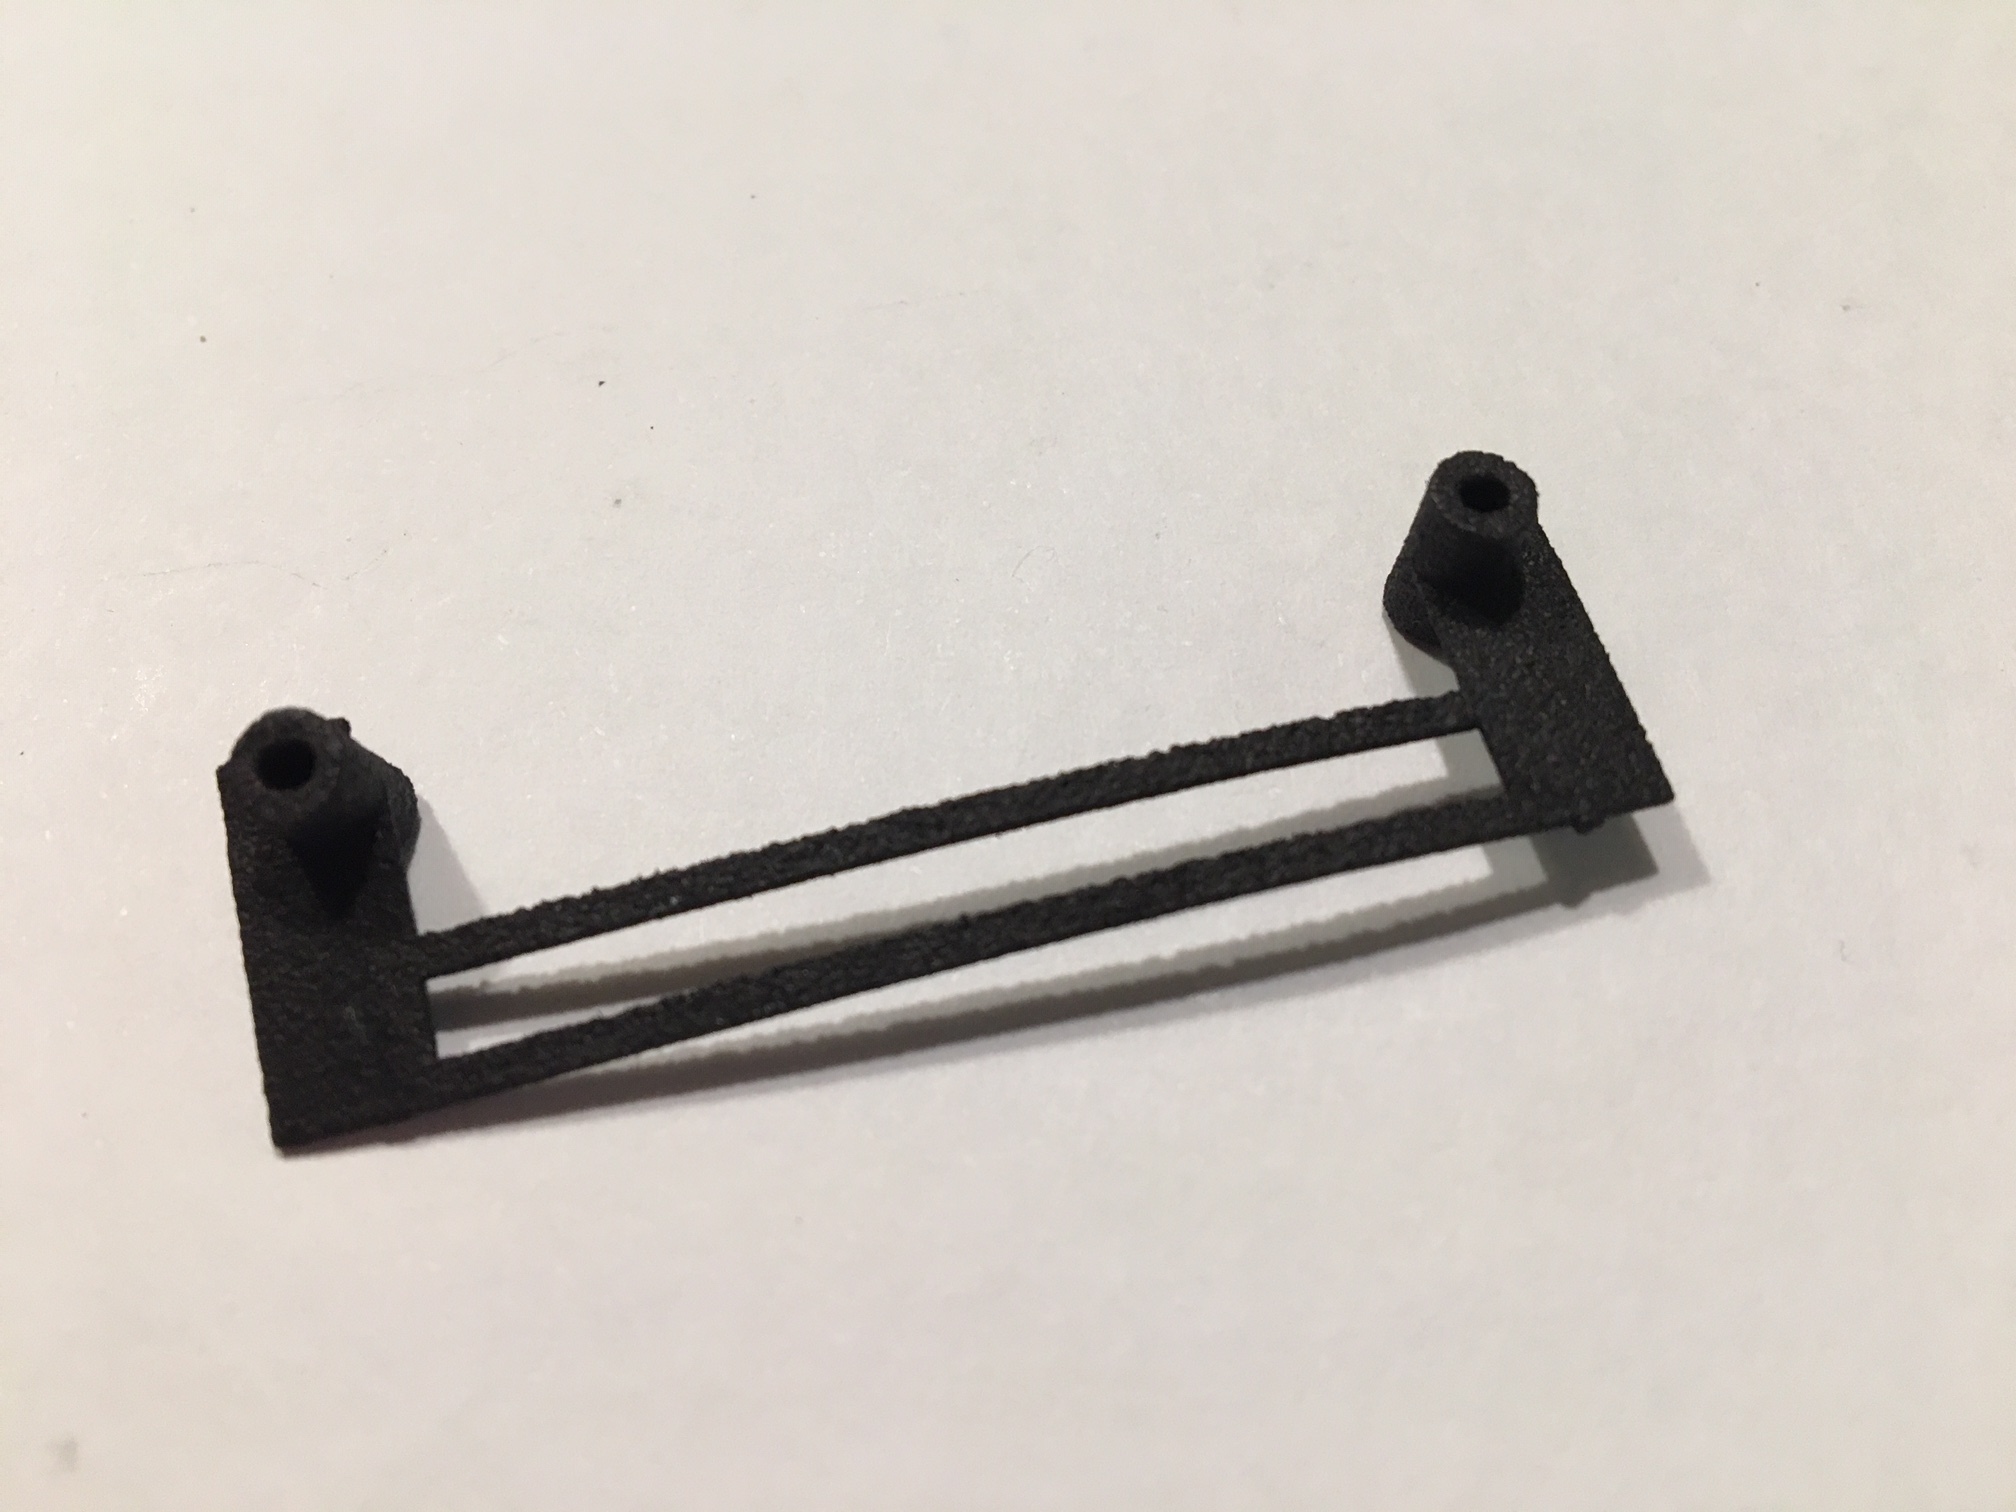
Let's assume that both posts are broken or cracked. The effect of this cracking is that the screws do not do their job. Usually, using longer screws may help, but this typically is short lived since the cracks will continue downwards. Once the pressure between both halves is softened, the calculator doesn't work anymore. The solution is to repair the broken posts.
Old methods to repair broken post is to glue them (but this doesn't hold together too long) and to tie them down with very small gauge copper cable, applying pressure so that it holds together. This may solve some cases, but not when the screw path has been destroyed - maybe due to strong tightening of the screws.
Other repair methods have been proposed, including drilling down the screw and placing in its place a cylinder with screw path, glued in place. We tried this method but there was a problem: the torque used to screw resulted in cracked glue and the cylinder separating from the substrate - every time.
Our method was devised with three goals in mind:
- Try to avoid the torque from the screw forcing on the glue with the substrate
- Try to ensure that the front part of the calculator is pulled up when screwing the back side on.
- Try to be compatible with all known zebra connectors - including our own.
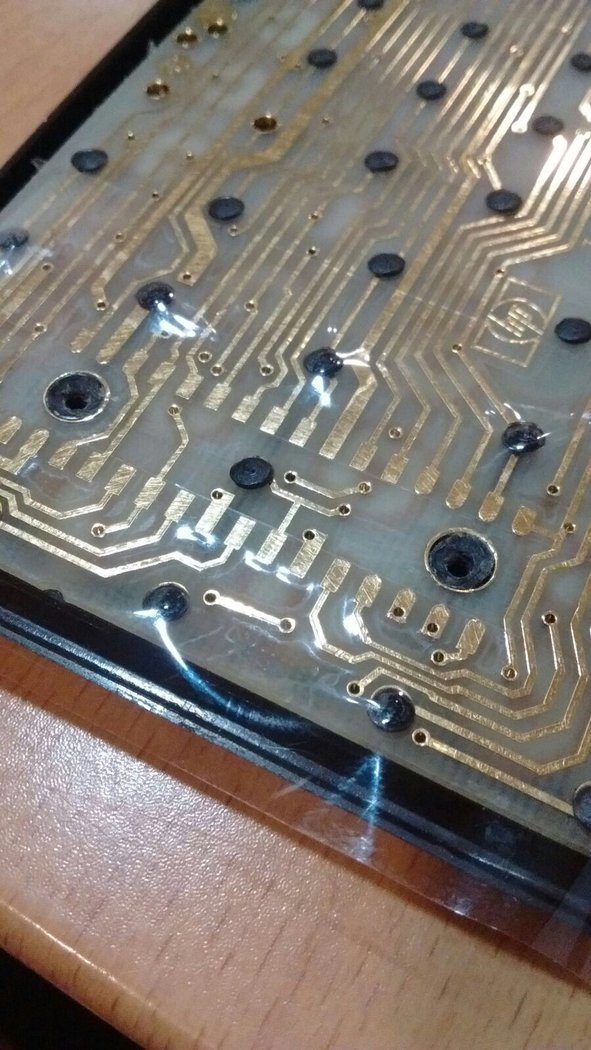
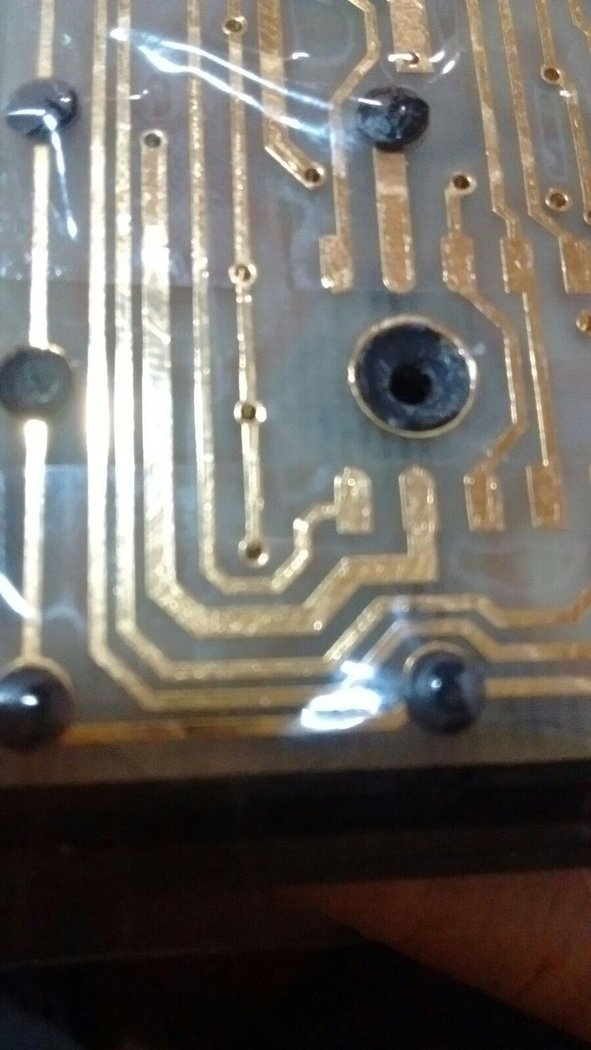
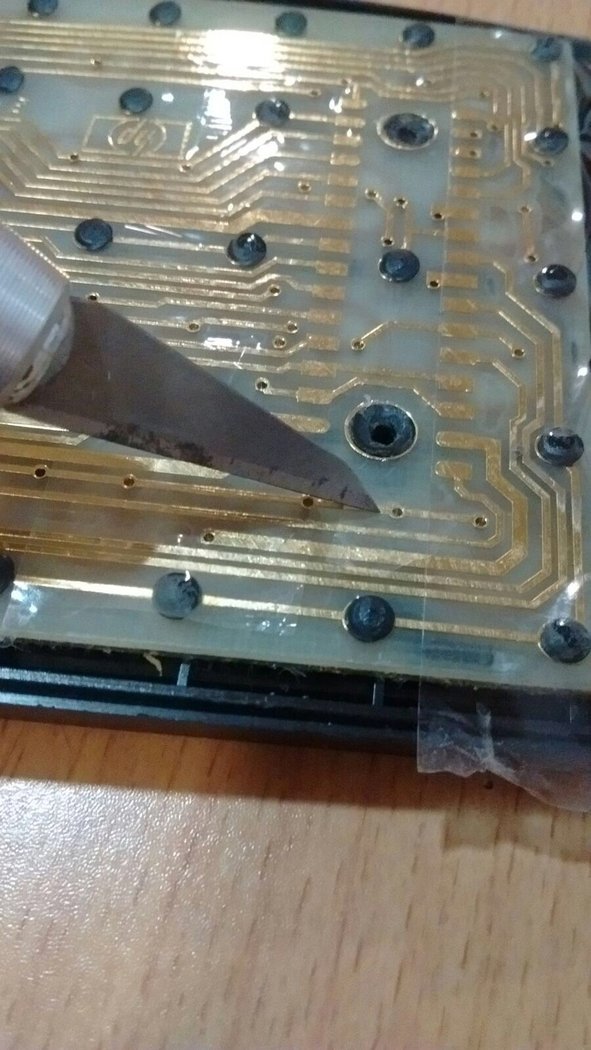
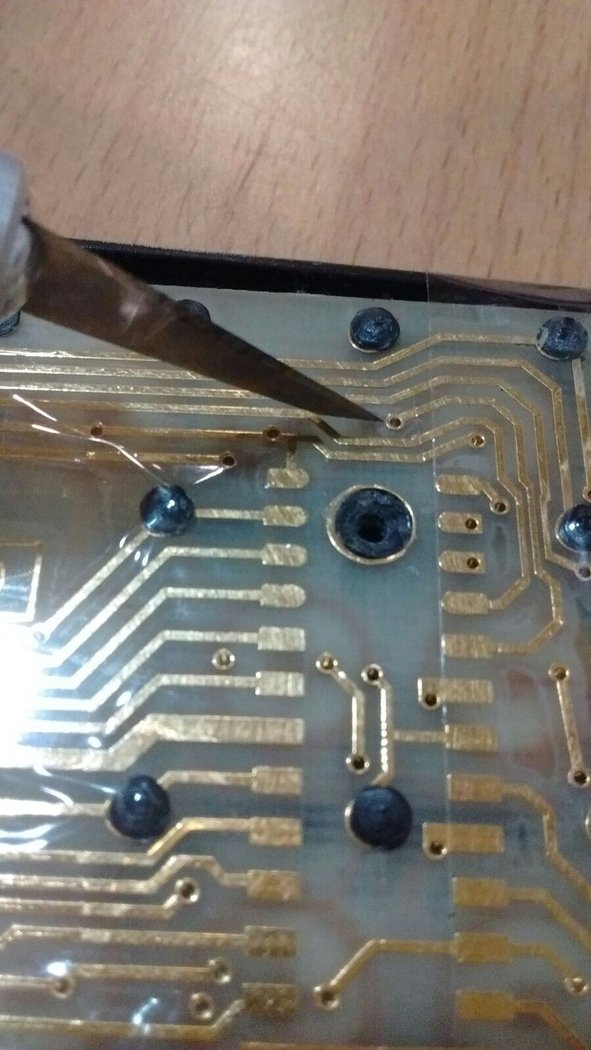
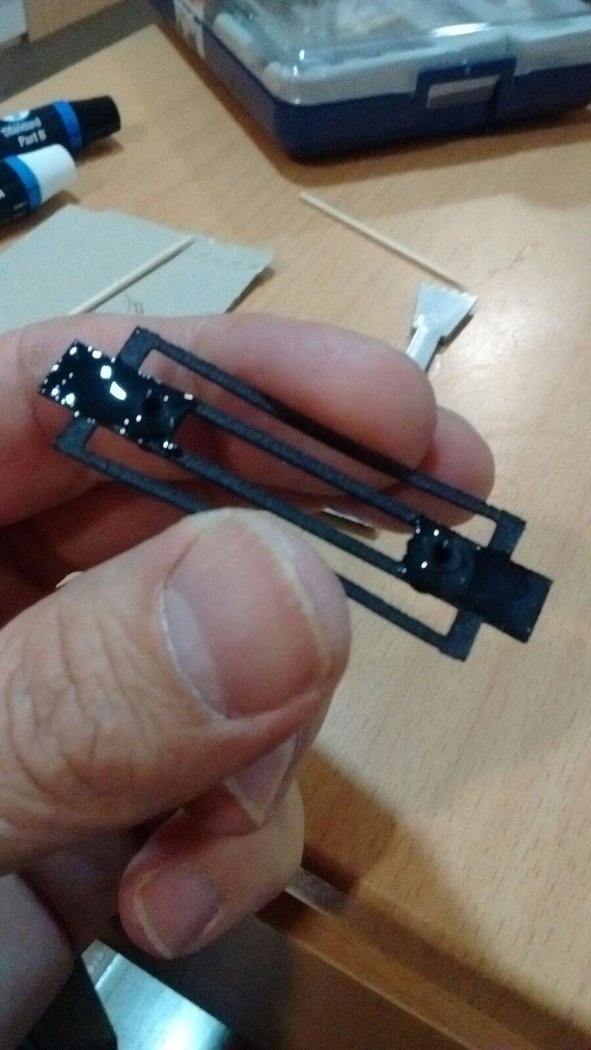
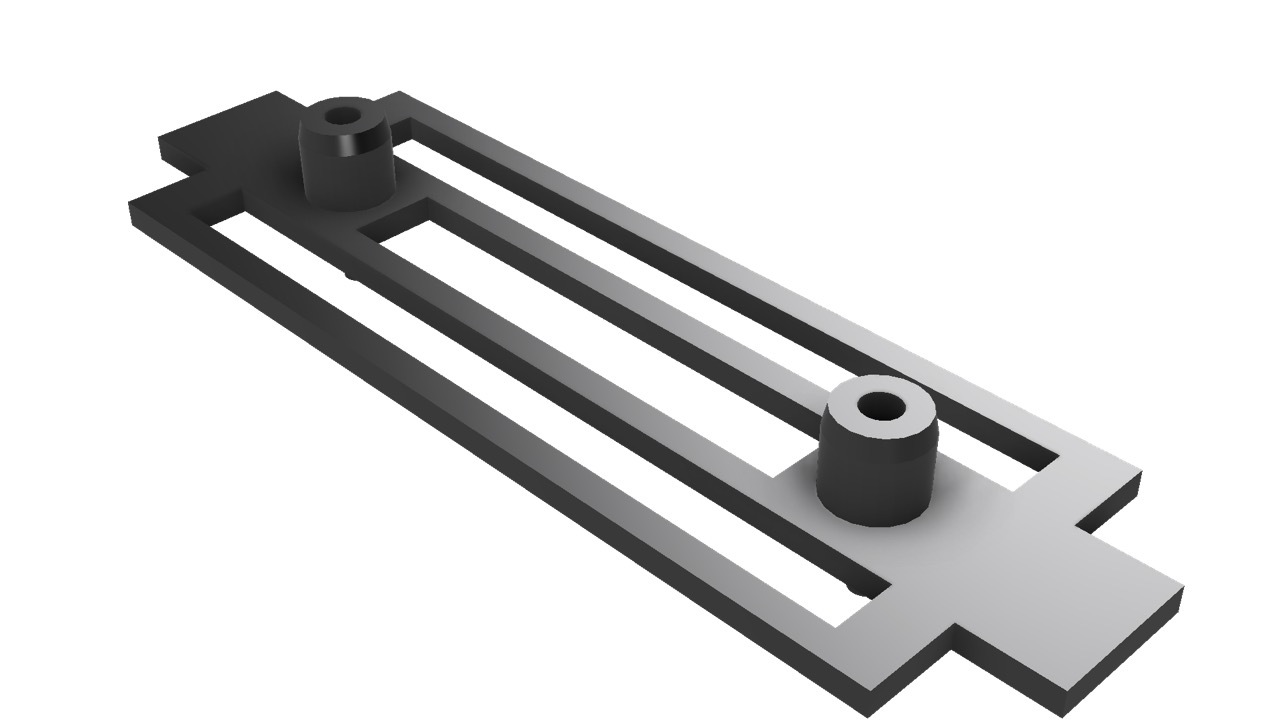
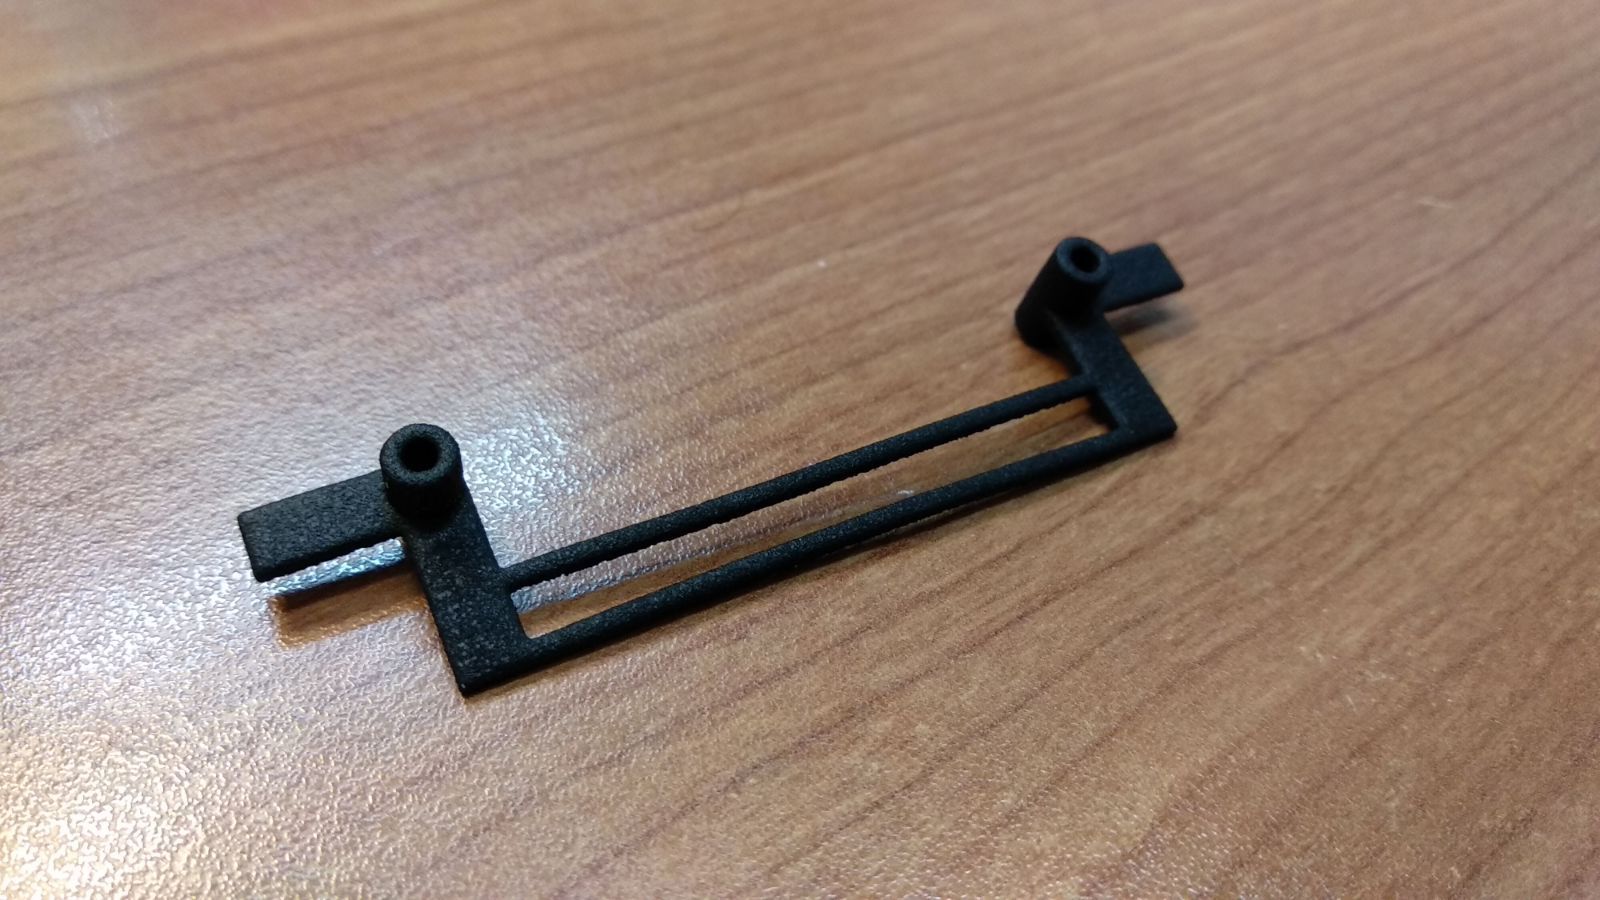
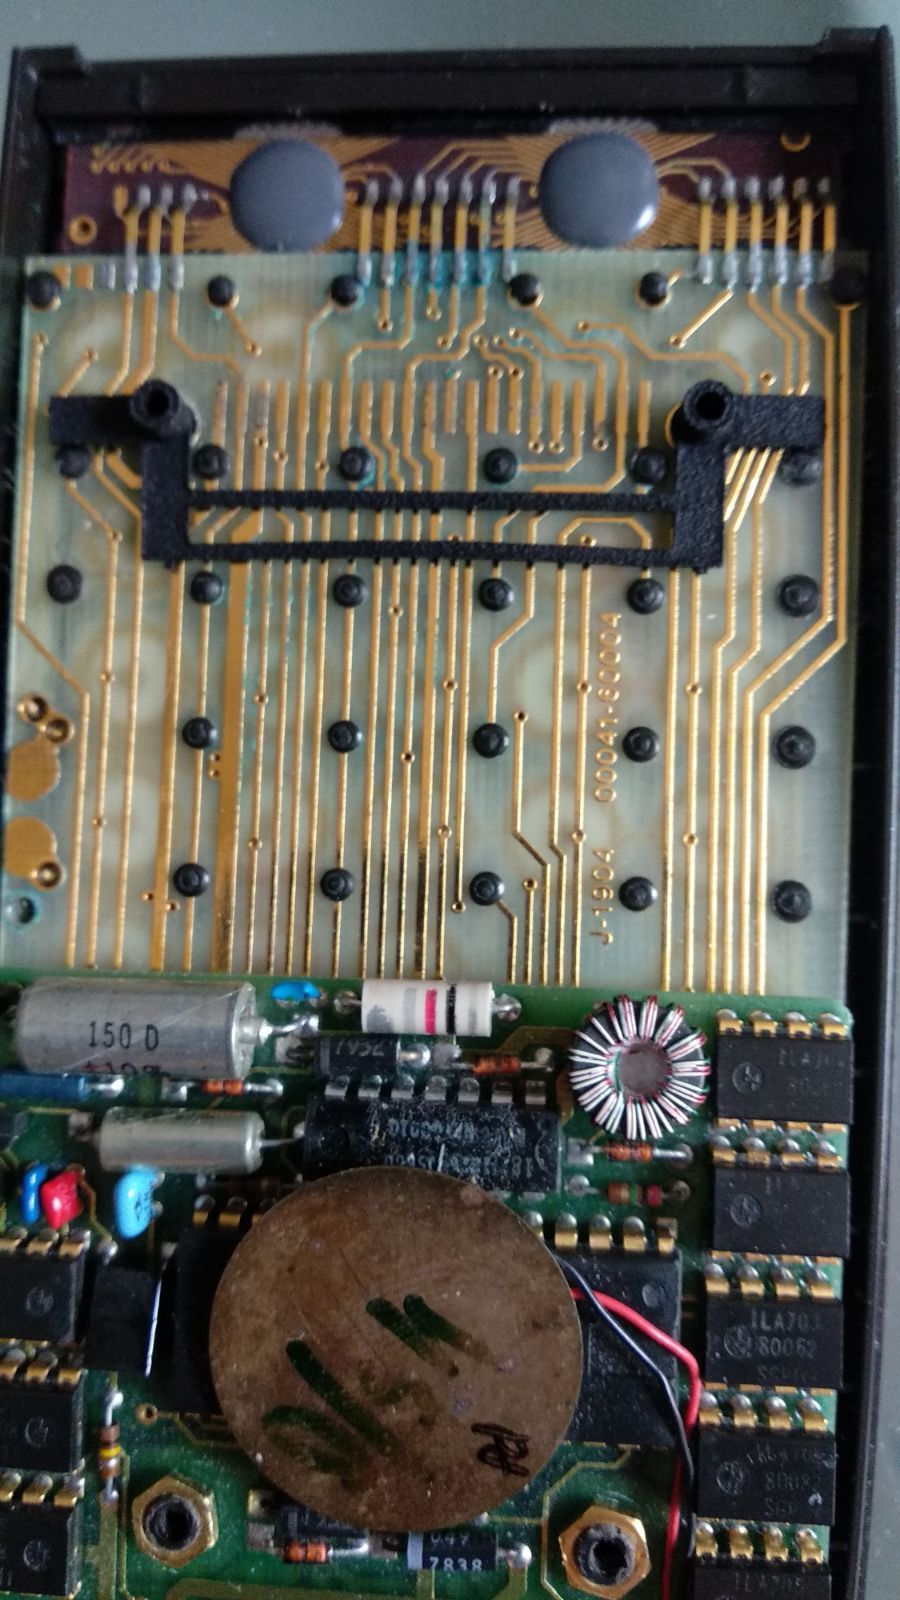
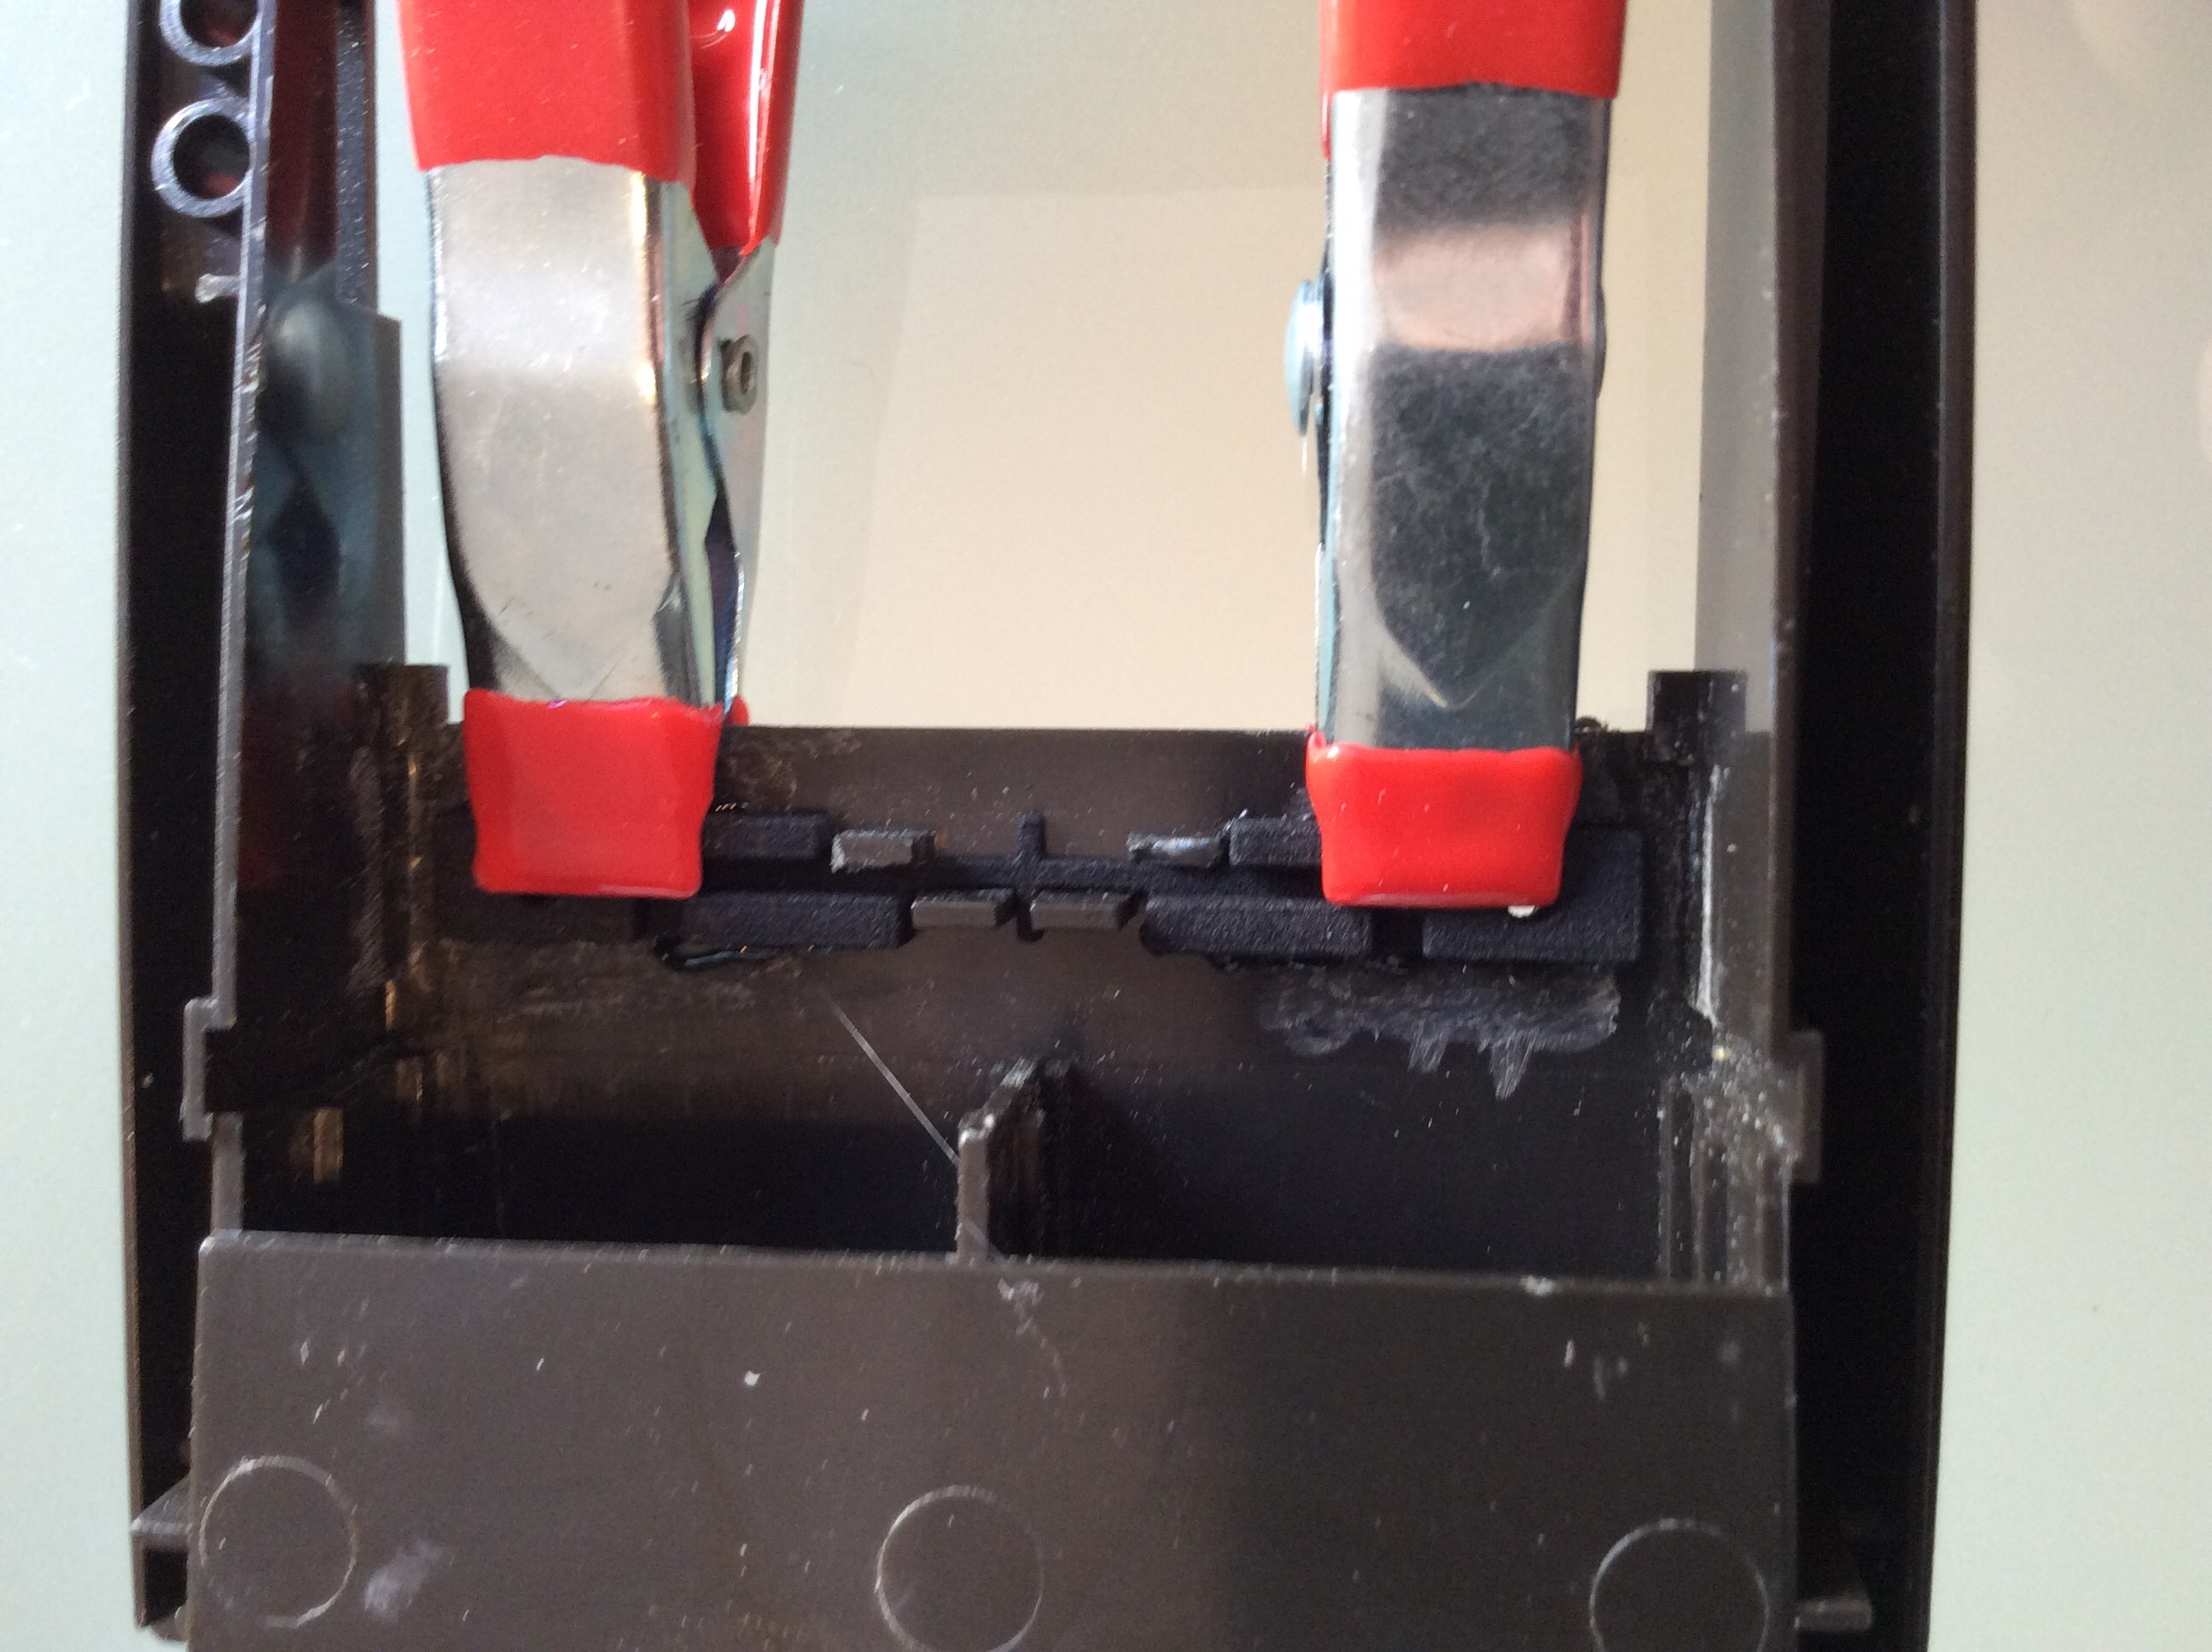
The piece that we have designed requires drilling the old posts to the keyboard ciruit level, taking care of leaving the hole clear. The design on the piece is such that the pin will be glued to the inner part of the rest of the screw post; and the surface of the piece can be glued to the keyboard circuit, so that the torque on the substrate is avoided (it also helps that torque is also resisted by the other post, when using the full piece)
When gluing the piece, there are several precautions that need to be taken:
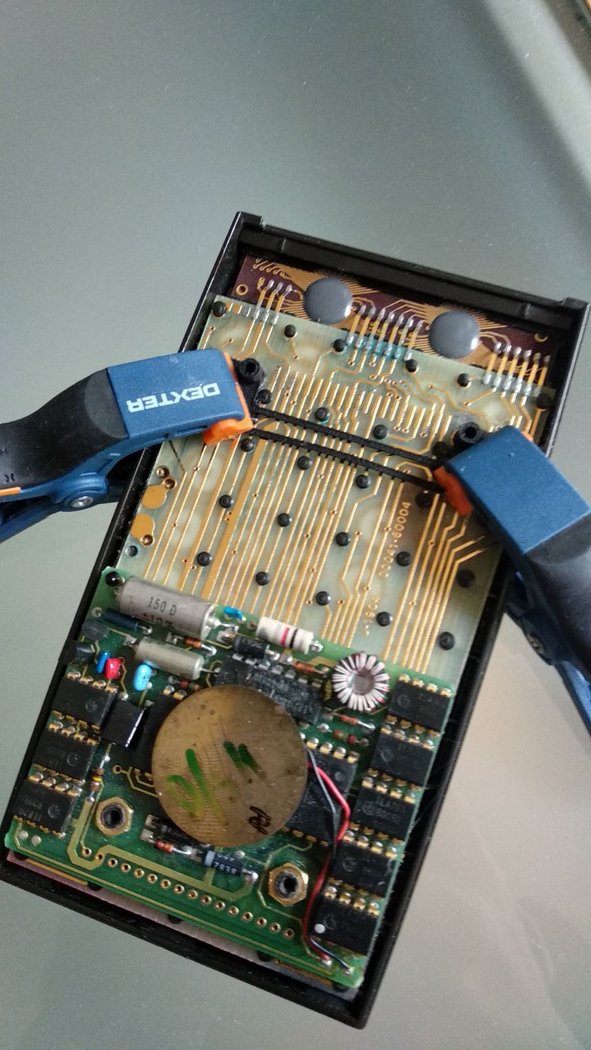
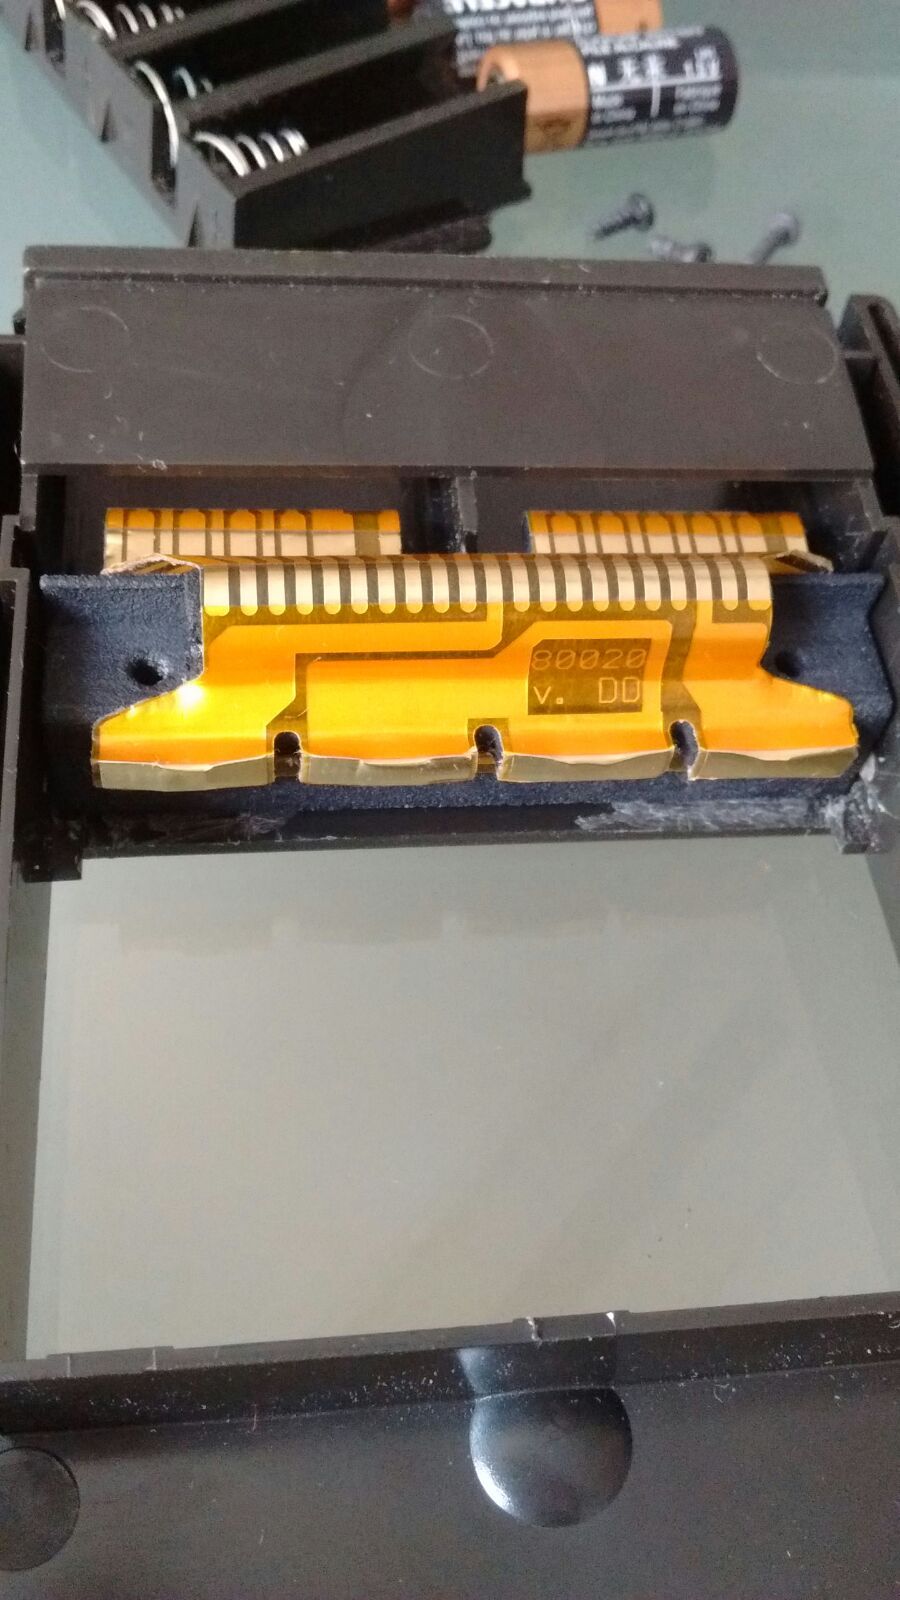
- Be sure of covering the zebra circuit part with tape -we don't want the glue to cover it.
- Cover also all nearby pin holes of the keyboard. If glue comes into one such hole, the key will not register. In severe cases, the key will be down all the time, glued in place!
- When you position the piece, make sure of using some pins through the holes to make sure the piece is well centered and the screws can go through.
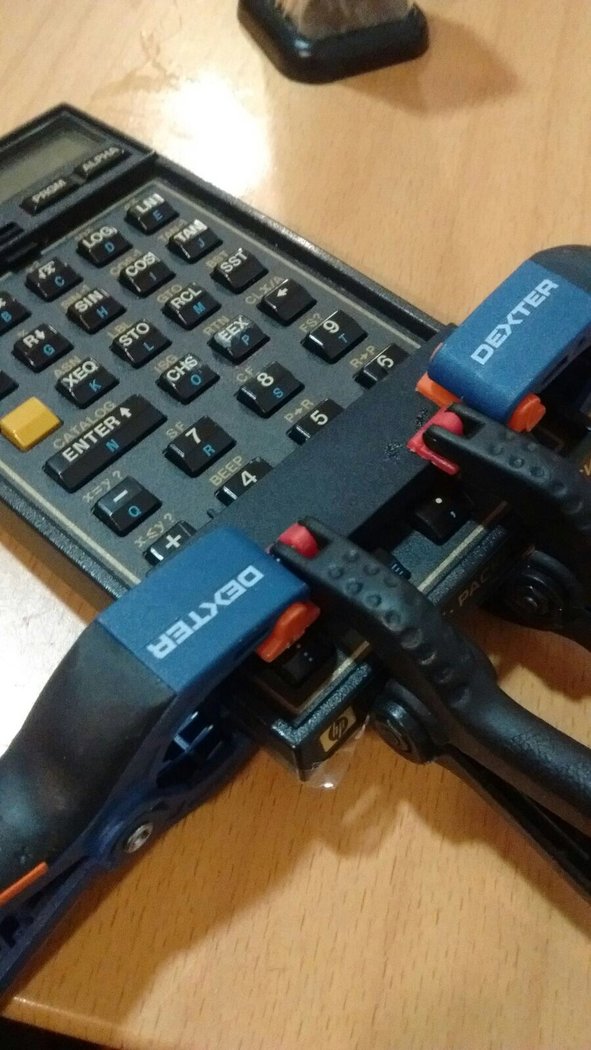
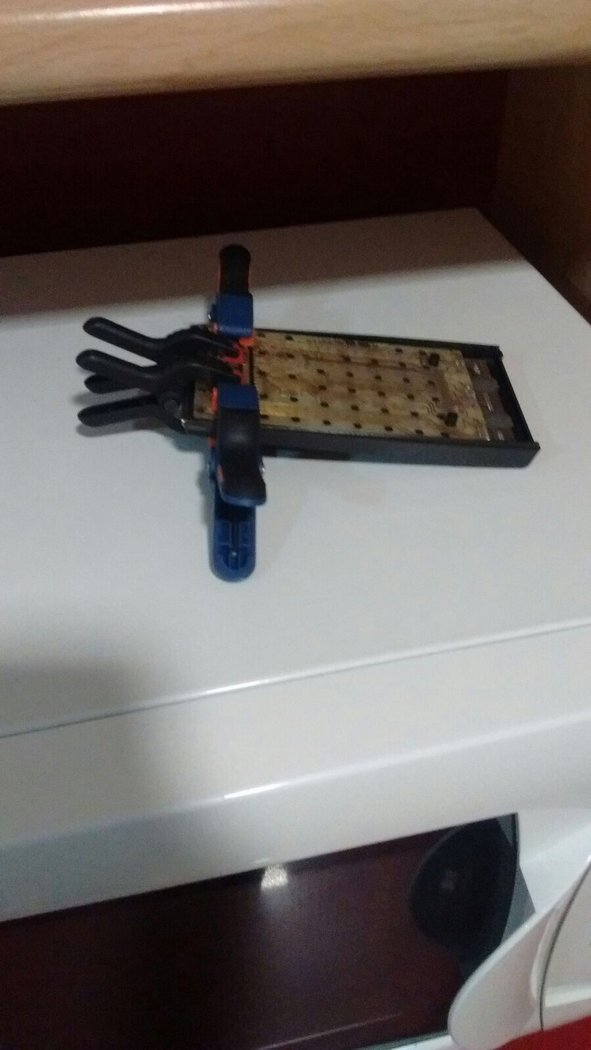
- When applying pressure, use clothes' pegs to hold the piece in place, preferably on the outer side.
- To avoid pushing the keyboard down, and only push down the front of the calculator, use the keyboard cover we have designed to support the pegs. Pushing the keyboard instead will result on separation between both halves of the calculator, since the attachment of the substrate to the pin will be at a lower level (the keyboard is linked to the keyboard circuit, not to the substrate)
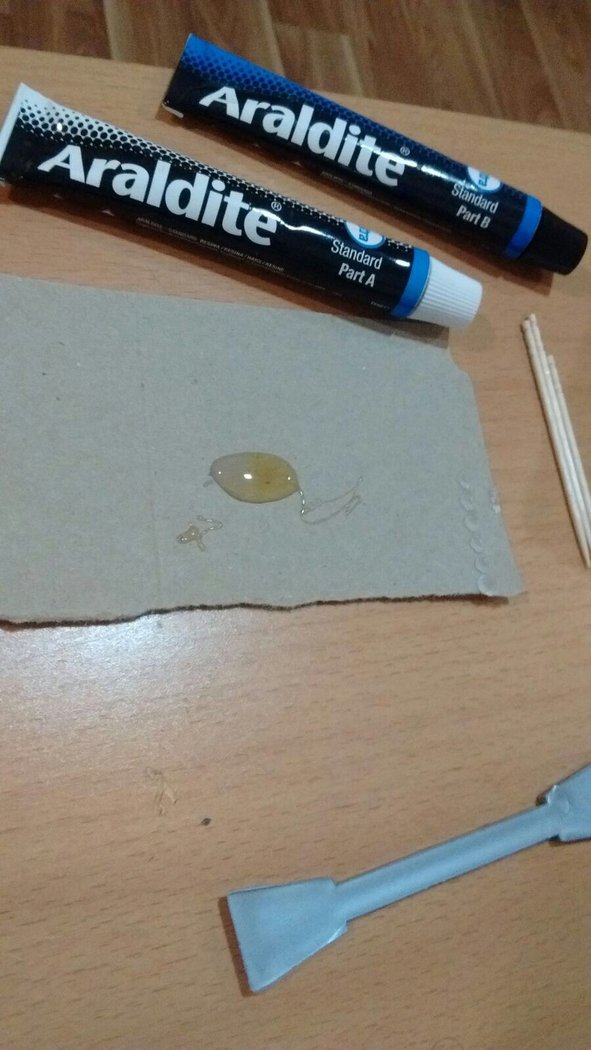
- Use epoxy glue, type Araldit.
- Let it cure overnight.
- Remove the tape over the zebra circuit path
- Place the zebra connectors
- Assemble the calculator and test.
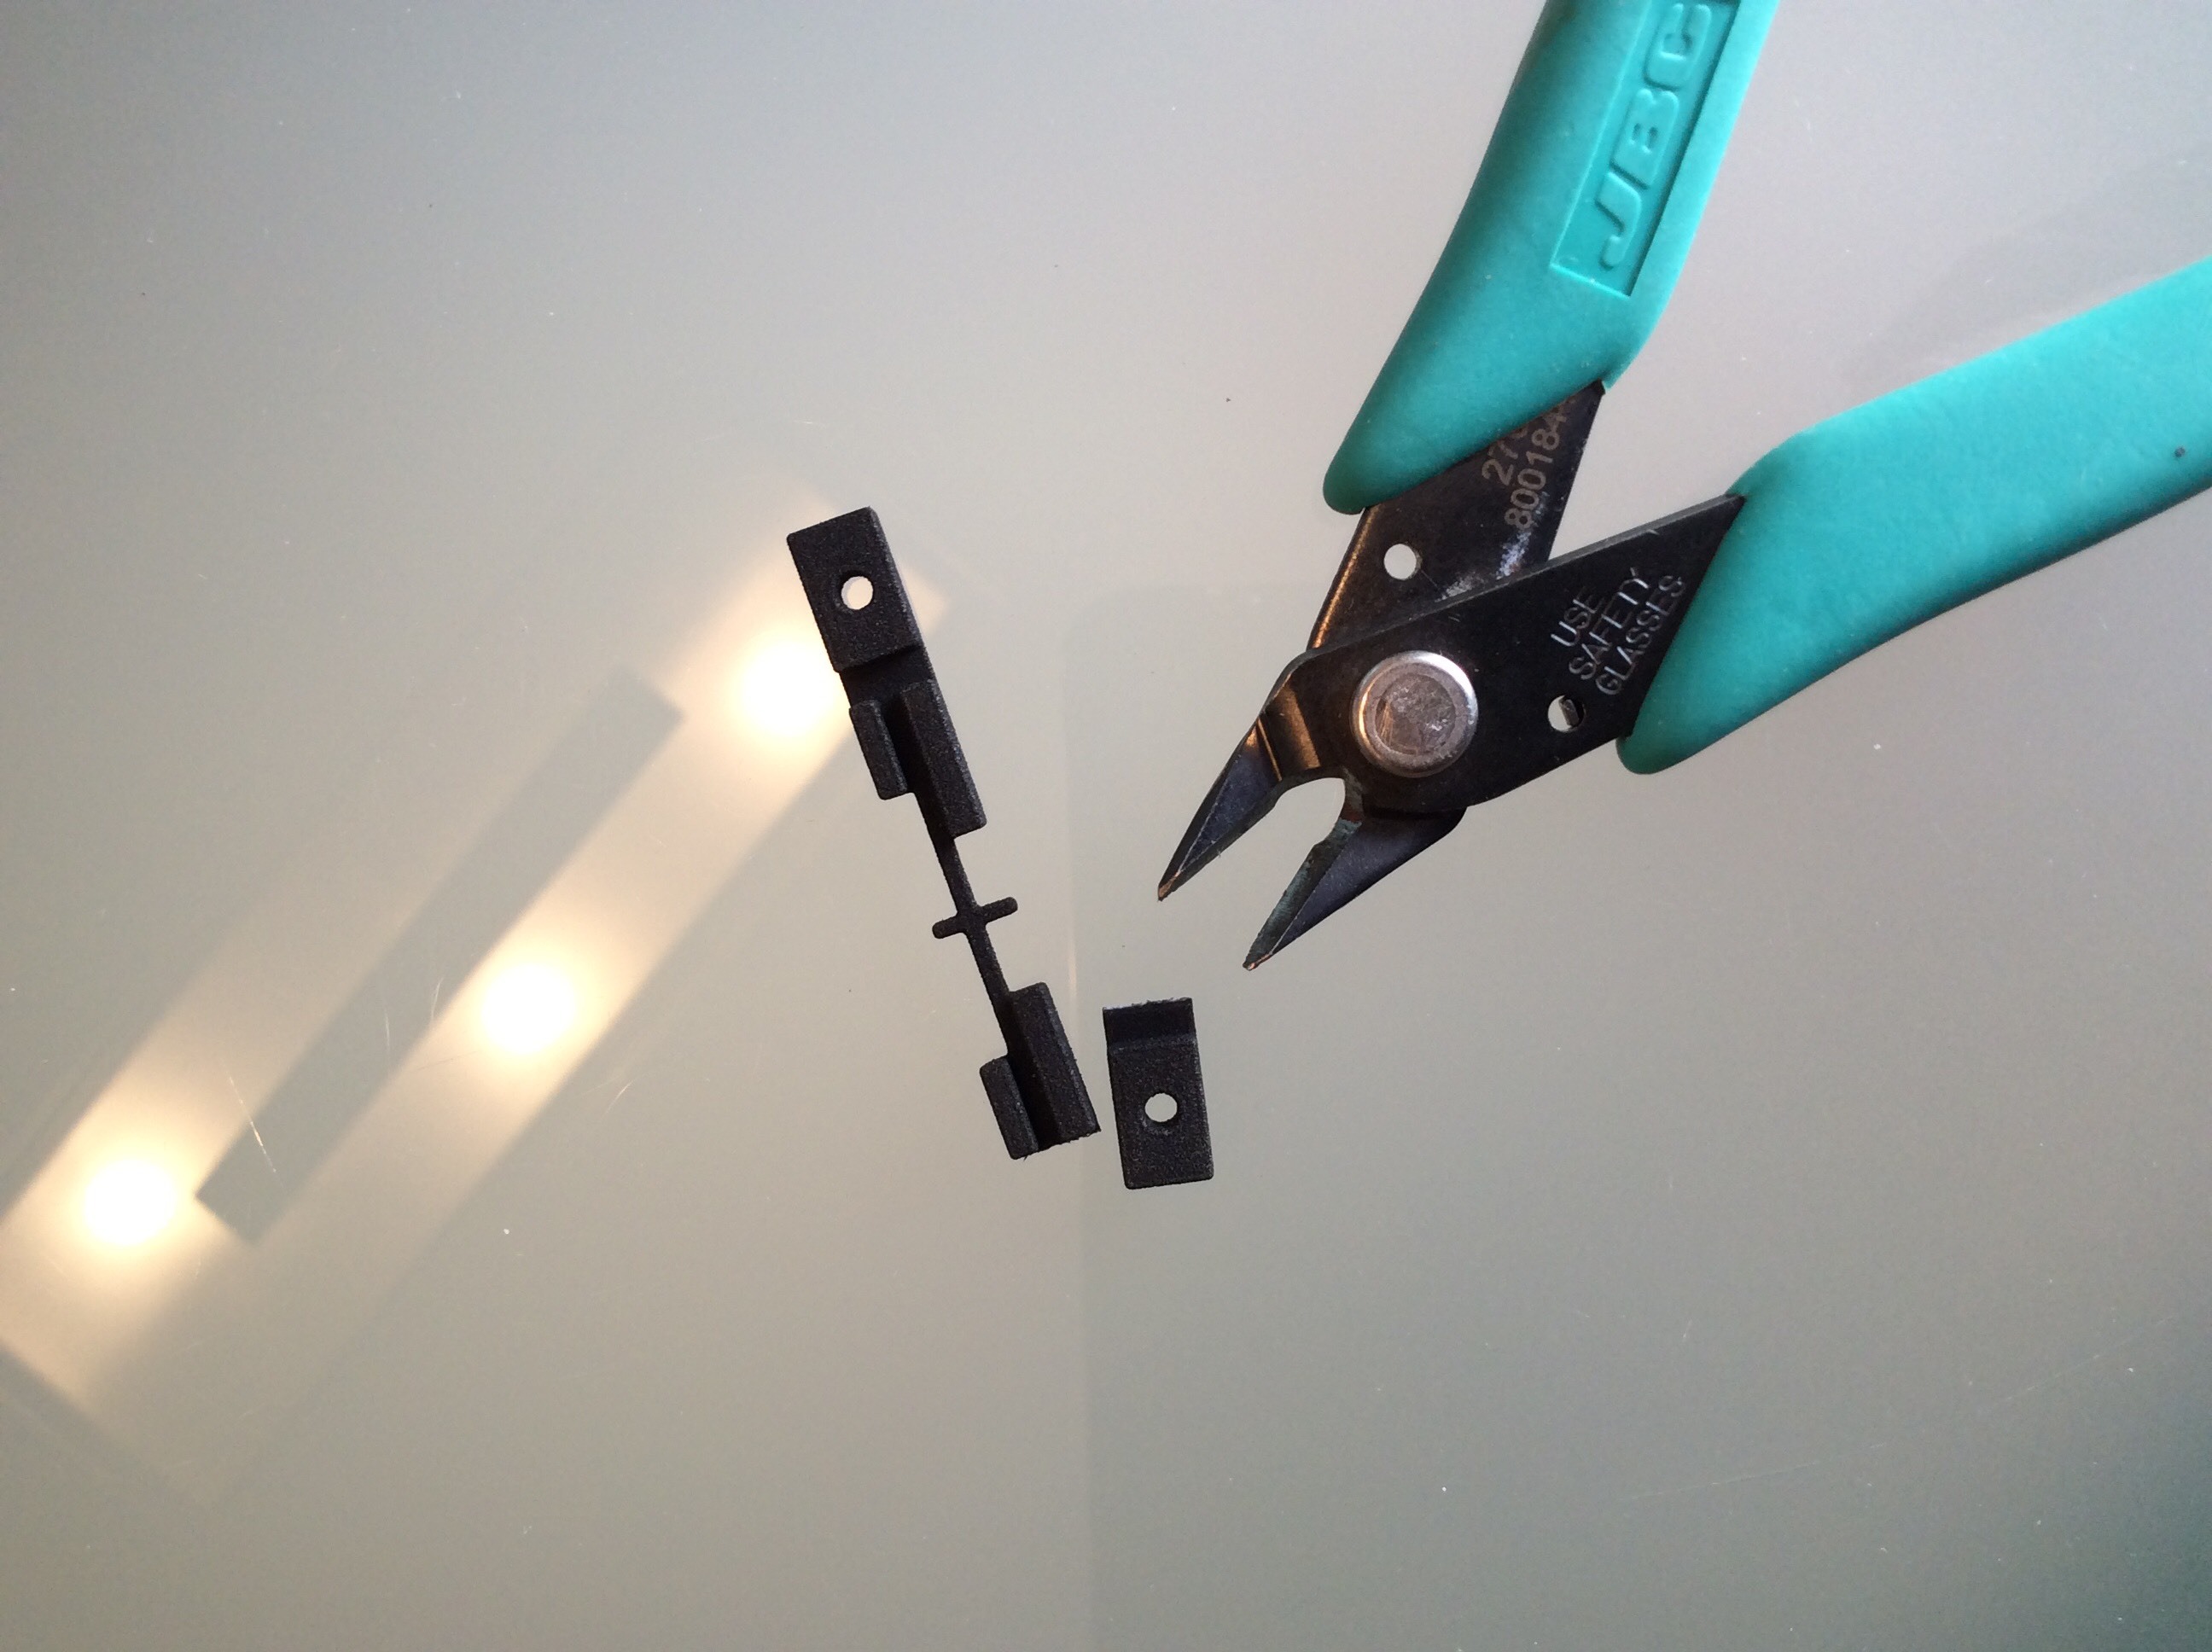
We recommend to repair both posts at the same time. However, if you are confident on the resistence of the other post, you can cut the piece in two. As it is symmetrical, it can be used for both posts, just twisting it 180º. Using the full piece, the other post side does not need to be glued - the torque resistence is done by the post itself over a much longer distance.
Additional product information
Accessories
| Product | Note | Status | Price | ||
|---|---|---|---|---|---|
|
|
25.00 € * | |||
|
|
10.00 € * | |||
|
* Prices include VAT
Display accessory details
|
|||||
 Keyboard support for repairs
 Spacer set for repairing old HP41c
Customers who bought this product also bought
|
|
|
|
|
|
|
|
Browse these categories as well: Accessories and spares, The HP41 Corner, Home, HP 41C Repair, Broken lower screw posts
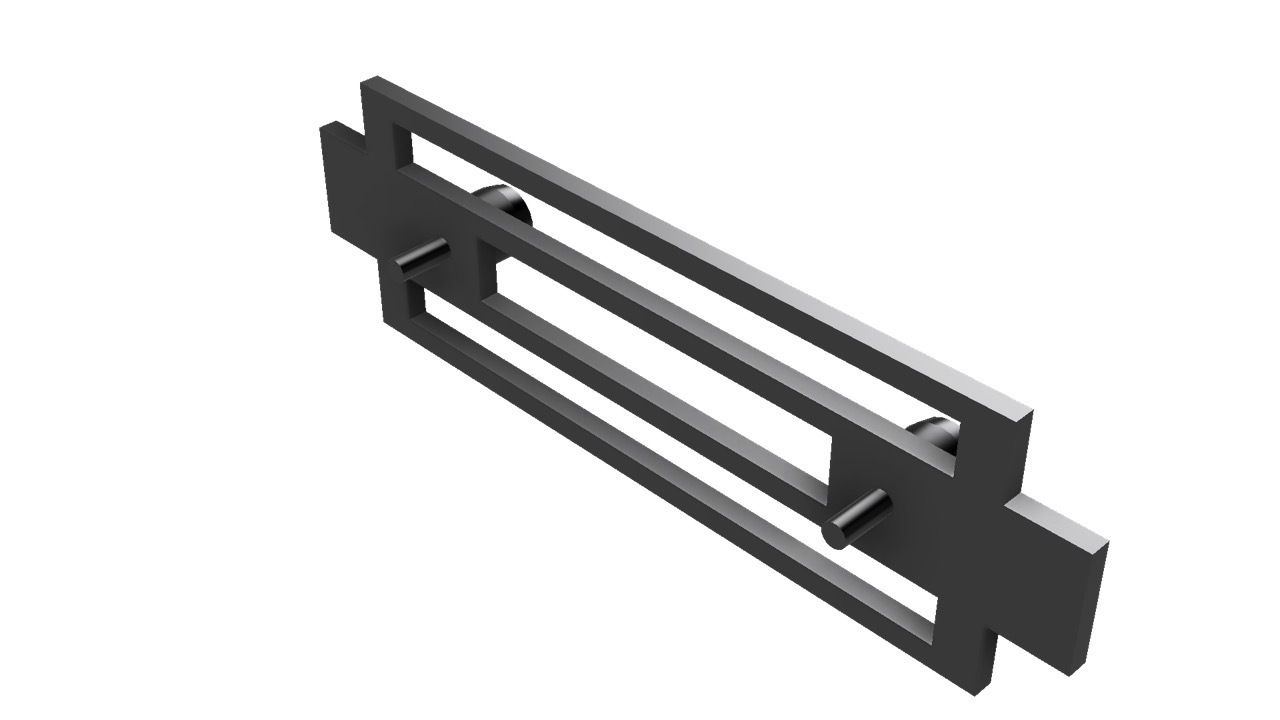
Upper Post Repair part
Product no.: UpperPostRepairStill in stock
Available delivery methods: Courier Spain, Courier Zone 1, Courier Zone 2, Courier Zone 3, Courier Zone 4, Light package, Shipping small items region 2, Entrega Canarias/Baleares, Overseas traceable, Letter


Upper Post repair
Material needed
- Upper post repair piece
- Clothes' peg
Let's assume that both posts are broken or cracked. The effect of this cracking is that the screws do not do their job. Usually, using longer screws may help, but this typically is short lived since the cracks will continue downwards. Once the pressure between both halves is softened, the calculator doesn't work anymore. The solution is to repair the broken posts.
Old methods to repair broken post is to glue them (but this doesn't hold together too long) and to tie them down with very small gauge copper cable, applying pressure so that it holds together. This may solve some cases, but not when the screw path has been destroyed - maybe due to strong tightening of the screws.
Other repair methods have been proposed, including drilling down the screw and placing in its place a cylinder with screw path, glued in place. We tried this method but there was a problem: the torque used to screw resulted in cracked glue and the cylinder separating from the substrate - every time.
Our method was devised with three goals in mind:
- Try to avoid the torque from the screw forcing on the glue with the substrate
- Try to ensure that the front part of the calculator is pulled up when screwing the back side on.
- Try to be compatible with both fullnut and halfnut version
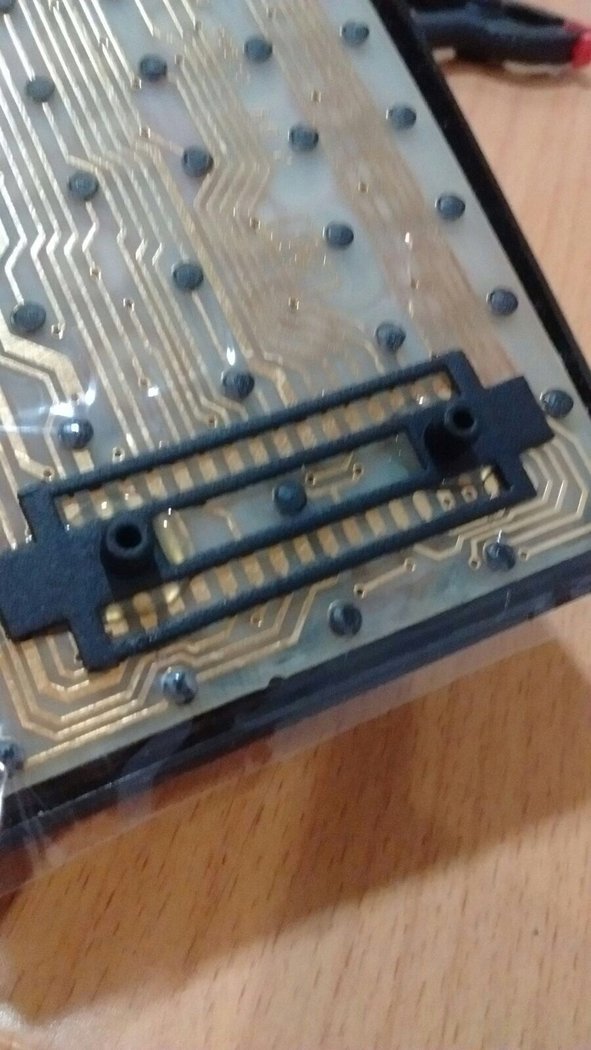
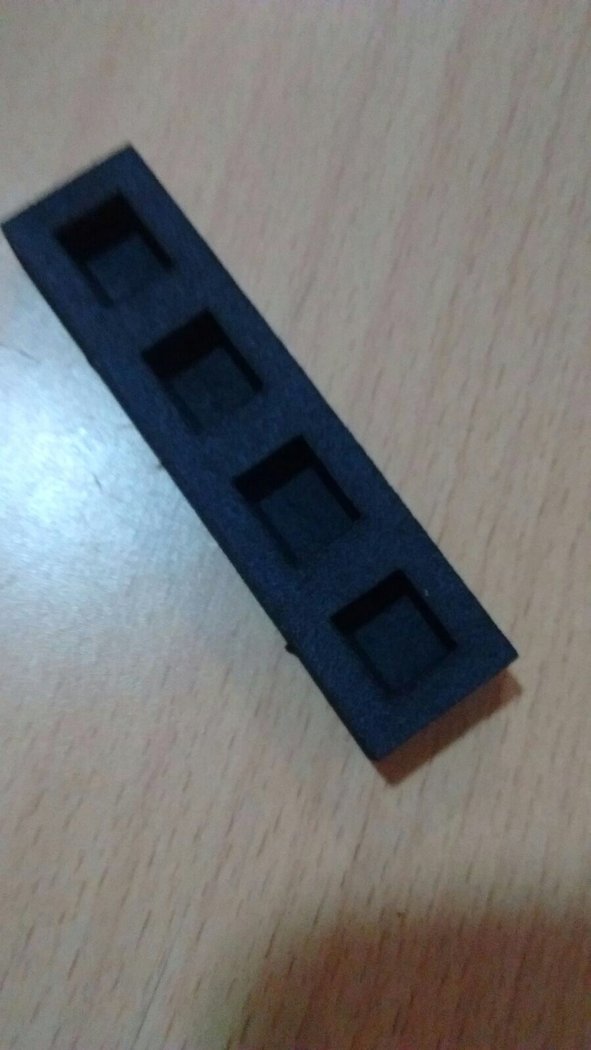
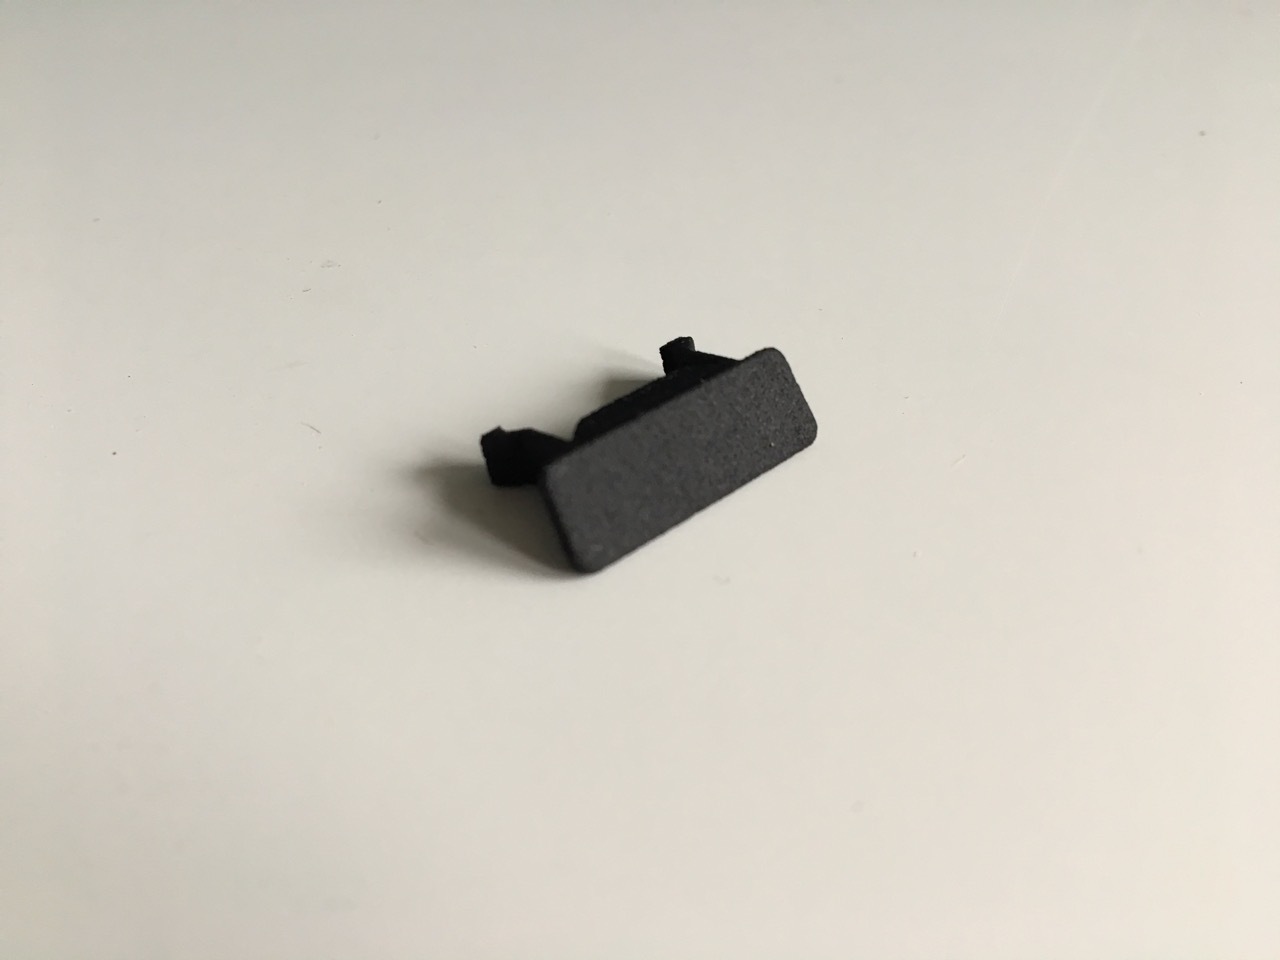
The piece that we have designed requires drilling the old posts to 3,5mm below the keyboard ciruit level. The design on the piece is such that the cylindrical body will be glued to the rest of the screw post; and the surface of the piece can be glued to the keyboard circuit, so that the torque on the substrate is avoided (it also helps that torque is also resisted by the other post, when using the full piece)
When gluing the piece, there are several precautions that need to be taken:
- Be sure of covering the zebra circuit part with tape -we don't want the glue to cover it.
- Cover also all nearby pin holes of the keyboard. If glue comes into one such hole, the key will not register. In severe cases, the key will be down all the time, glued in place!
- When applying pressure, use clothes' pegs to hold the piece in place, preferably on the outer side.
- Try to place the other side of the pegs away from the keys of the keyboard - it may damage them permanently.
- Use E6000 jewelry glue. We prefer black over clear just for clarity of repair.
- Let it cure overnight.
- Remove the tape.
- Assemble the calculator and test.
We recommend to repair both posts at the same time.
Alternatively, you can cut the other side of the 2 post piece with a tweezer and glue in place the rest of the piece.
Additional product information
Accessories
| Product | Note | Status | Price | ||
|---|---|---|---|---|---|
|
|
25.00 € * | |||
|
* Prices include VAT
Display accessory details
|
|||||
Customers who bought this product also bought
|
|
|
|
|
|
 |
|
Browse these categories as well: Accessories and spares, The HP41 Corner, Home, HP 41C Repair, Broken upper screw posts
Assembled HP-41c battery bay and expansion ports module Flat
Product no.: Flex-PCB AssembledFlatNot in stock
Available delivery methods: Free Delivery, Courier Spain, Courier Zone 1, Courier Zone 2, Courier Zone 3, Courier Zone 4, Light package, Shipping small items region 2, Entrega Canarias/Baleares, Overseas traceable, Letter, Entrega gratuita España


Accessories
| Product | Note | Status | Price | ||
|---|---|---|---|---|---|
|
|
22.00 € * | |||
|
|
44.00 € * | |||
|
|
12.80 € * | |||
|
* Prices include VAT
Display accessory details
|
|||||
 Assembled HP-41c battery bay and expansion ports module
Customers who bought this product also bought
|
|
|
|
|
|
|
|
Browse these categories as well: Accessories and spares, Classic Calculators, The HP41 Corner, Home, Corroded Battery contacts, Corroded circuit paths, Damaged screen - not all segments light on, Scientific, HP 41C Repair, The Calculator Store Offers
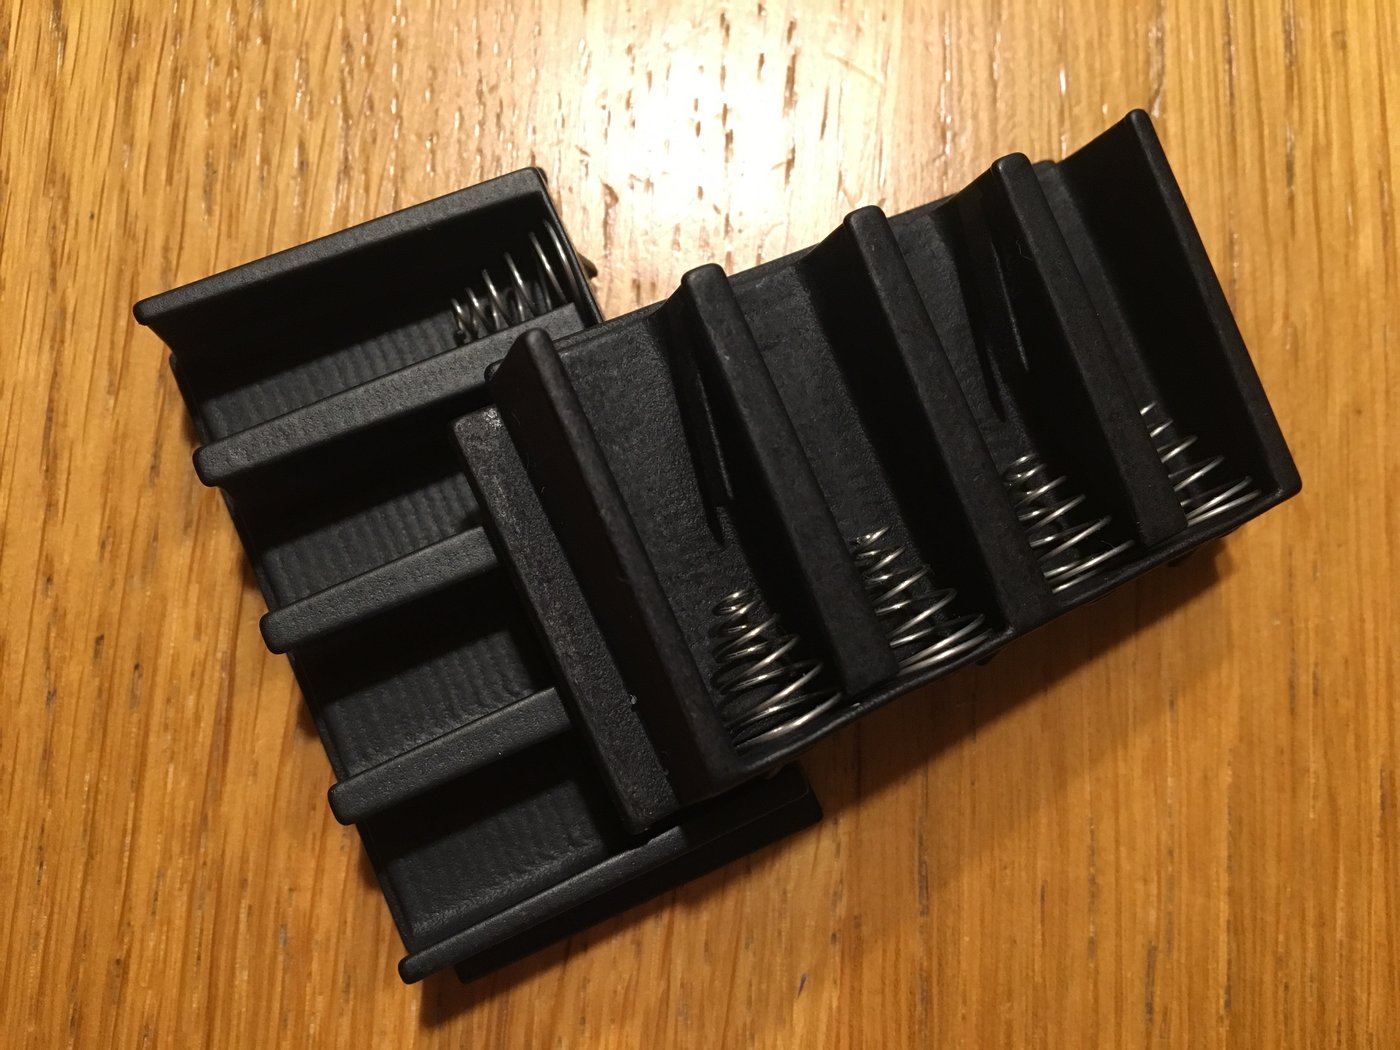
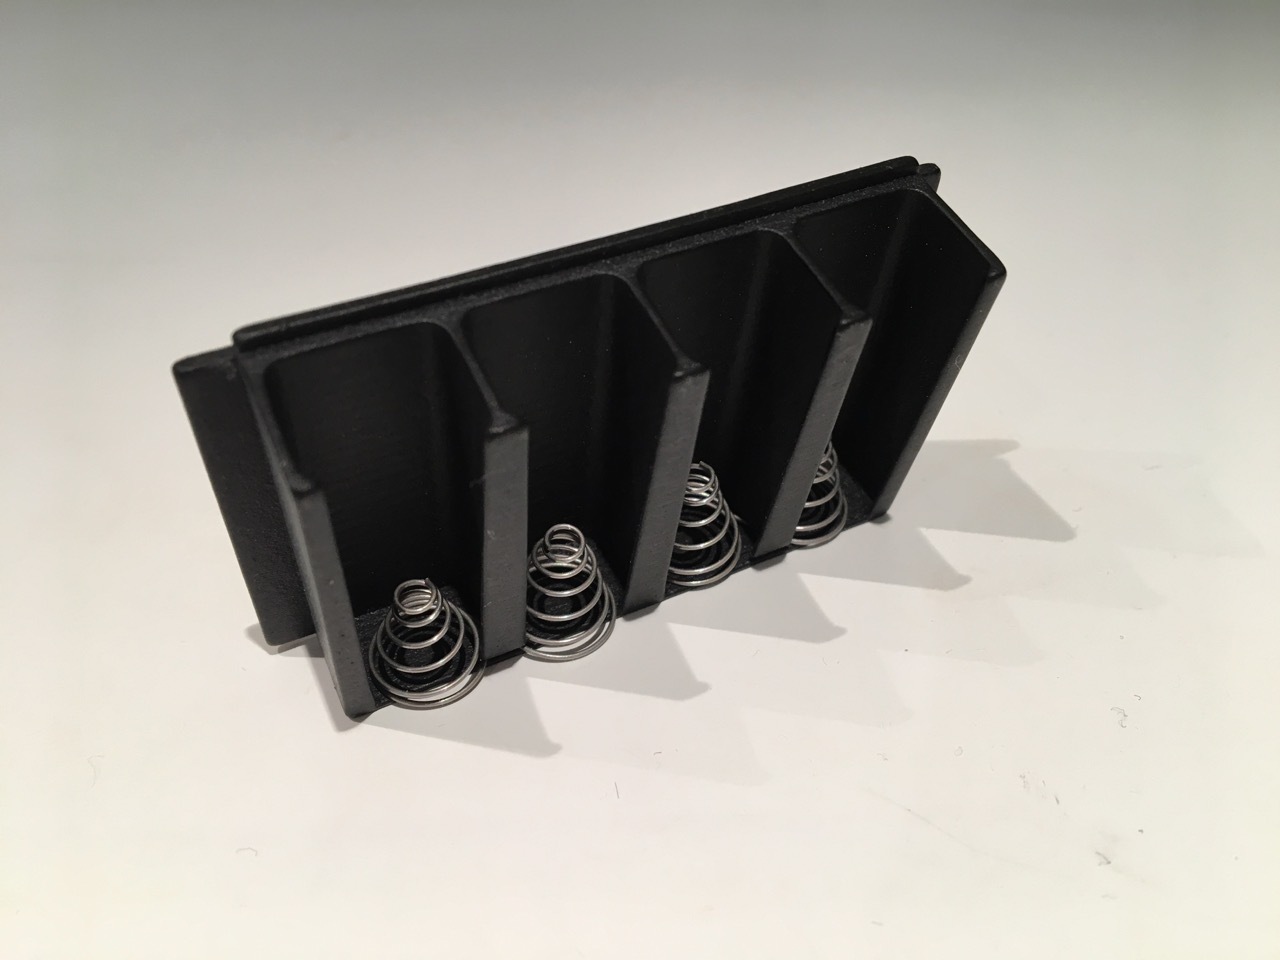
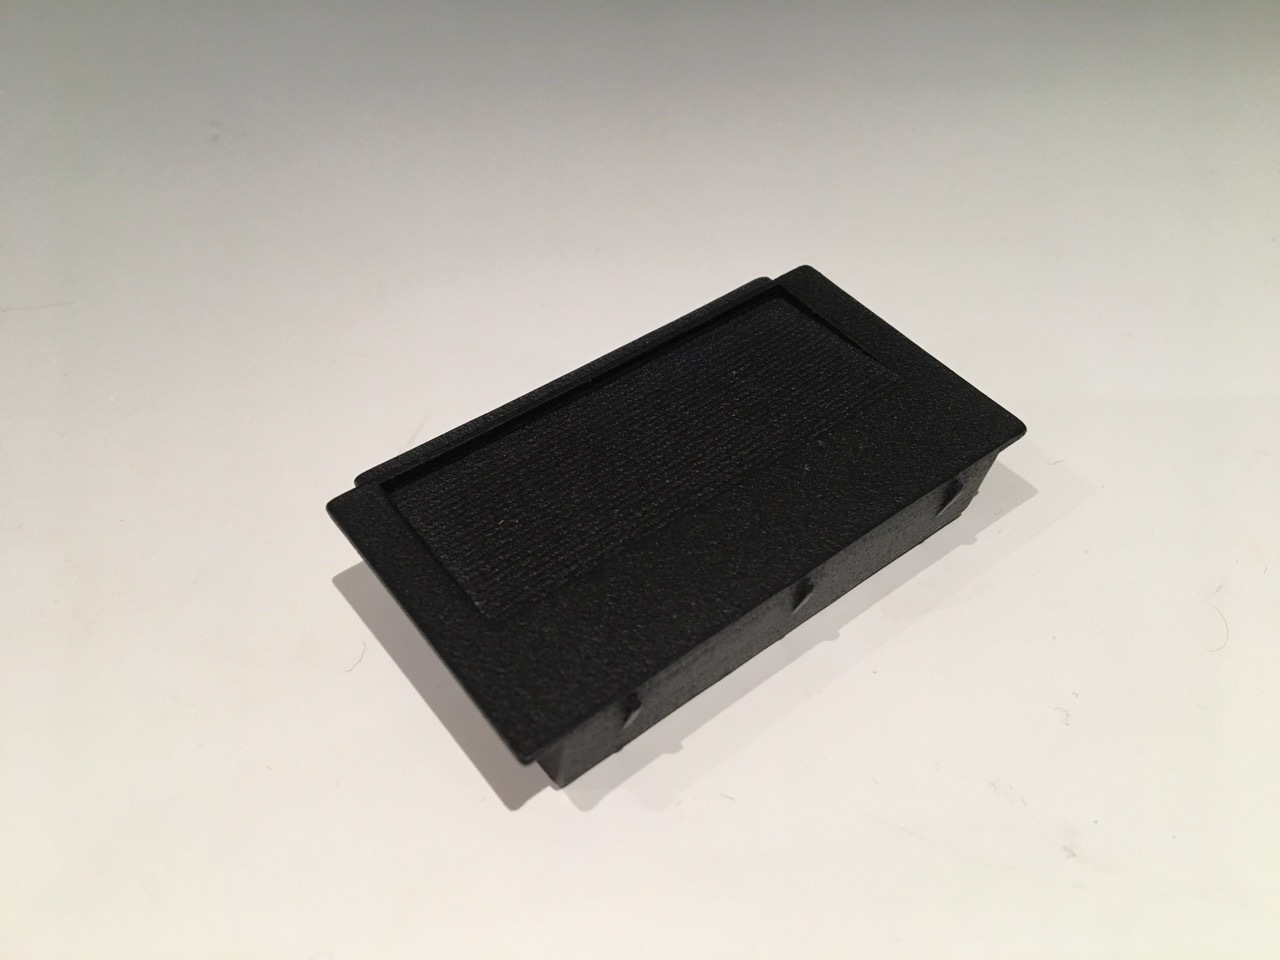
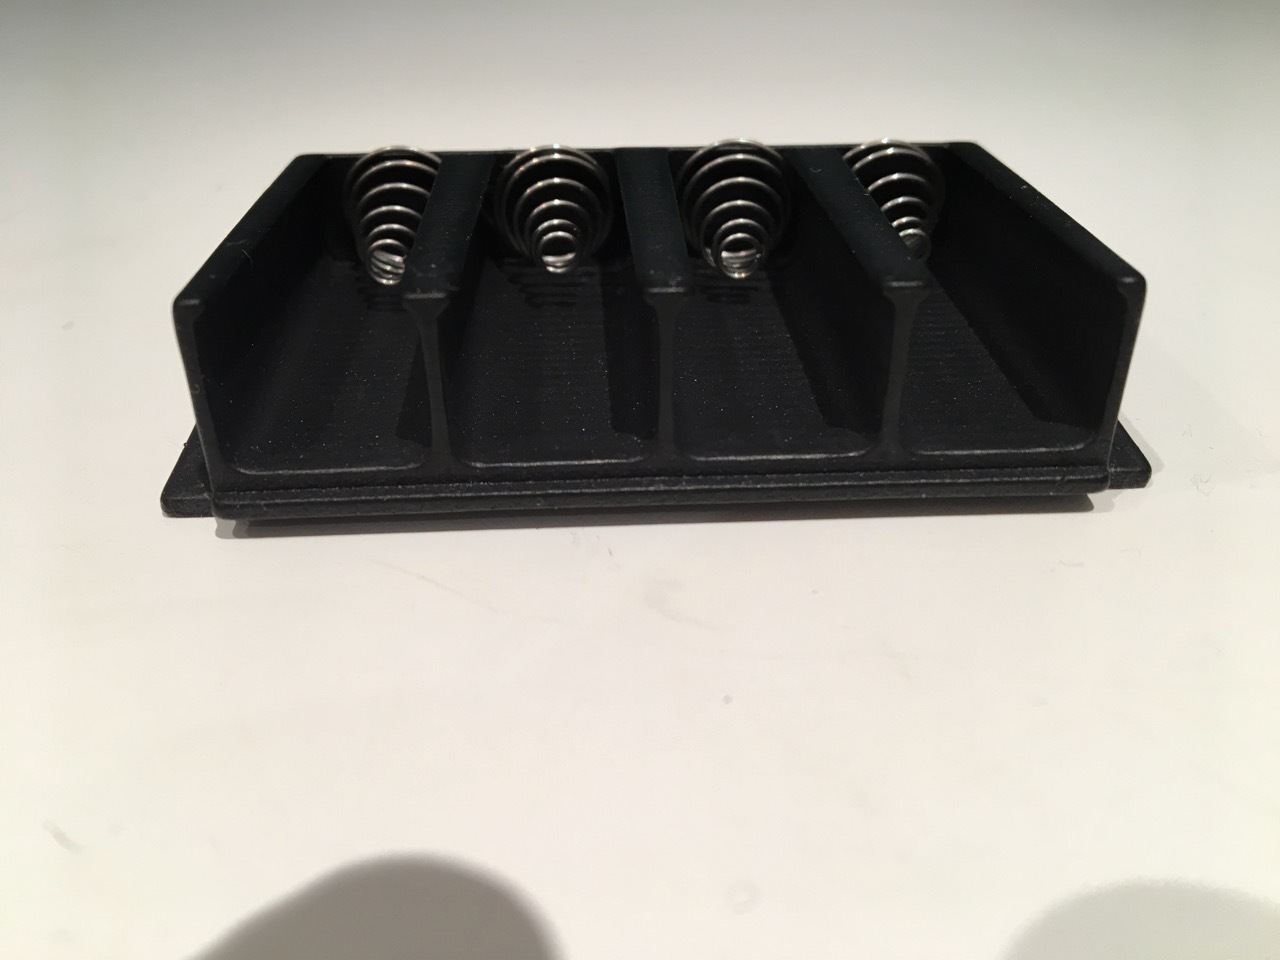
Battery holder 3D
Product no.: Battery holder 3DIn stock
Available delivery methods: Courier Spain, Courier Zone 1, Courier Zone 2, Courier Zone 3, Courier Zone 4, Light package, Shipping small items region 2, Entrega Canarias/Baleares, Overseas traceable, Letter, Entrega gratuita España

Customers who bought this product also bought
|
|
|
|
 |
|
|
Browse these categories as well: The HP41 Corner, Accessories and spares, Home, The Calculator Store Offers
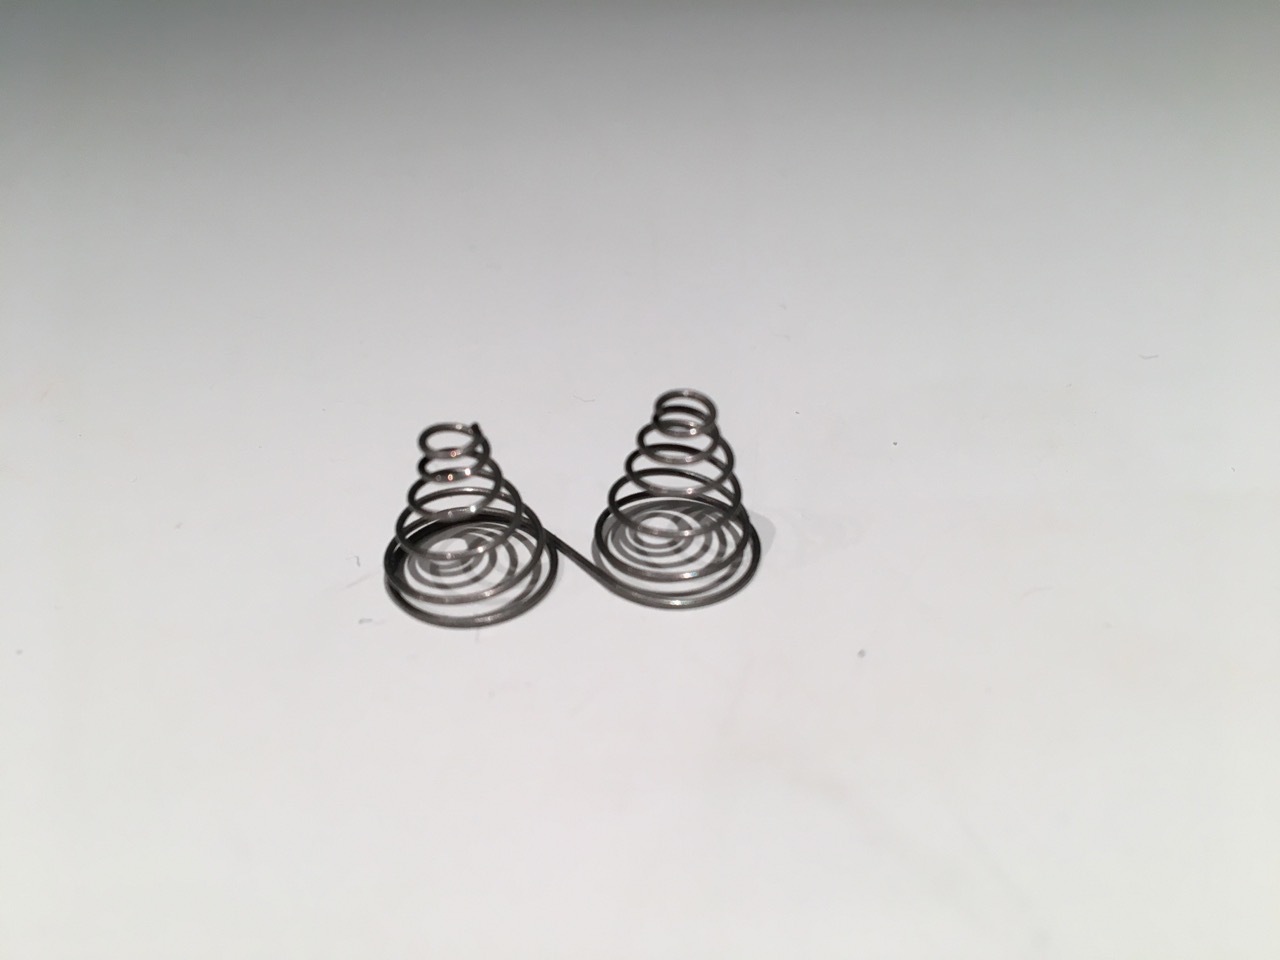
HP41c battery holder spring
Product no.: SpringIn stock
Available delivery methods: Courier Spain, Courier Zone 1, Courier Zone 2, Courier Zone 3, Courier Zone 4, Light package, Shipping small items region 2, Entrega Canarias/Baleares, Overseas traceable, Letter, Entrega gratuita España
Customers who bought this product also bought
|
|
|
|
|
|
|
|
Browse these categories as well: Accessories and spares, The HP41 Corner, HP 41C Repair
Sponge for HP41c standard case
Product no.: EsponjaIn stock
Available delivery methods: Light package, Shipping small items region 2, Overseas traceable, Entrega gratuita España

Accessories
| Product | Note | Status | Price | ||
|---|---|---|---|---|---|
|
|
4.00 € / 4 piece(s) * | |||
|
* Prices include VAT
Display accessory details
|
|||||
 Feet for HP41c HP41cv HP41cx calculators - set of 4
Customers who bought this product also bought
|
|
|
|
 |
|
|
Browse these categories as well: Home, Accessories and spares, Classic Calculators, The HP41 Corner
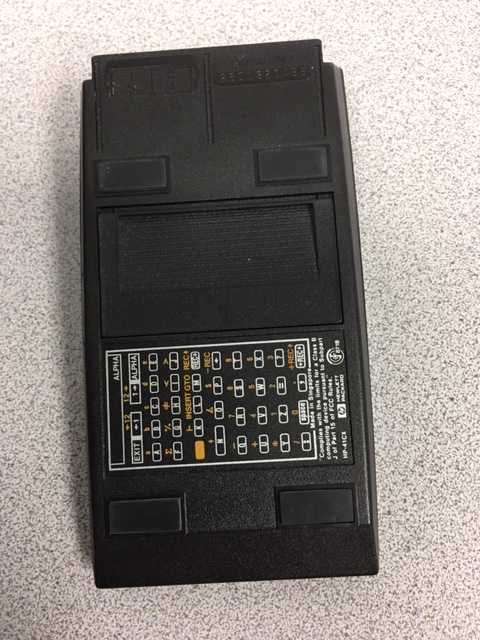
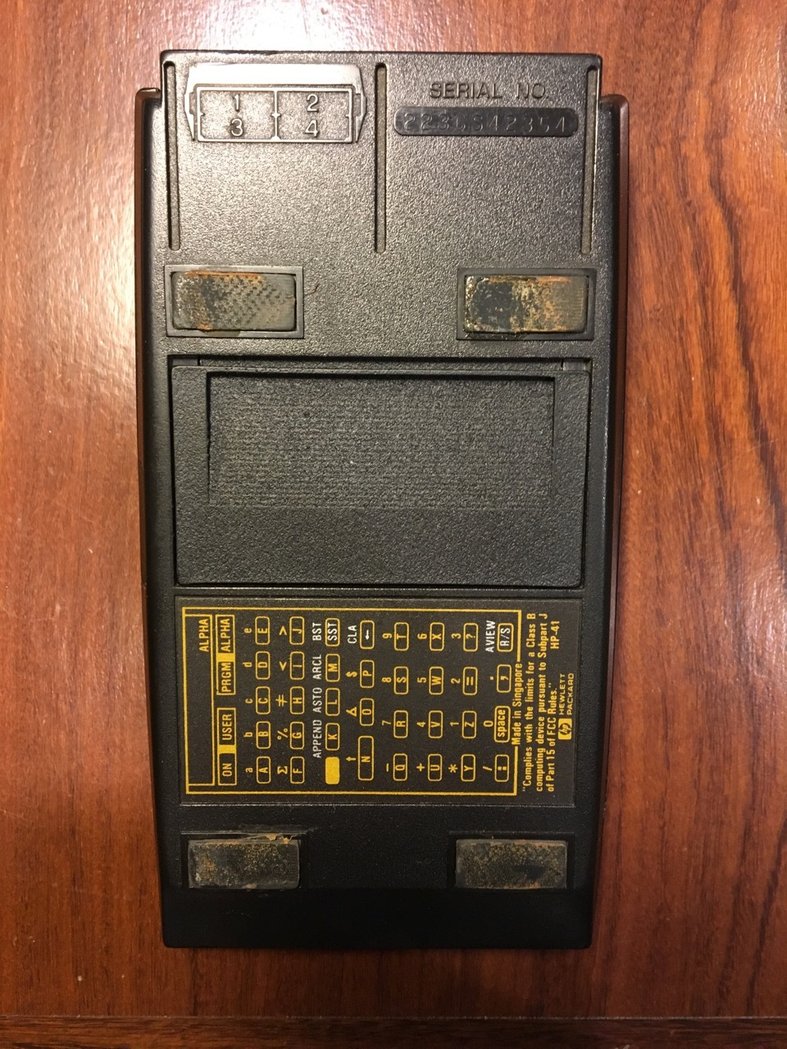
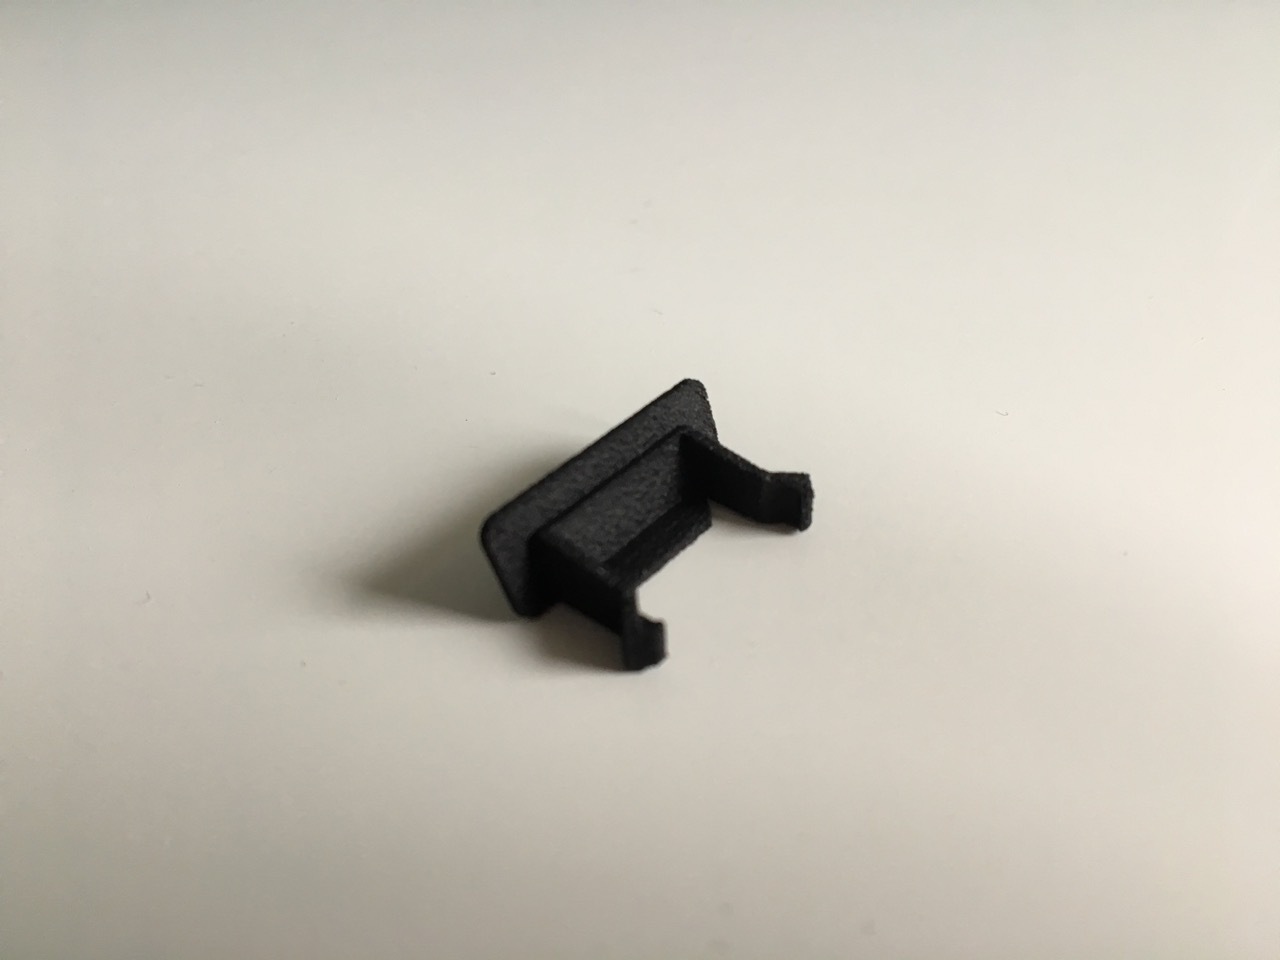
Piece for repair of back case of HP41C
Product no.: brokenbackIn stock
Available delivery methods: Light package, Shipping small items region 2, Entrega Canarias/Baleares, Overseas traceable, Letter, Entrega gratuita España
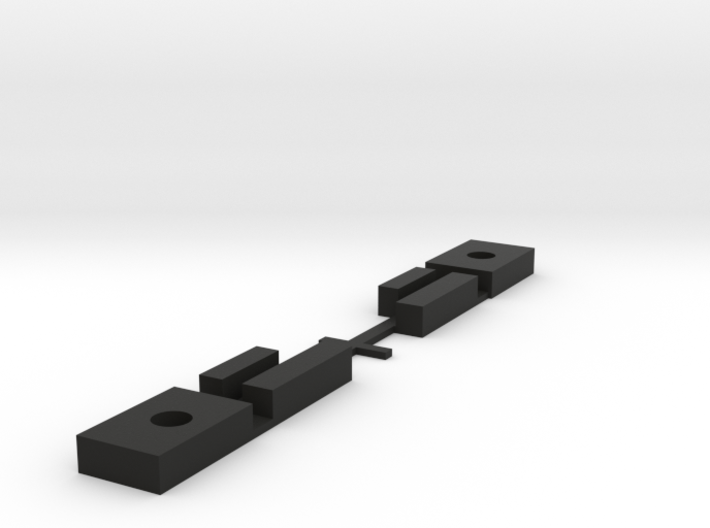
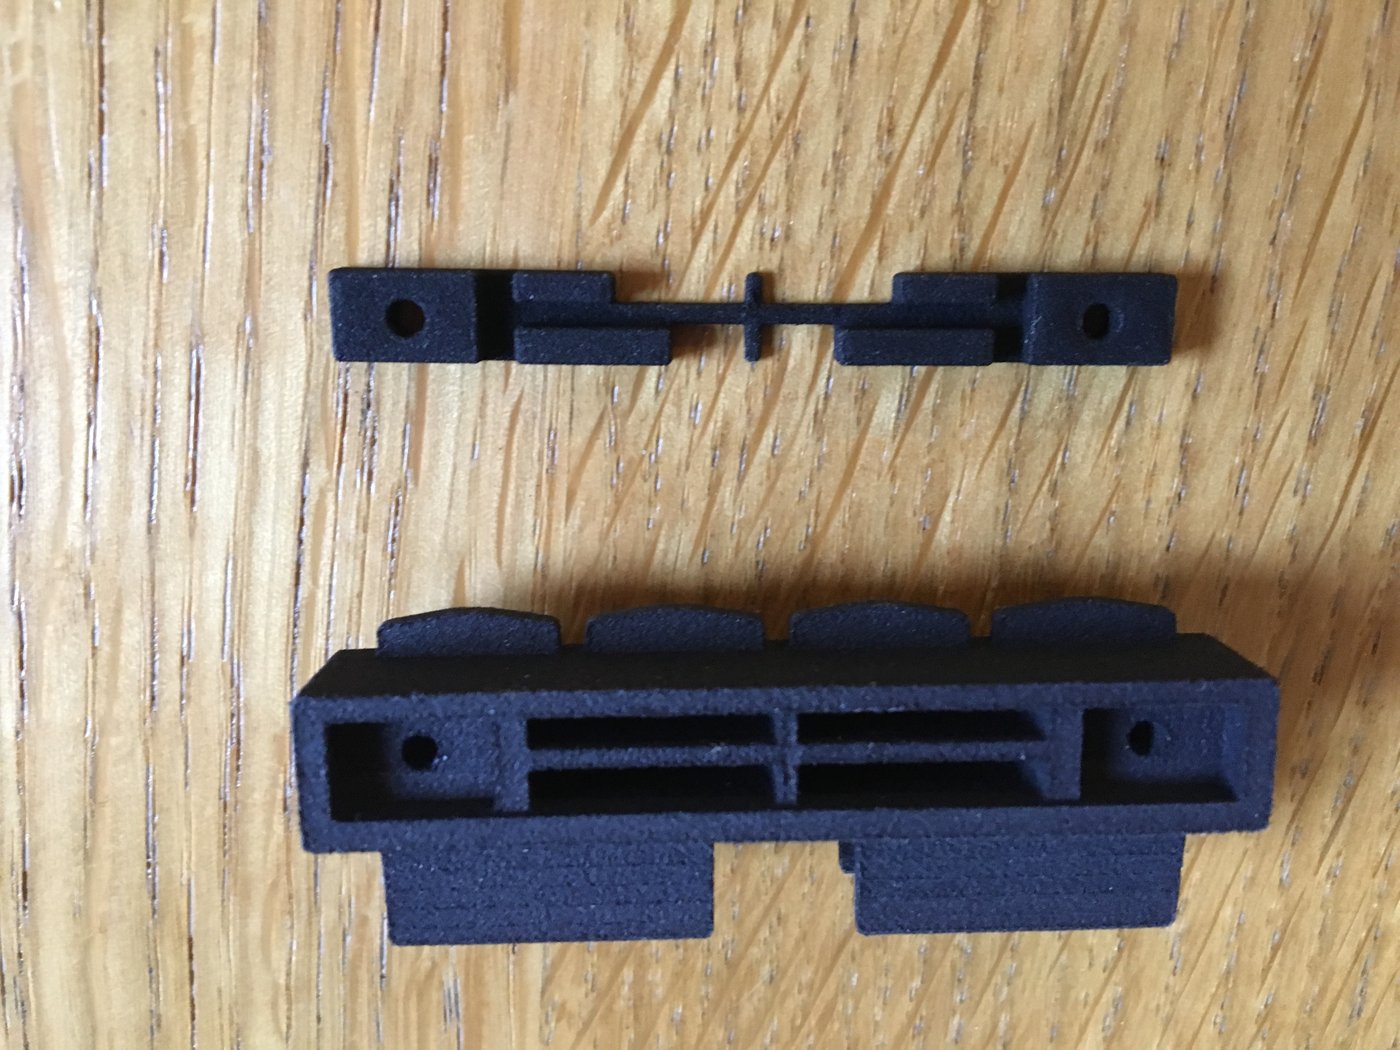
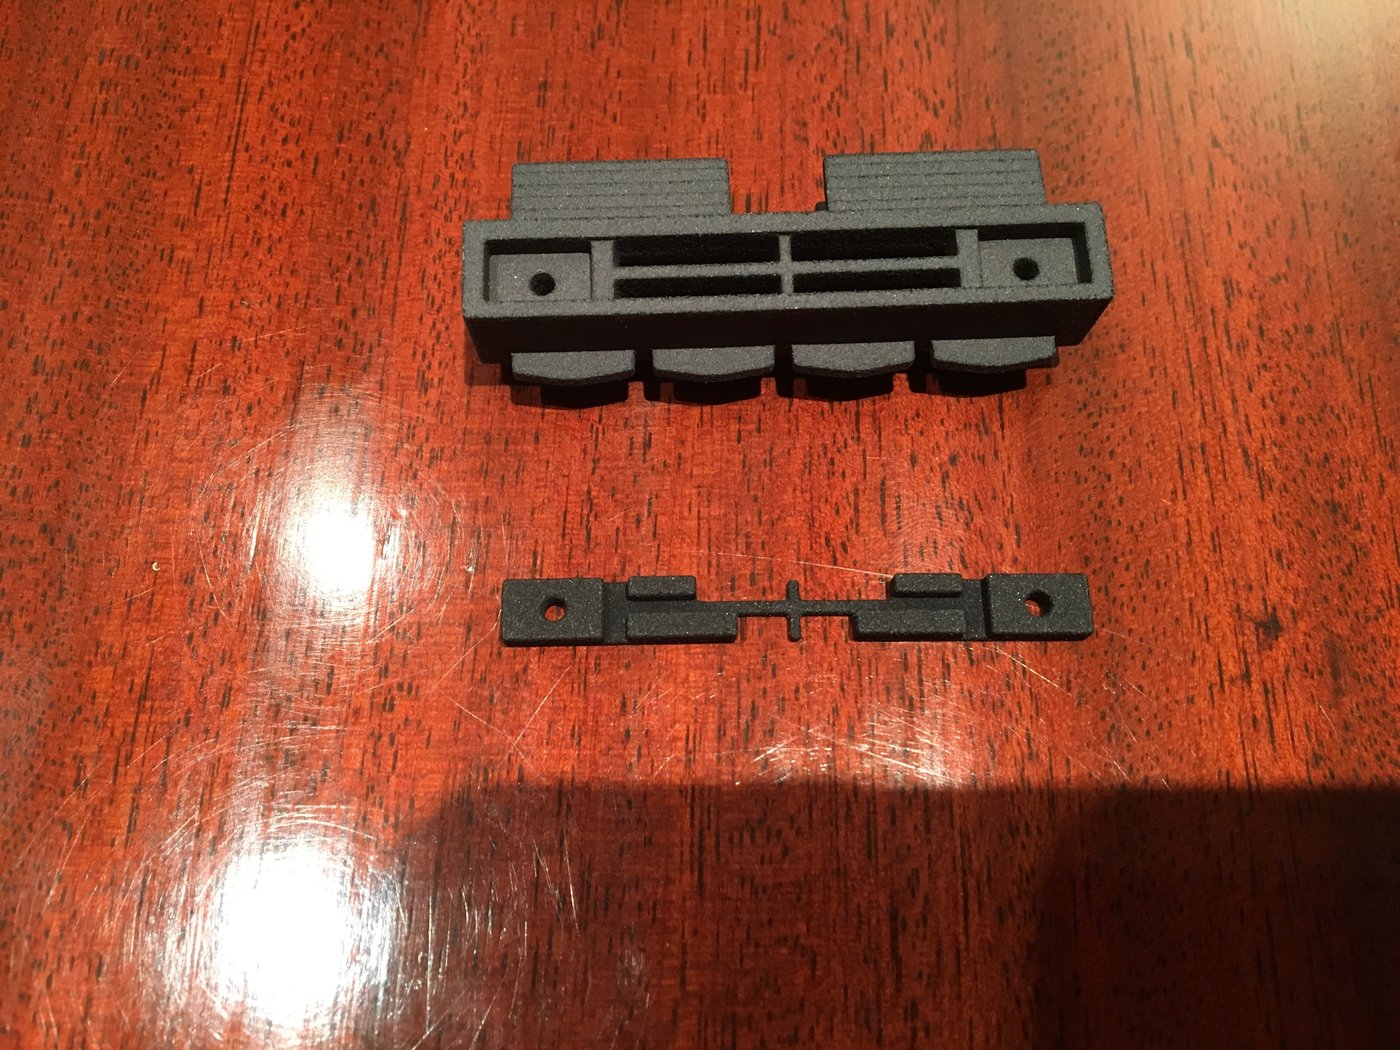
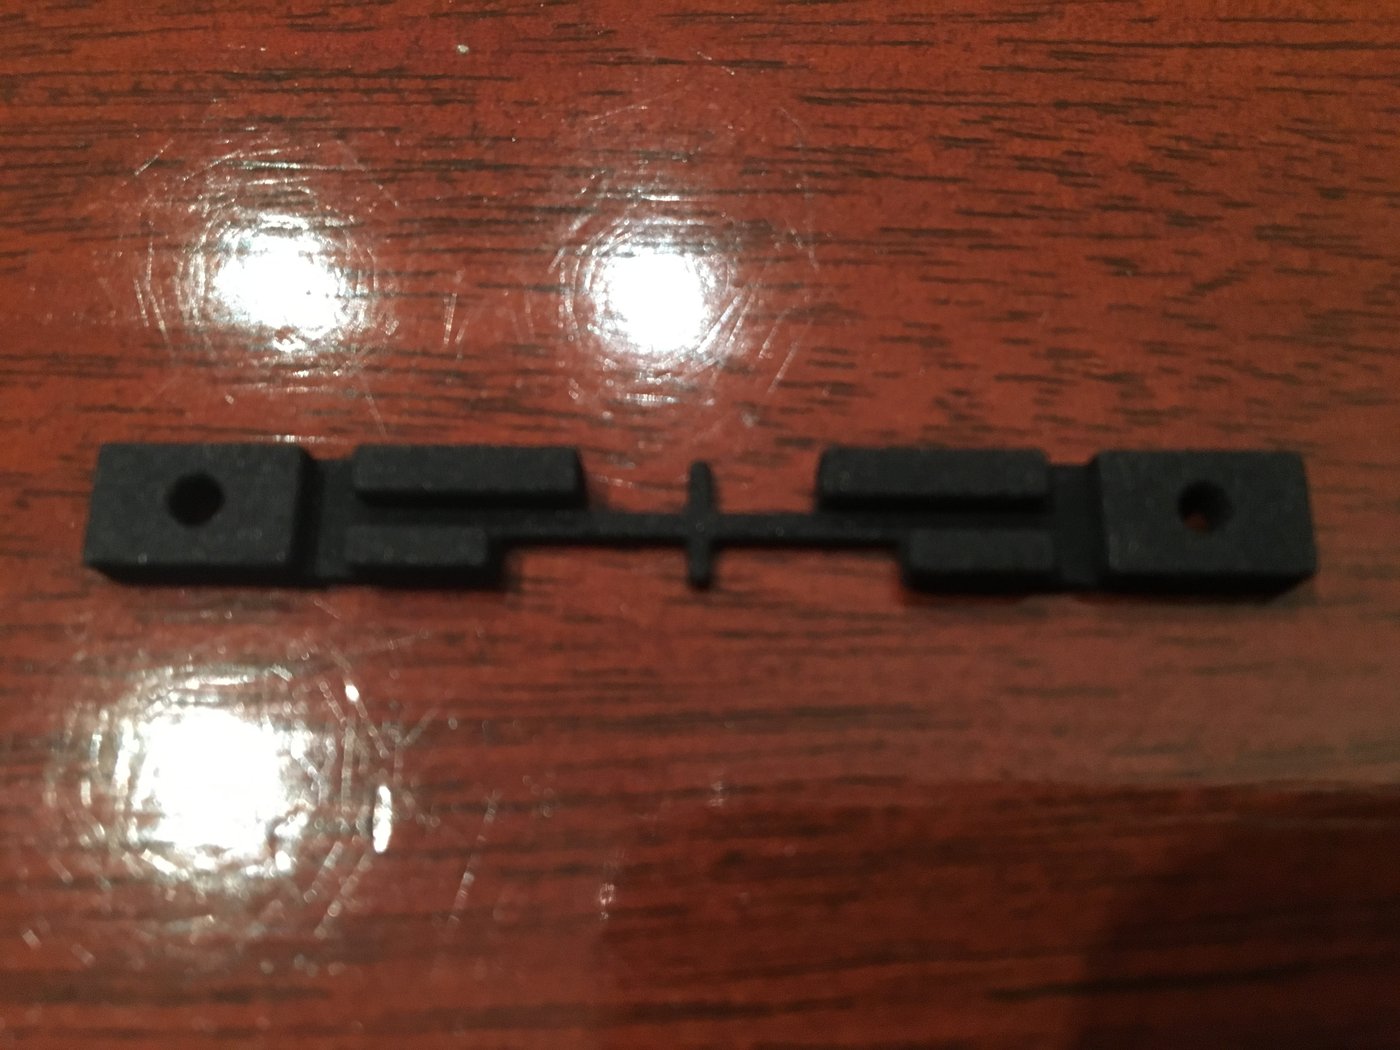
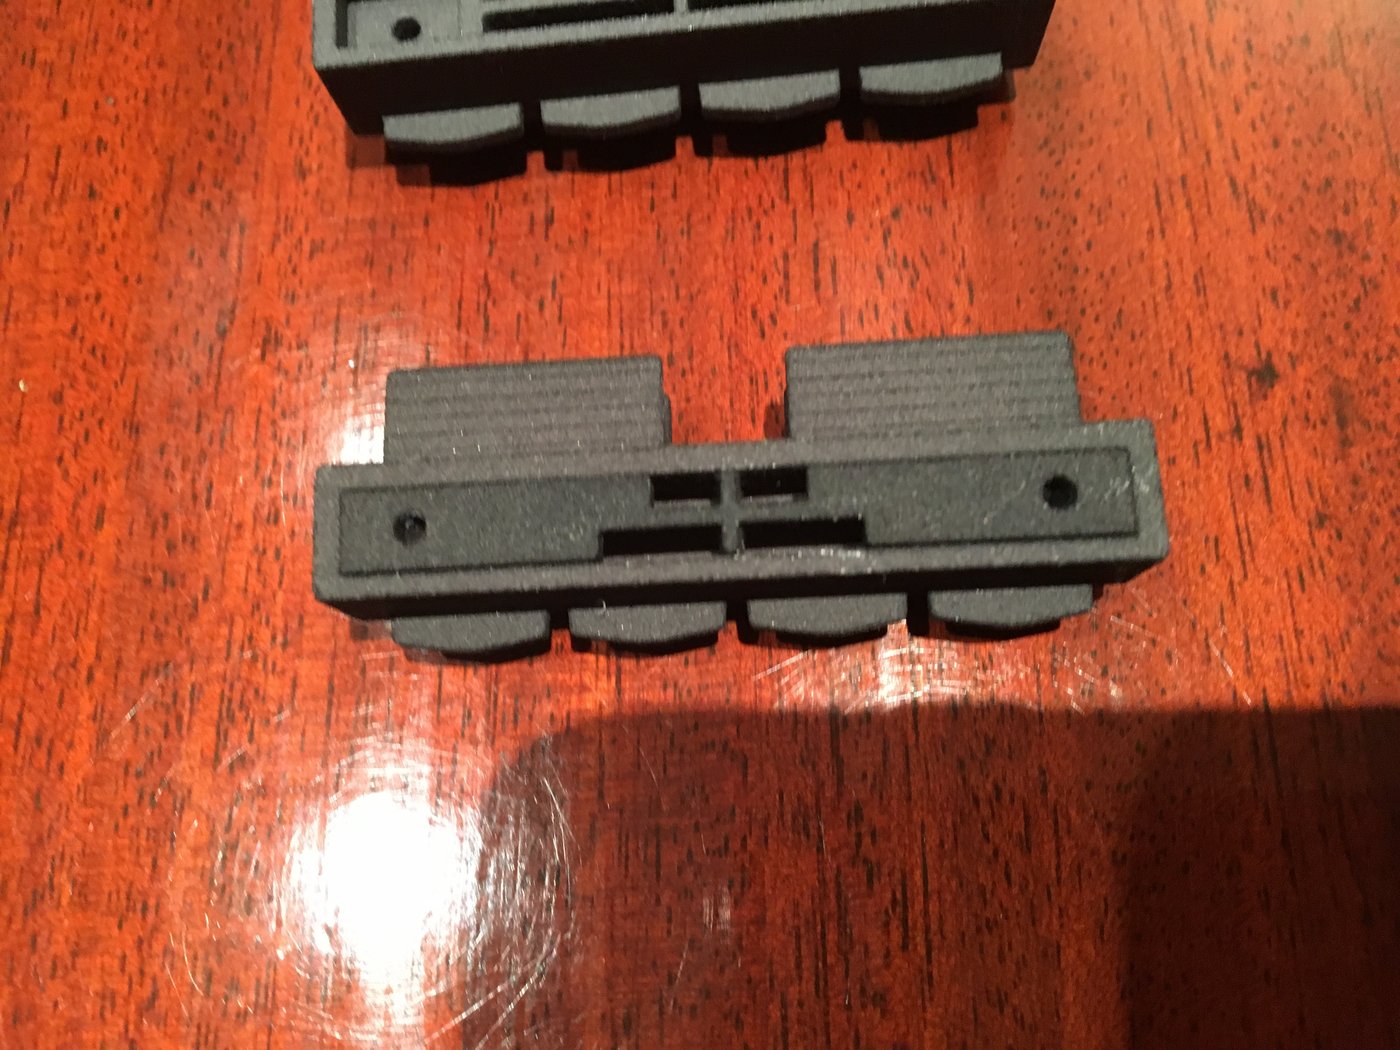
1 Piece for repairing HP41c back cases.
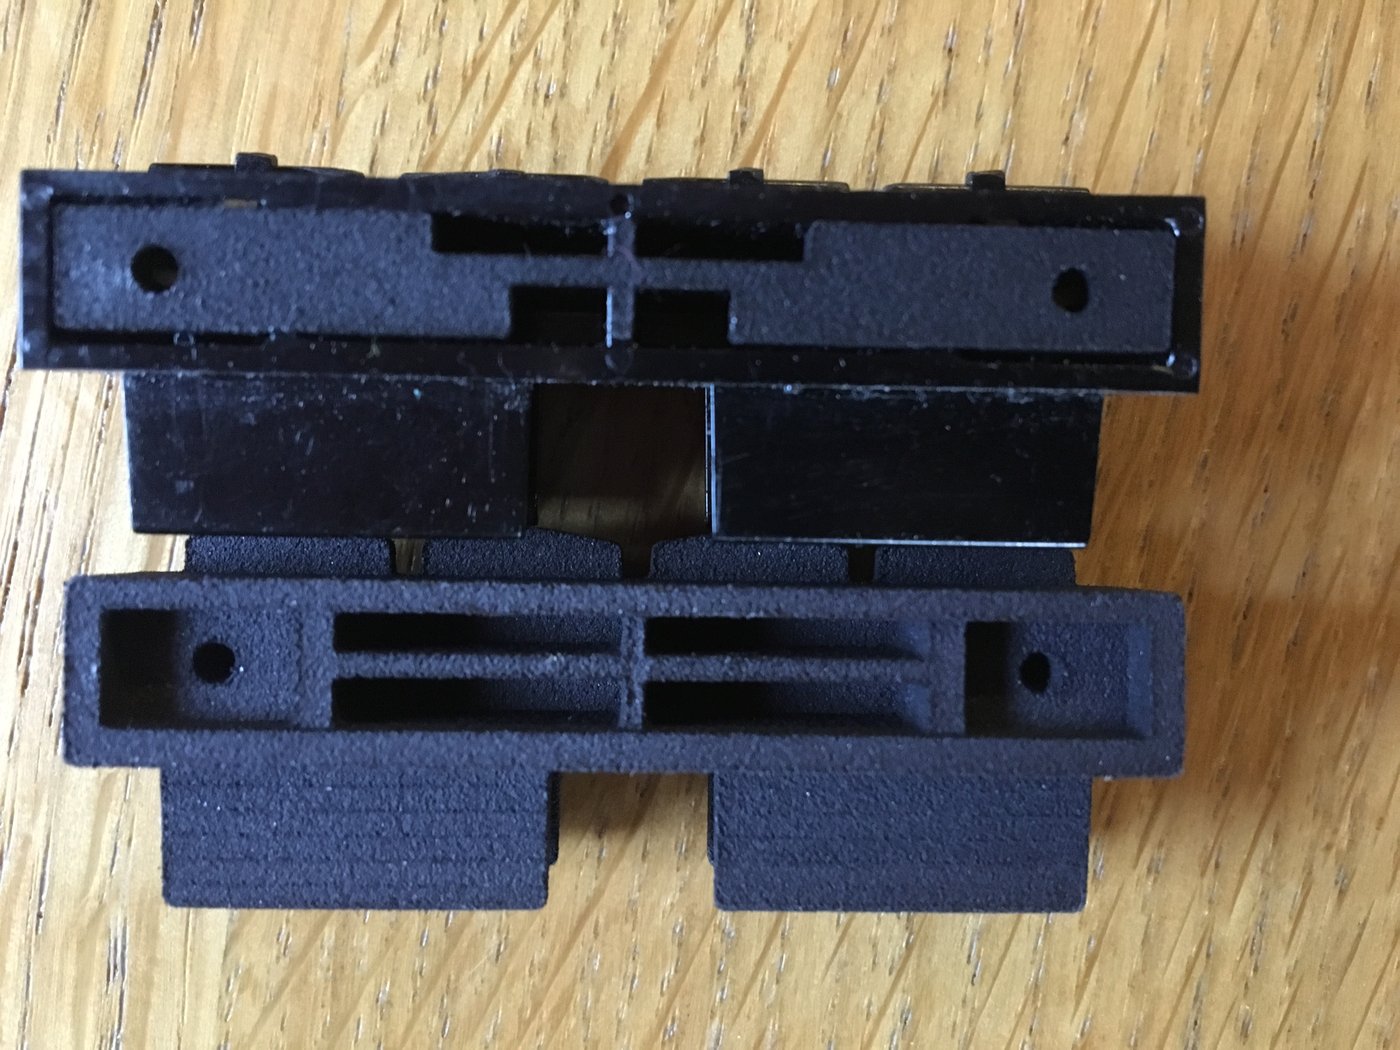
As many units suffer from broken upper screw supports on the back side of the calculator, we have created pieces for the repair of the back side of the HP41C - which offer bigger surface for adherence and also serve to hold the battery assembly in case the little wings in the back side are broken.
Instructions for use of back side repair piece.
1. Be aware, before everything else, that the piece has a right side and a left side. This is due to the space for the tabs in the calculator that keep the battery-port assembly in place. You need to be aware of this at all times - more so if you want to cut it as explained below.
2. Decide whether you will replace both sides or just one. The decision is easy when both are broken, but if one is not, you'll have to check whether the old standing support will withstand the pressure for long. Our recommendation is to replace both sides. If later one of the sides breaks down, the repair will be much more difficult and probably less solid. And you have already paid for both sides!!
3. If you are going to replace just one side, cut with a hobbyist scissors just the side you don't need, according to picture enclosed, again, be careful of cutting the side you dont need, since the piece has a single correct orientation!. The rest of the piece will serve to increment the glued area, better align the piece in place and also to better support the battery-port assembly.
2. With a Dremel machine, file and level the area that had the support. You don't need to remove the tabs in between the two screw post, but you need to remove them if they are twisted or half-broken.
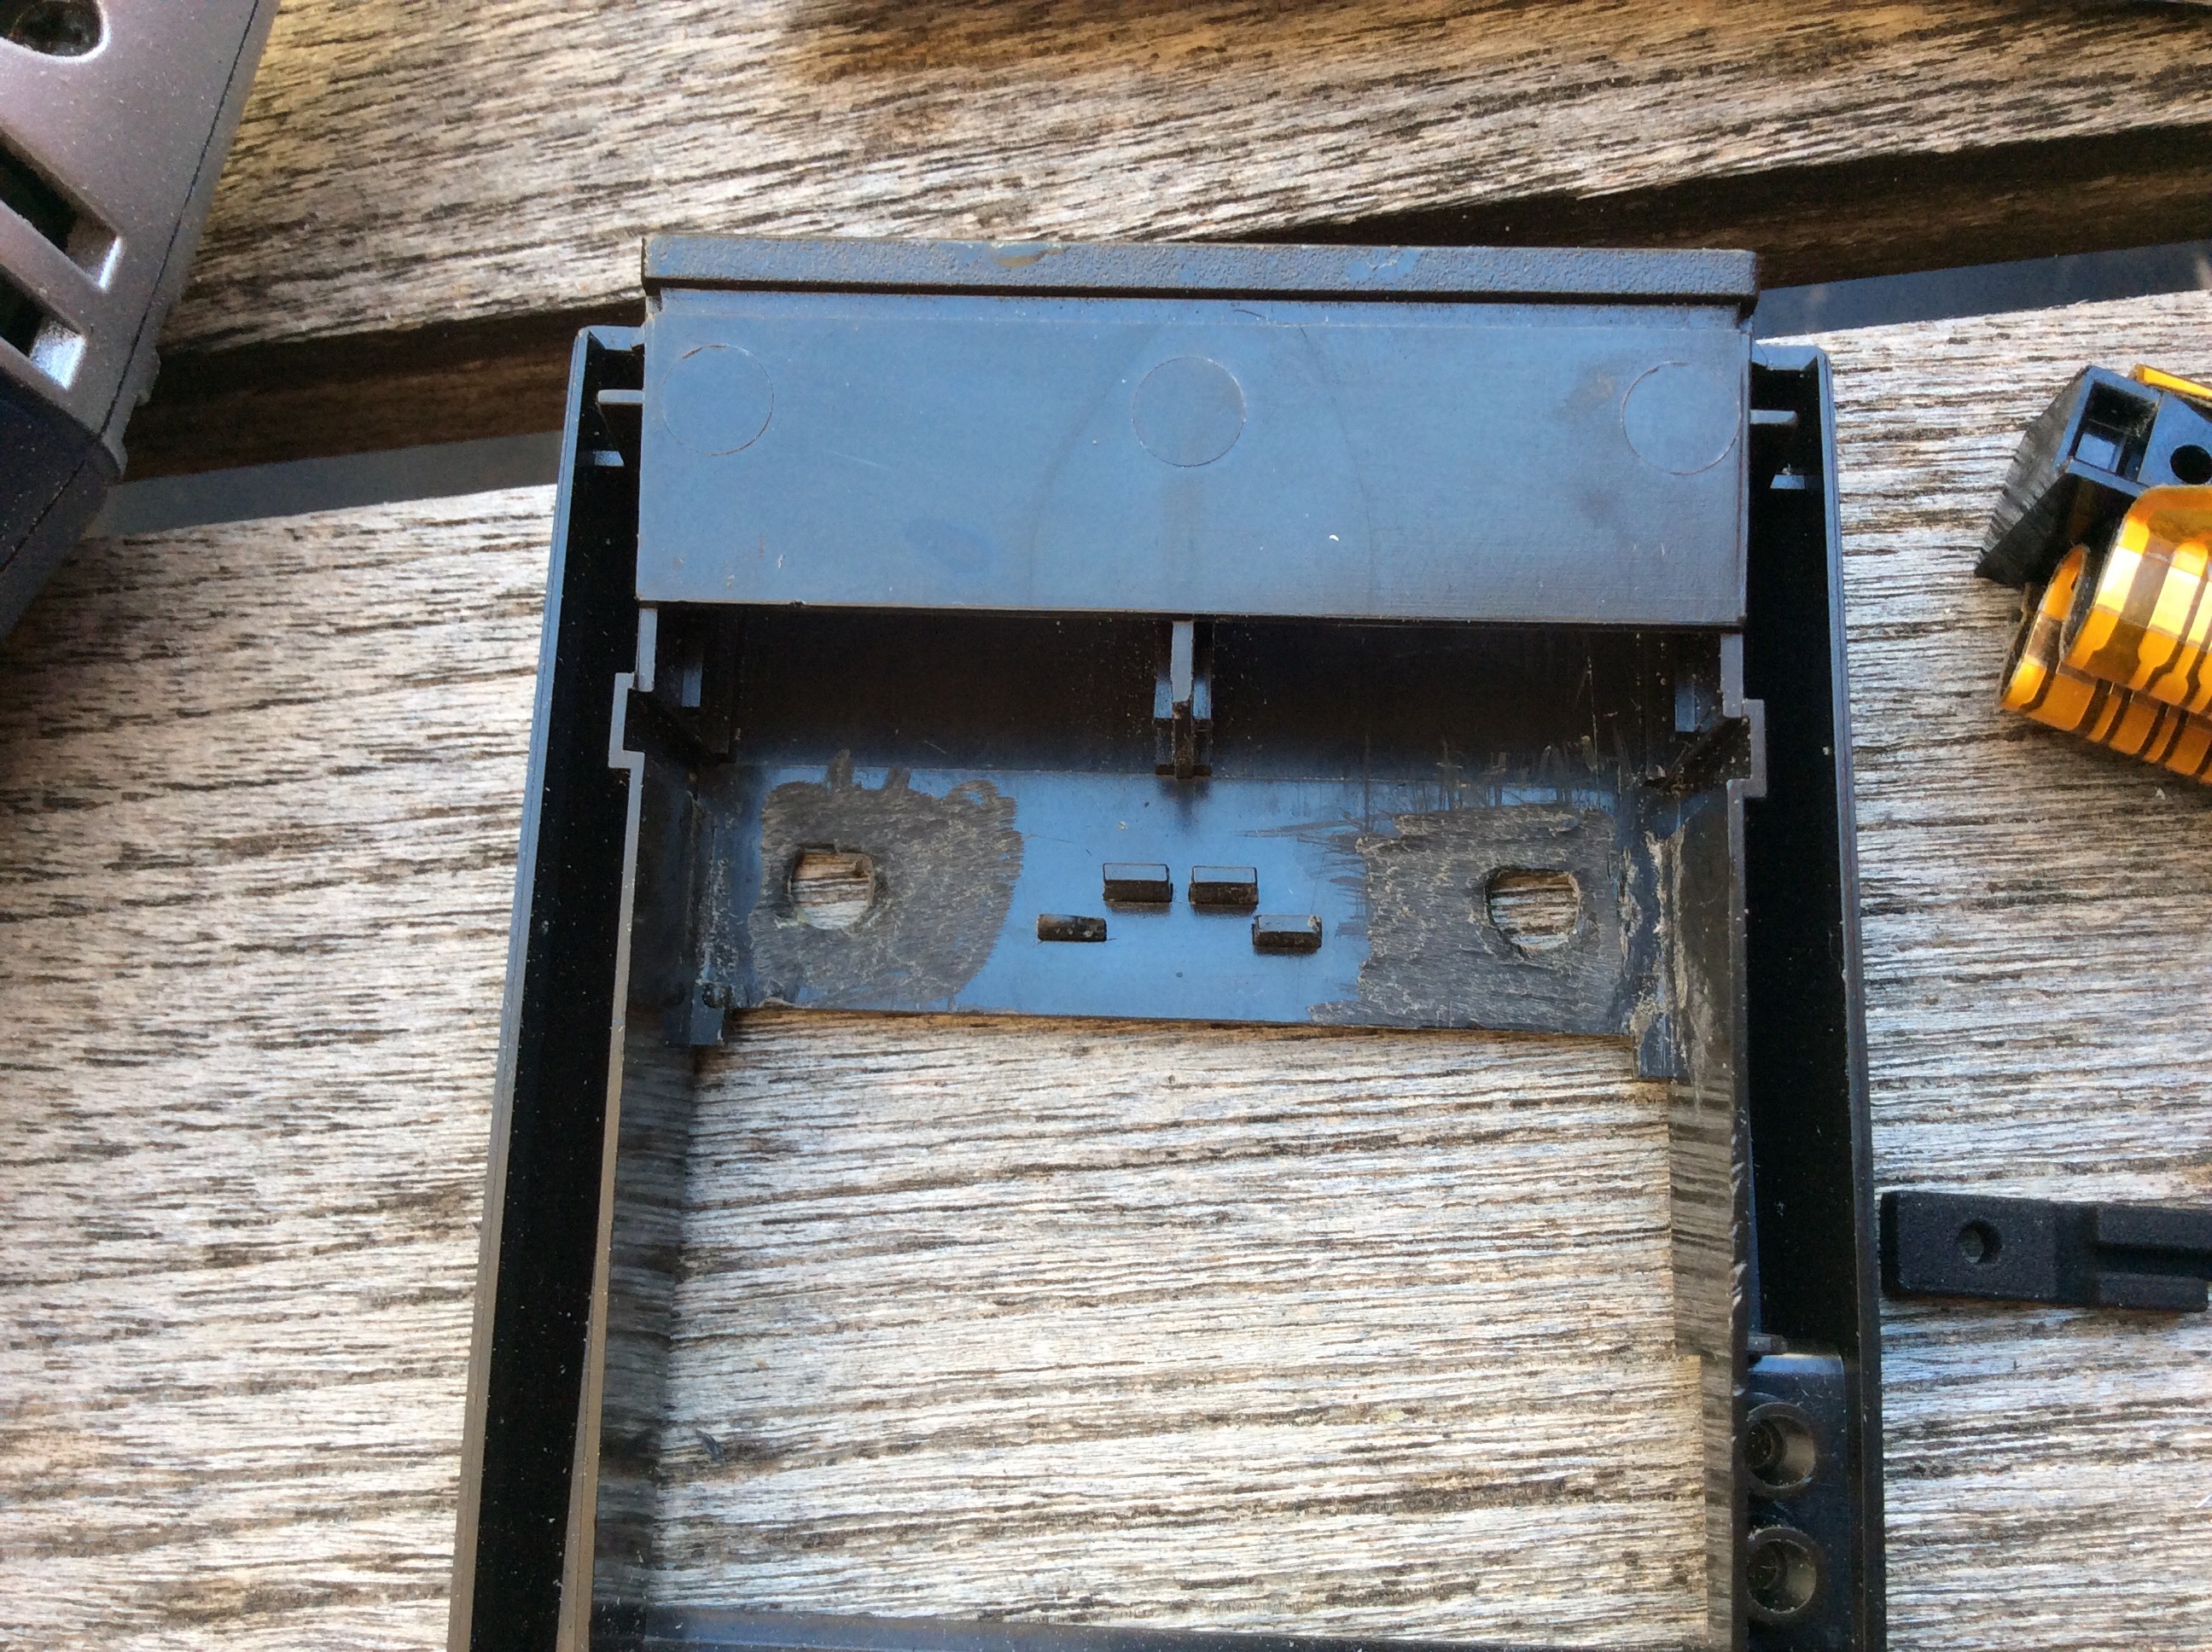
5. Put the piece in place. There is only one "right" way. The cross part is tight because it is needed to properly locate both holes at the extremes. Do not force it. Please make sure it is not bent downwards. Make sure it makes good contact. Remove the piece.
6. Put some glue in the bottom of the piece. Do not put too much or it will go out when pressed. We have used E6000 black glue with good results. Do not use cyanoacrylate glues. Put the piece back in place. Press and remove with a stick or a blade the excess glue, if any. If the screw holes are partially obstructed by glue, pass a screw in the opposite direction (to avoid separating the piece from the back side).
7. Secure the piece in place with a pair of clamps - lighter pressure like clothes' pegs will not be enough. Be careful that there is no excess glue from the other side of the case and the clamps are adhered to the piece! Leave for 24h for the glue to cure. And you're done! You have a repaired back that will withstand a lot of abuse again.
8. The piece is designed to accept both the original and the new battery-ports assembly - so you need to press it down to have it in place. The screw holes should fit a little bit tighter than in the original calculator, but should be perfectly aligned with the assemblies and the screw posts below.
Also, if you're buying from the US, it is maybe better to buy it directly from Shapeways there (just click on the link)
Additional product information
Accessories
| Product | Note | Status | Price | ||
|---|---|---|---|---|---|
|
|
44.00 € * | |||
|
|
22.00 € * | |||
|
|
50.00 € * | |||
|
* Prices include VAT
Display accessory details
|
|||||
 4 x Piece for repair of back case of HP41C
Customers who bought this product also bought
|
|
|
|
|
|
|
|
Browse these categories as well: The HP41 Corner, Home, Accessories and spares, HP 41C Repair, Broken upper back case screw head supports
HP41c side cover
Product no.: Side CoverIn stock
Available delivery methods: Light package, Shipping small items region 2, Entrega Canarias/Baleares, Overseas traceable, Letter, Entrega gratuita España

Accessories
| Product | Note | Status | Price | ||
|---|---|---|---|---|---|
|
|
22.00 € * | |||
|
* Prices include VAT
Display accessory details
|
|||||
Customers who bought this product also bought
|
|
|
|
|
|
|
|
Browse these categories as well: Accessories and spares, Classic Calculators, The HP41 Corner, Home, The Calculator Store Offers